I know it might seem like it’s all fun and games but these are the realities of renovation:

No matter how well I tape off all doors and openings this house just won’t stay clean.
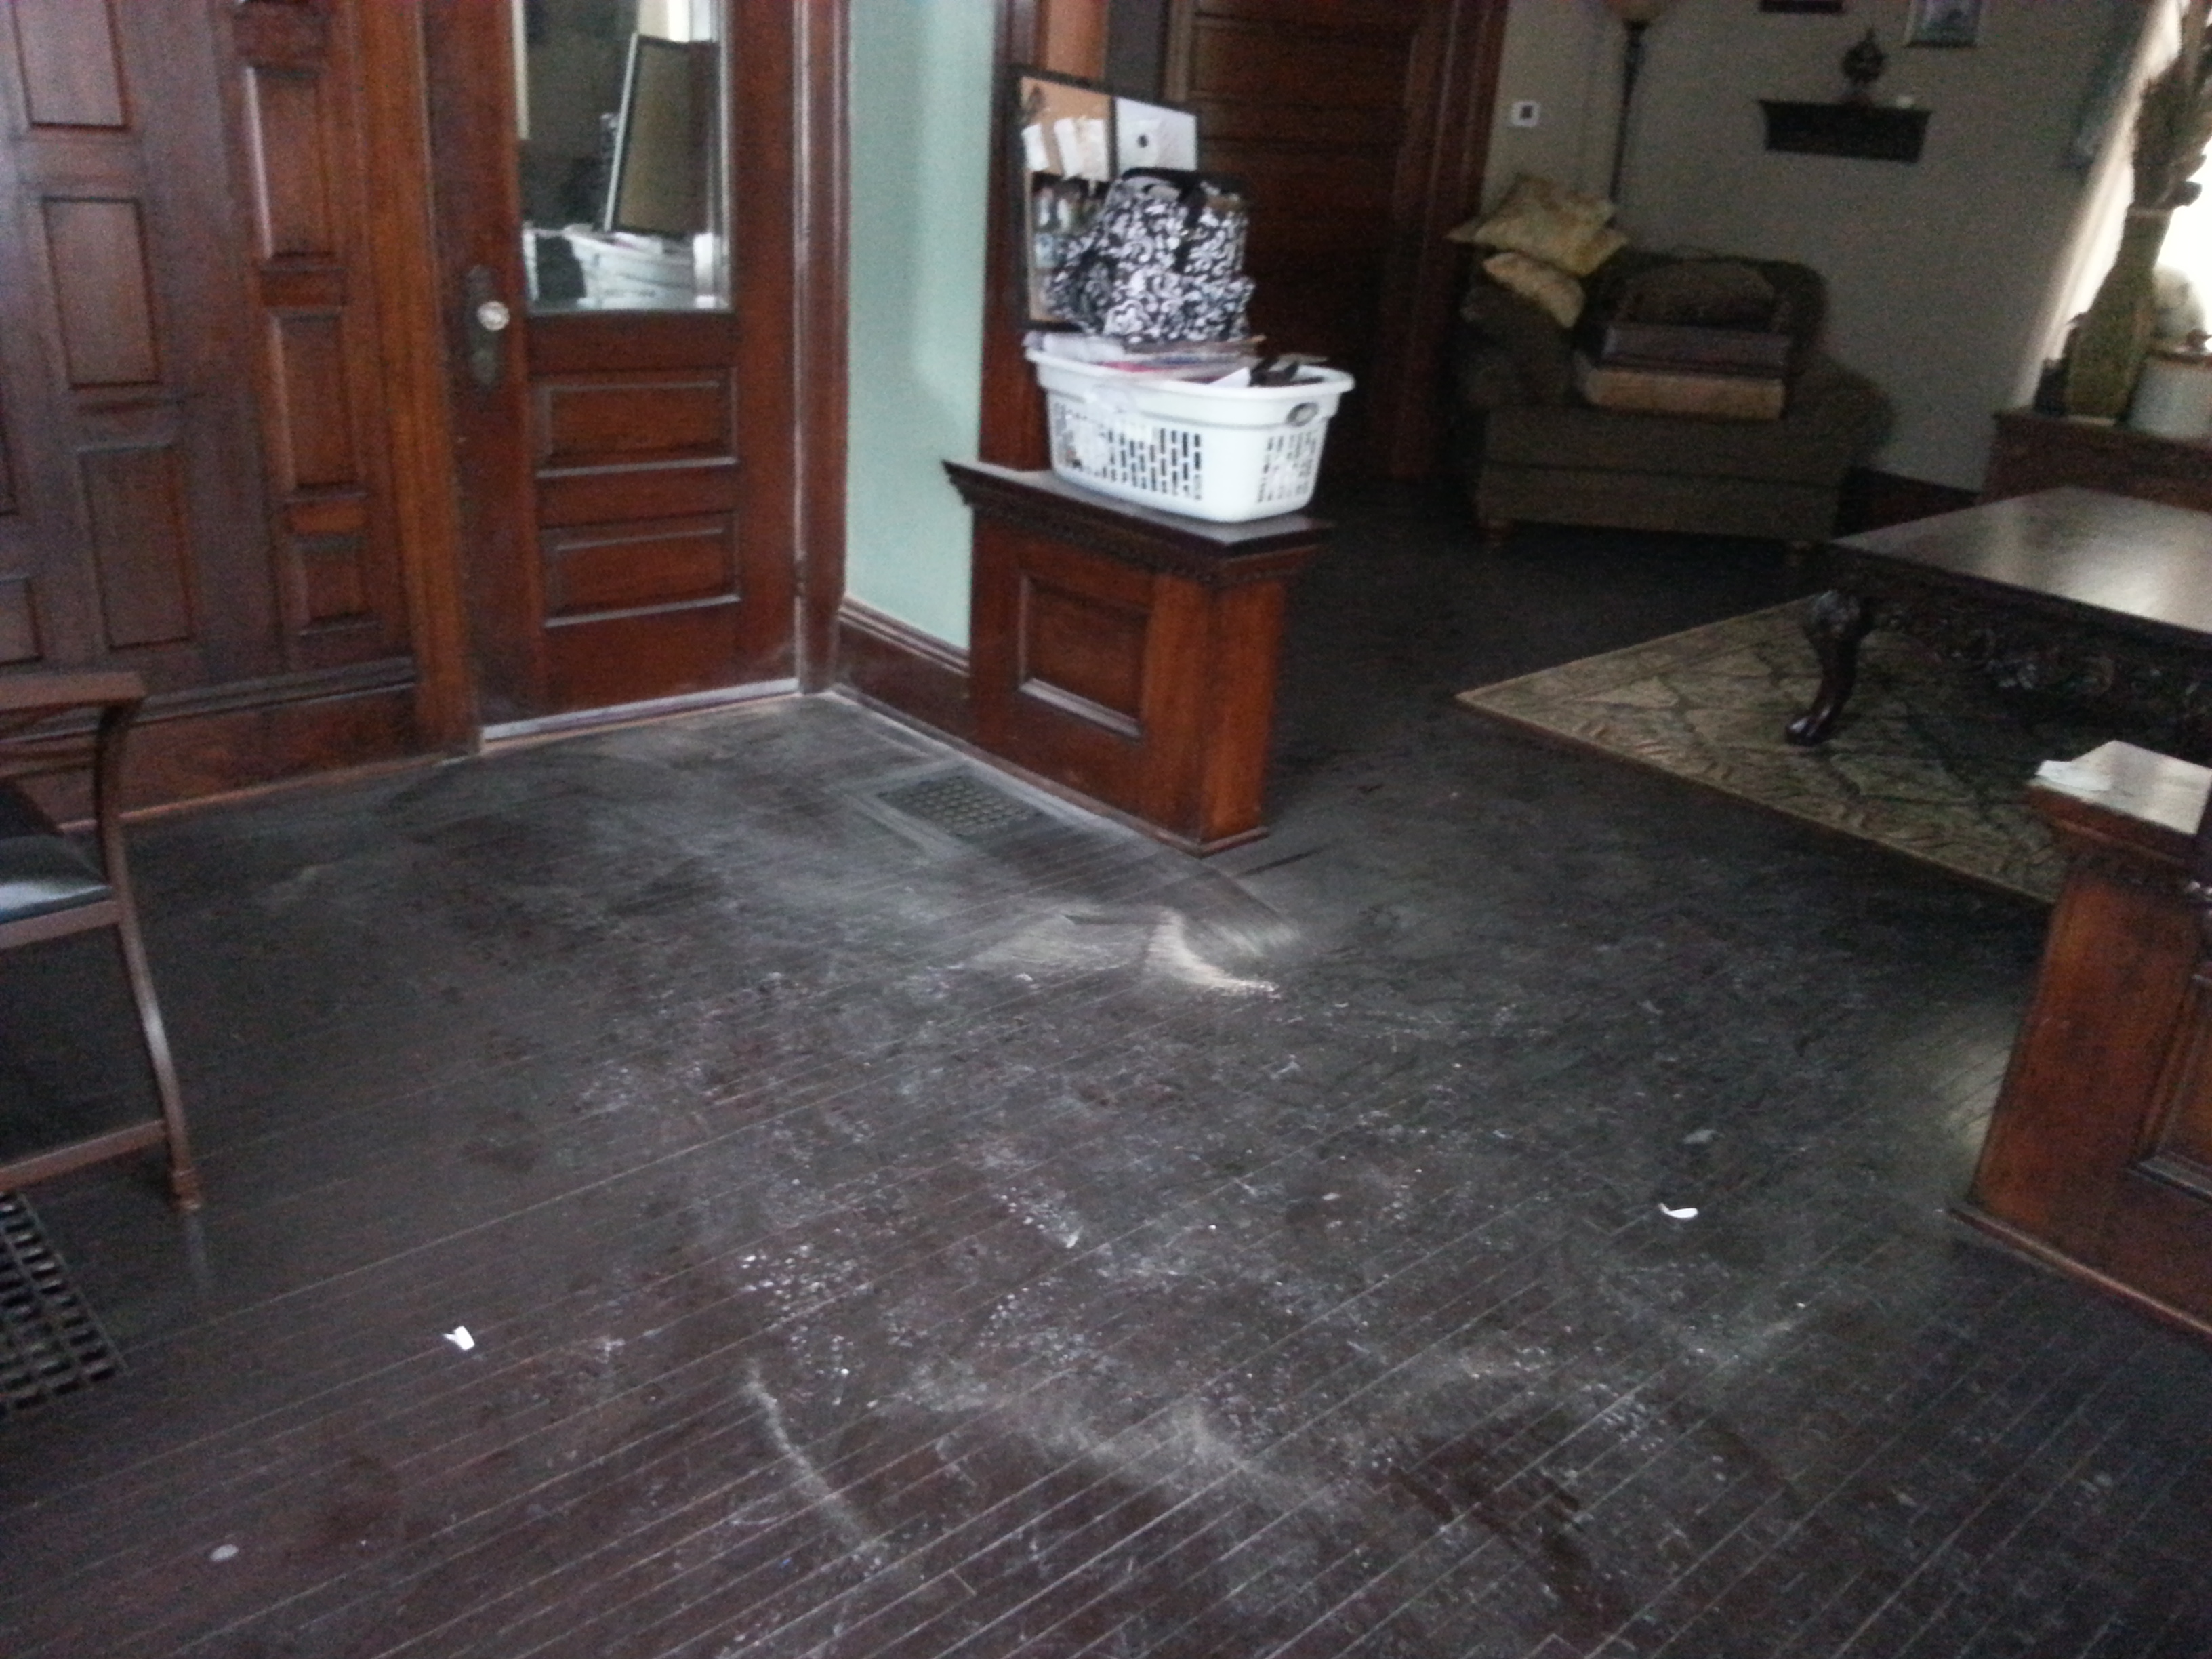
Plaster dust why must you torture me so?

I know it might seem like it’s all fun and games but these are the realities of renovation:
No matter how well I tape off all doors and openings this house just won’t stay clean.
Plaster dust why must you torture me so?
This has been a rough last few months. Raul has been at school most nights every week trying to get closer to finishing his Bachelor’s degree in Graphic Design. One of the classes that he had to take this semester was a photography class. He convinced me to be his model for his final project (it took a LOT of bribery hehe). Anyways, in the midst of all the Holiday Home tour chaos he was busy planning a Steampunk themed photoshoot. If you don’t know what Steampunk the best way that I can explain it is that it is an artistic form that combines science fiction, machinery, and either Victorian stylings or the American Wild West. What this means is lots of guns, gears, and really tight corsets (oy!). What this also means is that our house was basically the perfect setting for his shoot. He scoured the secondhand stores for some additional props and clothes to make my outfit and we were set to go. The shoot was a grueling 5 hours (!!!!) but the end product was worth it. Check out this link to his photography Facebook page to see all the photos!
http://www.facebook.com/media/set/?set=a.445060075554068.102064.228738967186181&type=1
![]()
This is what my to-do list looks like today…how about yours? ![]()

Restoring a house means that there are always a ton of things to do…sometimes so many things that my brain can no longer keep track of them and I have to put it all down on paper so I can see the progress I make by crossing things off one by one. It’s amazing the high I get from marking that one little thing off the list 😉
Some of you will remember the awful internal debate I staged with myself when trying to decide what kind of wallpaper to hang and even if I should put said wallpaper up. Thanks so much for all the feedback from all of you who commented! It made it a lot easier to make a decision. Even with all the comments and suggestions I still had to make three trips to the Benjamin Moore paint store in order to decide what I really wanted.
Here’s a snapshot of the choices I started with:

I asked for readers to vote for their favorite(s) to see what choice would be the most popular. I got a lot of feedback on here as well as on my link posted in my Facebook feed….and the results wereeeee:
Choice #1 8 votes
Choice #2 0 votes
Choice#3 0 votes
Choice#4 1 vote
Choice#5 5 votes
Choice#6 2 votes
Choice#7 0 votes
Choice#8 4 votes
Choice#9 2 votes
Choice#10 1 vote
Choice#11 2 votes
Choice#12 2 votes
Choice#13 1 vote
Choice#14 2 votes
Choice#15 3 votes
And although my personal favorite was #11, clearly Choice #1 was the winner! I loved #1 but I was on the fence about it because the pattern was ultra-white and all my accents and even the ceiling I had painted a cream color…a pale, cream color but nonetheless it wasn’t stark white. I considered some of the comments which swayed me towards a more neutral choice. I also took to heart the advice given to me by a couple of you who screamed the word “NOOOO!!” when you heard mention of wallpaper. I therefore struck a compromise with myself. I would ONLY wallpaper a very small area AND I would focus on a design and pattern that complemented the walls of the bedroom rather than contrasted against it like I had originally planned.
So naturally, I ended up choosing a wallpaper that isn’t even one of the 15 choices! 😉 It IS the same pattern as #11 BUT it is more similar in color to #5 or #10.
After all the deliberation, choosing the wallpaper ended up being the easy part! Benjamin Moore has to order the paper from Thibault.com and the wrong color was sent to me (how ironic that the wallpaper that first arrived was very similar to #1?!). The salesperson at the store insisted that I would need 2 rolls…which meant a lot of $$. When the wrong pattern arrived I took the opportunity to insist that I only needed one roll…and wanting to remedy the mistake, Benjamin Moore obliged and even waived the restocking fee and shipping charges as well. Which meant I saved a lot of money in the end :)))
When I finally got my hands on the wallpaper we set right in to work. Since part of the paper would be bordered by the exposed brick chimney we had to clean the bricks before applying the paper. In removing the plaster and scrubbing away the dust, the mortar had become a bit stained. My dad suggested applying an acid made specifically for cleaning stone to get the brick and mortar back to sparkling.

Meanwhile, my mom and I started measuring and cutting the paper to place the first strip on the wall. I purchased a gallon of wallpaper glue from Lowe’s and poured it into a paint pan. The glue can be applied with a roller or brush. Simply lay the paper on a flat surface and start covering it from edge to edge with the paste.

(Although the directions say to spread glue on the back of the paper, I found that after trial and error it was much easier to roll the glue directly onto the painted wall)
The actual hanging of the wallpaper is the trickiest part. Managing 8ft of soggy paper is not the easiest task in the world. Luckily, I had someone who lived through all the wallpaper nightmares of the 60’s, 70’s and 80’s to help me out-my mom 😉


The whole process was super easy and finished in less than half an hour! Oh and we had over half of the roll left which means I can use it for artwork and other nifty things in order to kind of carry the theme throughout the bedroom. Check out the finished TV nook!


I love how the paper has a metallic finish to it that changes from gold to silver to gray to brown depending on where you are standing. It really pulls out ALL the colors of the room. You may be wondering why there is a electrical plug smack in the middle of all that papery goodness..but that’s where the TV is going to mount so no fears! 😉 All that’s left is to trim out the walls and it will be a gorgeous!
I AM SIMPLY OBSESSED WITH THE WAY THAT IT TURNED OUT!
Much love and until next time!
-L.
Writing a blog post really seems to fill your head with kitschy sayings, donchakno?! I’m trying to avoid all the overused one liners and catch phrases but I guess really I should just get on with it.
Meet…ME! Lyndsay, your fabulous blog hostess, writer extraordinaire, first time homeowner, and overall crazy woman (I mean, really, how could I not be to buy this hunking (honking?) piece of property that’s 101 years old!?).
Raul and I recently stepped into the world of home-owning. Hellloooooo stress (and goodbye money!). We are so totally in love with our home though, it’s disgusting.
")
We first found the house on a random drive through town that has only further reinforced by belief in destiny, fate, will of the Gods, whatever you wanna call it. We had been admiring historic neighboorhoods for a couple of years and took time to bike through them during the warmer weekends so that we could admire them up close. Last fall, on a whim, I asked Raul to drive through one of the neighboorhoods on the way home. BAM! Open House 2-4! Jackpot, baby!
Me, being the timid little vixen that I am, chickened out and told Raul just to drive home (really, who gets intimidated by an open house!?) I quick googled the house when we got home and once I saw a couple photos of the inside I knew that we had to go back! In person, the house was breathtaking. Take a look at this entryway.

GAWGEOUS!!!!
The woodwork is so rich and suprisingly well cared for.
So anyways, we were basically sold from the moment our little feet crossed that threshold. The house is about 2000 square feet, plenty of room for two people, especially two people who don’t always get along 😉
PLUS there was bonus space in a cool 3rd floor studio space with skylights and turret to boot! Our imaginations were fairly spinning!
I hem-hawed for a few weeks. That’s me. Trusty Taurus. Don’t ever rush me into any decision, especially when it means delving into my horde of money. 😉
Around Christmas time, this neighborhood puts on a Holiday Home Tour where the public can go check out about ten historic homes decked out in red and green splendor. The residents were awesome and the vibe was just really cool. We knew we would fit right in. I made an appointment with Greg Thomas of Ruoff Mortgage (HIGHLY RECOMMENDED!) the next week to have them assess my financial situation and see where I stood. It was the moment of truth.
Luckily the house was right in our price range. Having been pre-approved, we called Son Huynh, an absolutely AWESOME realtor with Coldwell Banker to help us navigate the purchasing of the home. It was a long process with many steps, offers and counter-offers, and an interminable wait but Son got us the house, and for the right price, too!
Now, the remodeling process begins! Though the house is in sound condition there are a lot of repairs and updates that need to be done before we move in. We are shooting for May 1st- but we’re willing to wait a little longer in order to complete the Master Bedroom repairs and Bathroom update before we move all of our belongings in. Update on the remodeling process next time!
ADIOS! 🙂
-Lyndsay
The discovered collection
Renovating a 1911 Victorian...DIY style!
Renovating a 1911 Victorian...DIY style!
Formerly Manhattan Nest
Free Furniture Plans and The DIY Secrets Retailers and Design Pros don't want you to know!
Home Decorating & DIY Tutorials
