Video Tour of our Master Bedroom

A few days ago we did an interview with the Fort Wayne Journal Gazette about this blog and the projects that we have completed in our home. As we were giving the photographer a tour through the house he asked us to do a short video…. a live, unscripted video! I was instantly transported back to speech class in high school and college. I was so nervous to talk about the house with nothing planned!! The link’s been active for a few days but it took me awhile to even work up the nerve to watch the video 😉

Anyways, I finally took a look and it’s not half bad. Check it out for yourselves 🙂

<p><a href=”http://vimeo.com/115439568″>Who Lives There? Lyndsay Sheets and Raul Perez.</a> from <a href=”http://vimeo.com/thejournalgazette”>The Journal Gazette</a> on <a href=”https://vimeo.com”>Vimeo</a&gt;.</p>


Before…and AFTER!!

Wow! It has been months without an update posted on here about our progress…and yet it seems as if the entire holiday season passed in the blink of an eye! We worked at full speed for several months in order to get the house ready for the Holiday Home tour. The two day tour was a complete success bringing in over 1300 guests and lots of exposure for our great neighborhood as well as The Reclamation Project, a community initiative to create a center for refugee immigrants which occupies the space at the former Rialto Theater on Calhoun Street. The two days of the tour were absolutely exhausting but hearing so many people say nice things about the work that we have done made it totally worth it. We opened up the foyer, the living room, the dining room, the master bedroom, the bathroom, and Raul’s office for the tour.  I thought it would be fun to show all of you just how far we have come since purchasing this home last March (wow, 1 year already!).  I’ve been seriously procrastinating as it is now almost Spring and I am just now getting around to editing and posting pictures of our house decorated for Christmas but better late than never! I was so fortunate to have the help of my mother and gram who helped me decorate for the tour. Also, my grandmother even asked some of her friends to donate some Christmas decorations which just looked absolutely beautiful in our home. I am so thankful! With everyone’s help I was able to do so much more than I could have managed on my own.

So without further ado please take a look at the colorful before and the marvelous after! (click on each picture to see it bigger)

Foyer BEFORE:

Entryway before

Foyer AFTER:

Entryway afterentryway after 2entryway after 3

Living Room BEFORE:


living room before

Living Room AFTER:

living room after living room after 2

Dining Room BEFORE:

Dining Room before

Dining Room AFTER:

dining room after dining room after 2

Master Bedroom BEFORE:

master bedroom before

Master Bedroom AFTER:

master bedroom after master bedroom after 2 master bedroom after 3

master bedroom after 4

Bathroom BEFORE:

bathroom before

Bathroom AFTER:

bathroom after bathroom after 2 bathroom after 3


Creating furniture!

Now that we’ve finally got the walls painted and floors refinished we can start finding and buying furniture. Although we have purchased a few new pieces of furniture for the house, we have really had a fun time finding old pieces at thrift stores, garage sales, etc and turning them into unique pieces for our house. The best part about this (besides the cheap price!) is that we get to style the furniture to fit our tastes and match the decor of the house as well. We keep a sharp eye out for pieces with curved lines or ornate carvings that fit the time period of the house and present a good canvas for our furniture creation. Check out two of the pieces that we have restyled. Both were missing parts and/or damaged. With a little vision and a bit of paint we were able to make these two pieces into something fully functional and stylish as well!

My first project was a white cubby hole bookshelf that only needed a bit of paint to hide the scratches on its surface. We assembled the bookshelf on the front porch (and by we, I mean my dad 😉

The next step was to paint the bookshelf a glossy cream color to match the rest of the bedroom furniture.

I wanted to alter this piece of furniture and add a back to it so that I could add some fabric for a pop of color.  I purchase a large sheet of wood to create a backing and cut it down to the size of the bookshelf.

My original thought was to cover the backing in the wallpaper that I had leftover from our master bedroom nook. Unfortunately there was not enough left over so I went on the the next best idea- fabric! Joann Fabric was having a nice sale on their whole selection  so I chose a material with neutral color and a pattern similar to that of the aforementioned wallpaper. The fabric I chose was actually drapery fabric and had a great sheen to it as well as a cool, velvety texture.

We cut the fabric to size and attached it with duct tape to the wooden backing. Although staples may have been a sturdier form of attaching the fabric, duct tape allowed us to easily switch out the covering if we choose to alter our decor down the road. It also eliminates damage to the fabric piece which means we can use it other projects should we wish to.


Next we had to lug this thing up our L-shaped stairs and into the master bedroom.

I added a few books and knick-knacks anddddd project complete!

Our next project was creating a coffee table for the living room. I was fortunate enough to come into a table frame but not table top :/ No worries though, the frame of the table was absolutely too gorgeous to pass up!

We debated over whether to make the top of this out of wood or perhaps mosaic tiles or even a painted watercolor top. I was informed that the original top was made of marble that was cracked in shipping.

We decided to go with a wood top. We cut it to size and sanded it down. I also purchased a strip of trim to cover the crack between the table top and the frame.

After we assembled the trim and the table top we stained everything to match the existing frame.

Lastly, we added a protective coating on top to keep the surface looking nice.

All in all, two DIY projects that left our house looking a bit more homey! 🙂

1 tequila, 2 tequila, 3 tequila, FLOORS!!!!!

That’s what I feel that I need after these last few weeks. A nice big shot of tequila. Make it a double.

Wow! I’m sorry to all my readers (all 10 of you 😉 I have neglected this blog over the last month. Things have been non-stop, go, go, GO! at the house. It seems like every day I have the same routine. It’s wake up at 7. Work 8-4. Then jet over to the house and put in 4 or 5 hours of work before I head home for a quick shower and a chapter out of my book. Then it’s lights out.

I think that has been part of my blog writer’s block. I feel like the last month has been like the movie Groundhog- we are working our asses off day and night (and not just me- mad props to my MOM, my DAD, Raul and his FAM,too) yet we aren’t getting anything actually DONE.

There is definitely one thing I have learned though; I waaayyyy underestimated the time that it would take to get this house looking like I want it…Oh! and I also learned that I never, ever, ever, ever in my life and in all my future lives want to strip, sand, and refinish a hardwood floor again. Ever.  The process is long, messy, hot and EXPENSIVE!!!!! Granted, it is not as expensive as new hardwoods but stilllll….

When we first purchased the home the floors were not even a priority to me. They were kinda one of those projects that was lingering in the back of mind- I knew they needed to be done, but honestly their ugliness wouldn’t be any kind of barrier to me living in the house.

And then…we started making everything else so beautiful around the floors. They became a huge eyesore. So we decided to tackle the upstairs. At first it was just the master bedroom.  There was just a fine layer of stain left on the original flooring. A bit of sanding wouldn’t be too difficut. Right? WRONG!!! Then the bedroom looked so good that we decided to do the hallway, too. Now the hallway was covered in 3 layers of ugly grey paint. We had to add tons of stripping to the process. Then sanding. Then staining. Then protecting with a glossy polyurethane.

And then we figured as long as we were doing the hallway why not do the 3rd bedroom, too. Just while we were at it, you know. That room was also painted. And we soon discovered that whatever paint they had used on the floor, well, it wasn’t coming off with regular paint stripper. Like not at all. So that meant a lot of heavy duty sanding.

To make a long story short the whole process was very complicated and took ffoooorrrrreeevvveerrrr. In fact, it took so long, and affected me so deeply, that I would rather not even write about it. I will, however, provide you with a lot of cool pictures! The progress is amazing!

And voila! I will post pics of the finished product soon! The most exciting part is that now we can get furniture!! 🙂

Whoop! Whoop! (Wallpaper’s done!)

Some of you will remember the awful internal debate I staged with myself when trying to decide what kind of wallpaper to hang and even if I should put said wallpaper up.  Thanks so much for all the feedback from all of you who commented! It made it a lot easier to make a decision. Even with all the comments and suggestions I still had to make three trips to the Benjamin Moore paint store in order to decide what I really wanted.

Here’s a snapshot of the choices I started with:

I asked for readers to vote for their favorite(s) to see what choice would be the most popular. I got a lot of feedback on here as well as on my link posted in my Facebook feed….and the results wereeeee:

Choice #1          8 votes

Choice #2         0 votes

Choice#3          0 votes

Choice#4          1 vote

Choice#5           5 votes

Choice#6          2 votes

Choice#7          0 votes

Choice#8          4 votes

Choice#9          2 votes

Choice#10        1 vote

Choice#11         2 votes

Choice#12         2 votes

Choice#13         1 vote

Choice#14         2 votes

Choice#15          3 votes

And although my personal favorite was #11, clearly Choice #1 was the winner! I loved #1 but I was on the fence about it because the pattern was ultra-white and all my accents and even the ceiling I had painted a cream color…a pale, cream color but nonetheless it wasn’t stark white. I considered some of the comments which swayed me towards a more neutral choice. I also took to heart the advice given to me by a couple of you who screamed the word “NOOOO!!” when you heard mention of wallpaper. I therefore struck a compromise with myself.  I would ONLY wallpaper a very small area AND I would focus on a design and pattern that complemented the walls of the bedroom rather than contrasted against it like I had originally planned.

So naturally, I ended up choosing a wallpaper that isn’t even one of the 15 choices! 😉 It IS the same pattern as #11 BUT it is more similar in color to #5 or #10.

After all the deliberation, choosing the wallpaper ended up being the easy part! Benjamin Moore has to order the paper from Thibault.com and the wrong color was sent to me (how ironic that the wallpaper that first arrived was very similar to #1?!). The salesperson at the store insisted that I would need 2 rolls…which meant a lot of $$. When the wrong pattern arrived I took the opportunity to insist that I only needed one roll…and wanting to remedy the mistake, Benjamin Moore obliged and even waived the restocking fee and shipping charges as well. Which meant I saved a lot of money in the end :)))

When I finally got my hands on the wallpaper we set right in to work.  Since part of the paper would be bordered by the exposed brick chimney we had to clean the bricks before applying the paper.  In removing the plaster and scrubbing away the dust, the mortar had become a bit stained. My dad suggested applying an acid made specifically for cleaning stone to get the brick and mortar back to sparkling.

Meanwhile, my mom and I started measuring and cutting the paper to place the first strip on the wall.  I purchased a gallon of wallpaper glue from Lowe’s and poured it into a paint pan.  The glue can be applied with a roller or brush. Simply lay the paper on a flat surface and start covering it from edge to edge with the paste.

(Although the directions say to spread glue on the back of the paper, I found that after trial and error it was much easier to roll the glue directly onto the painted wall)

The actual hanging of the wallpaper is the trickiest part. Managing 8ft of soggy paper is not the easiest task in the world. Luckily, I had someone who lived through all the wallpaper nightmares of the 60’s, 70’s and 80’s to help me out-my mom 😉

The whole process was super easy and finished in less than half an hour! Oh and we had over half of the roll left which means I can use it for artwork and other nifty things in order to kind of carry the theme throughout the bedroom. Check out the finished TV nook!

I love how the paper has a metallic finish to it that changes from gold to silver to gray to brown depending on where you are standing. It really pulls out ALL the colors of the room. You may be wondering why there is a electrical plug smack in the middle of all that papery goodness..but that’s where the TV is going to mount so no fears! 😉 All that’s left is to trim out the walls and it will be a gorgeous!

I AM SIMPLY OBSESSED WITH THE WAY THAT IT TURNED OUT!

Much love and until next time!

-L.

We takin’ it allll off!

At this point we are halfway thru every project that we have started. Depending on whether you’re an optimist or a pessimist will change whether you see this as a good thing (yay! almost there!) or a bad thing (ugh! so much to go!). Me, I just see it as there is a LOT of shit everywhere I look! 😉

I feel like my life is literally in shambles right now. (Shout out to Nicole G…literally in shambles because everywhere I look there is dirt, dust, and things either falling apart or partially assembled! Oh and I feel like I only have 3 outfits anymore since I am always wearing work clothes 😉

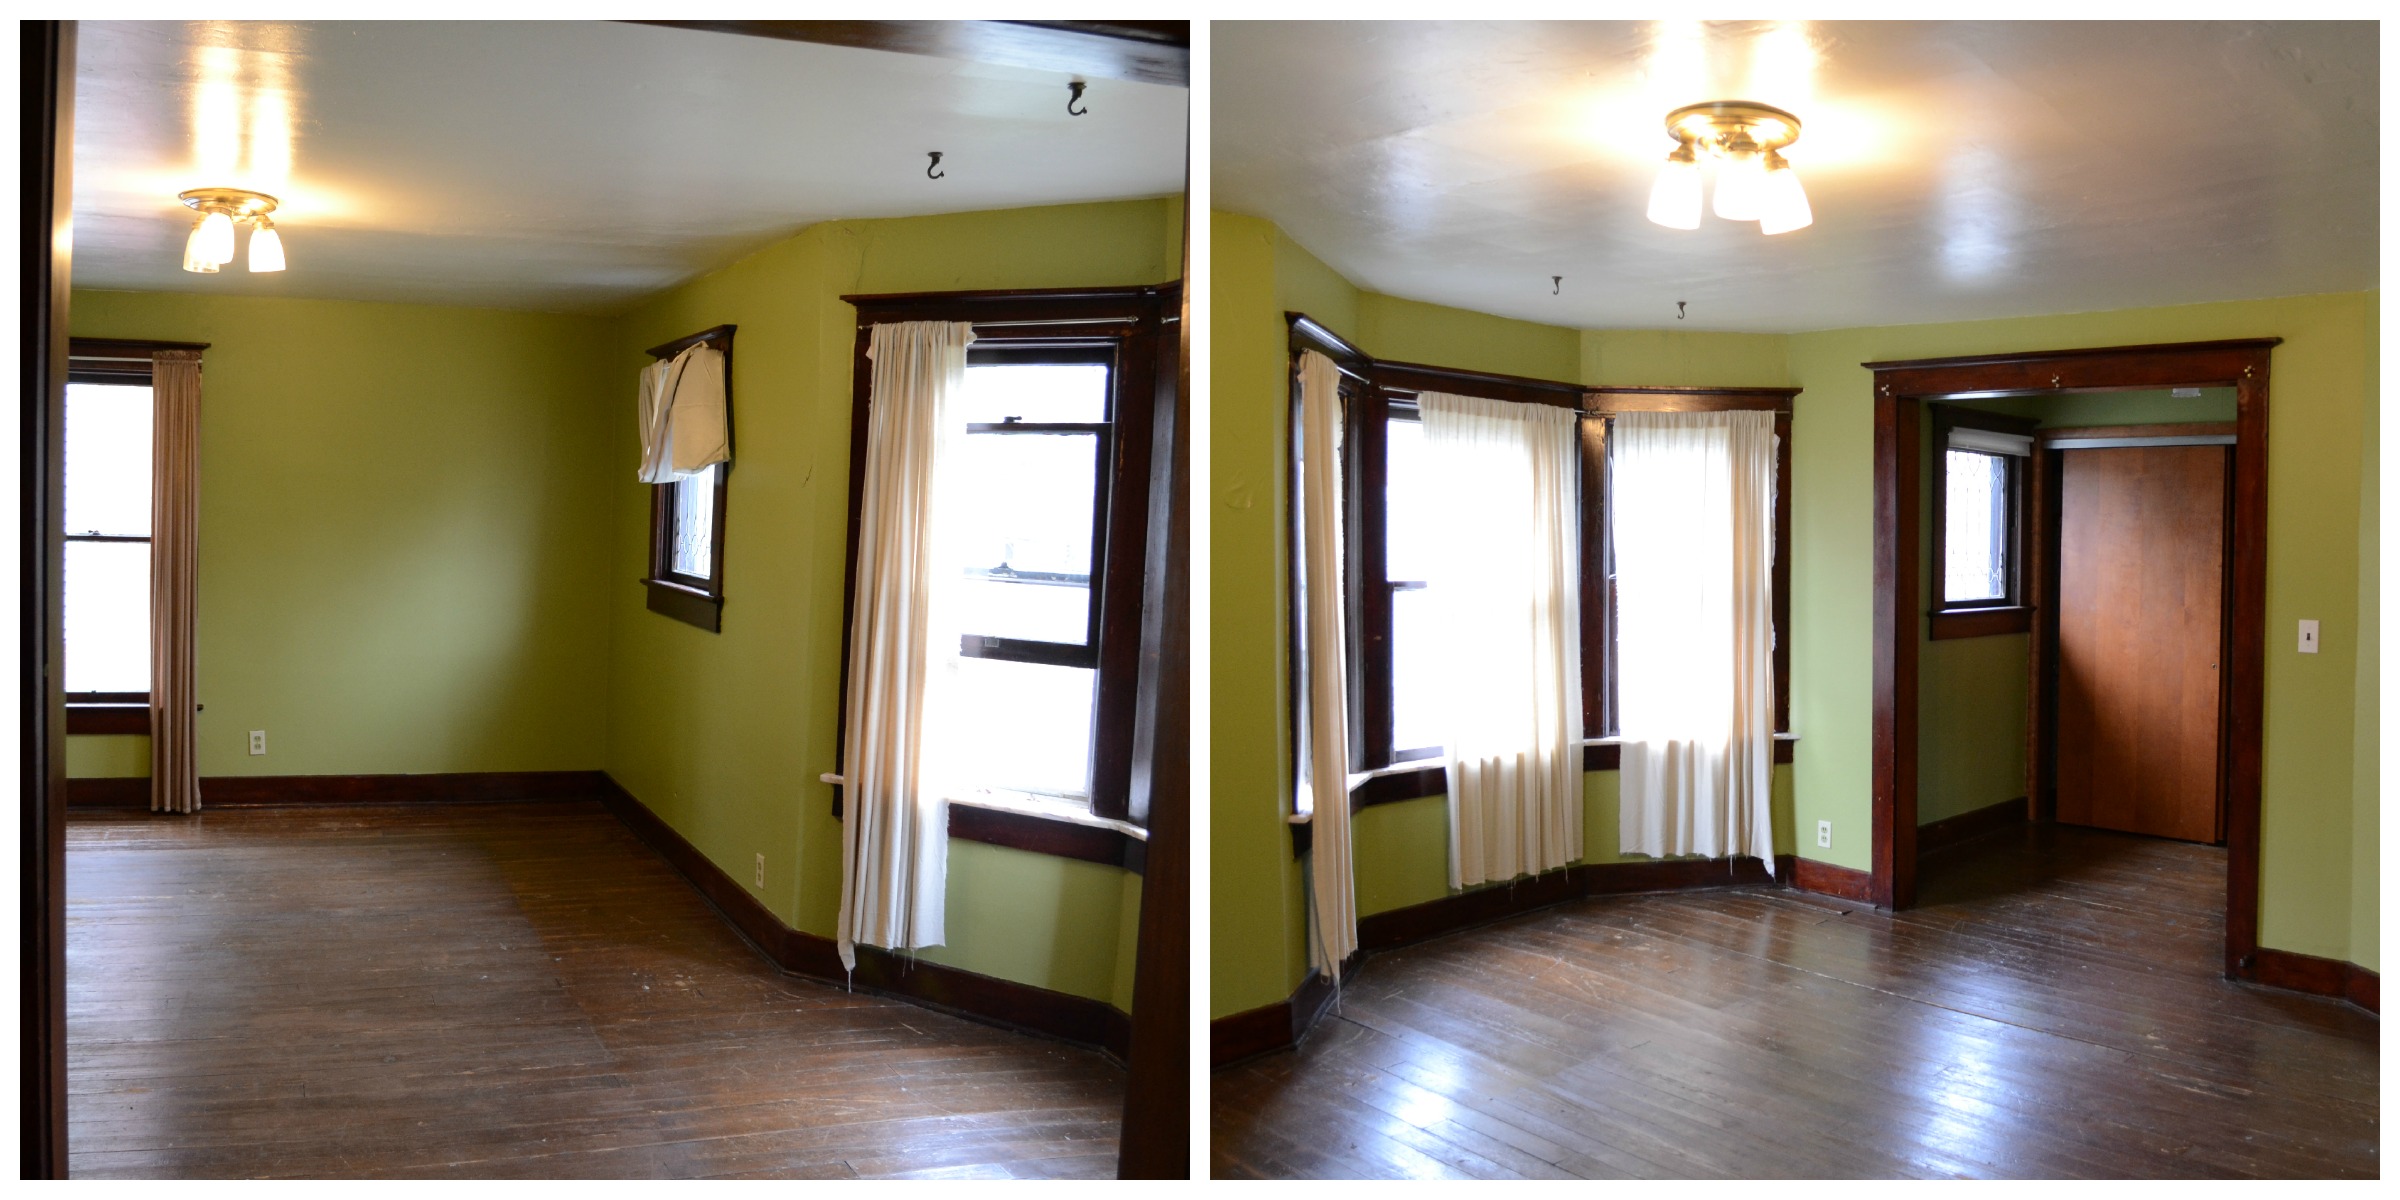
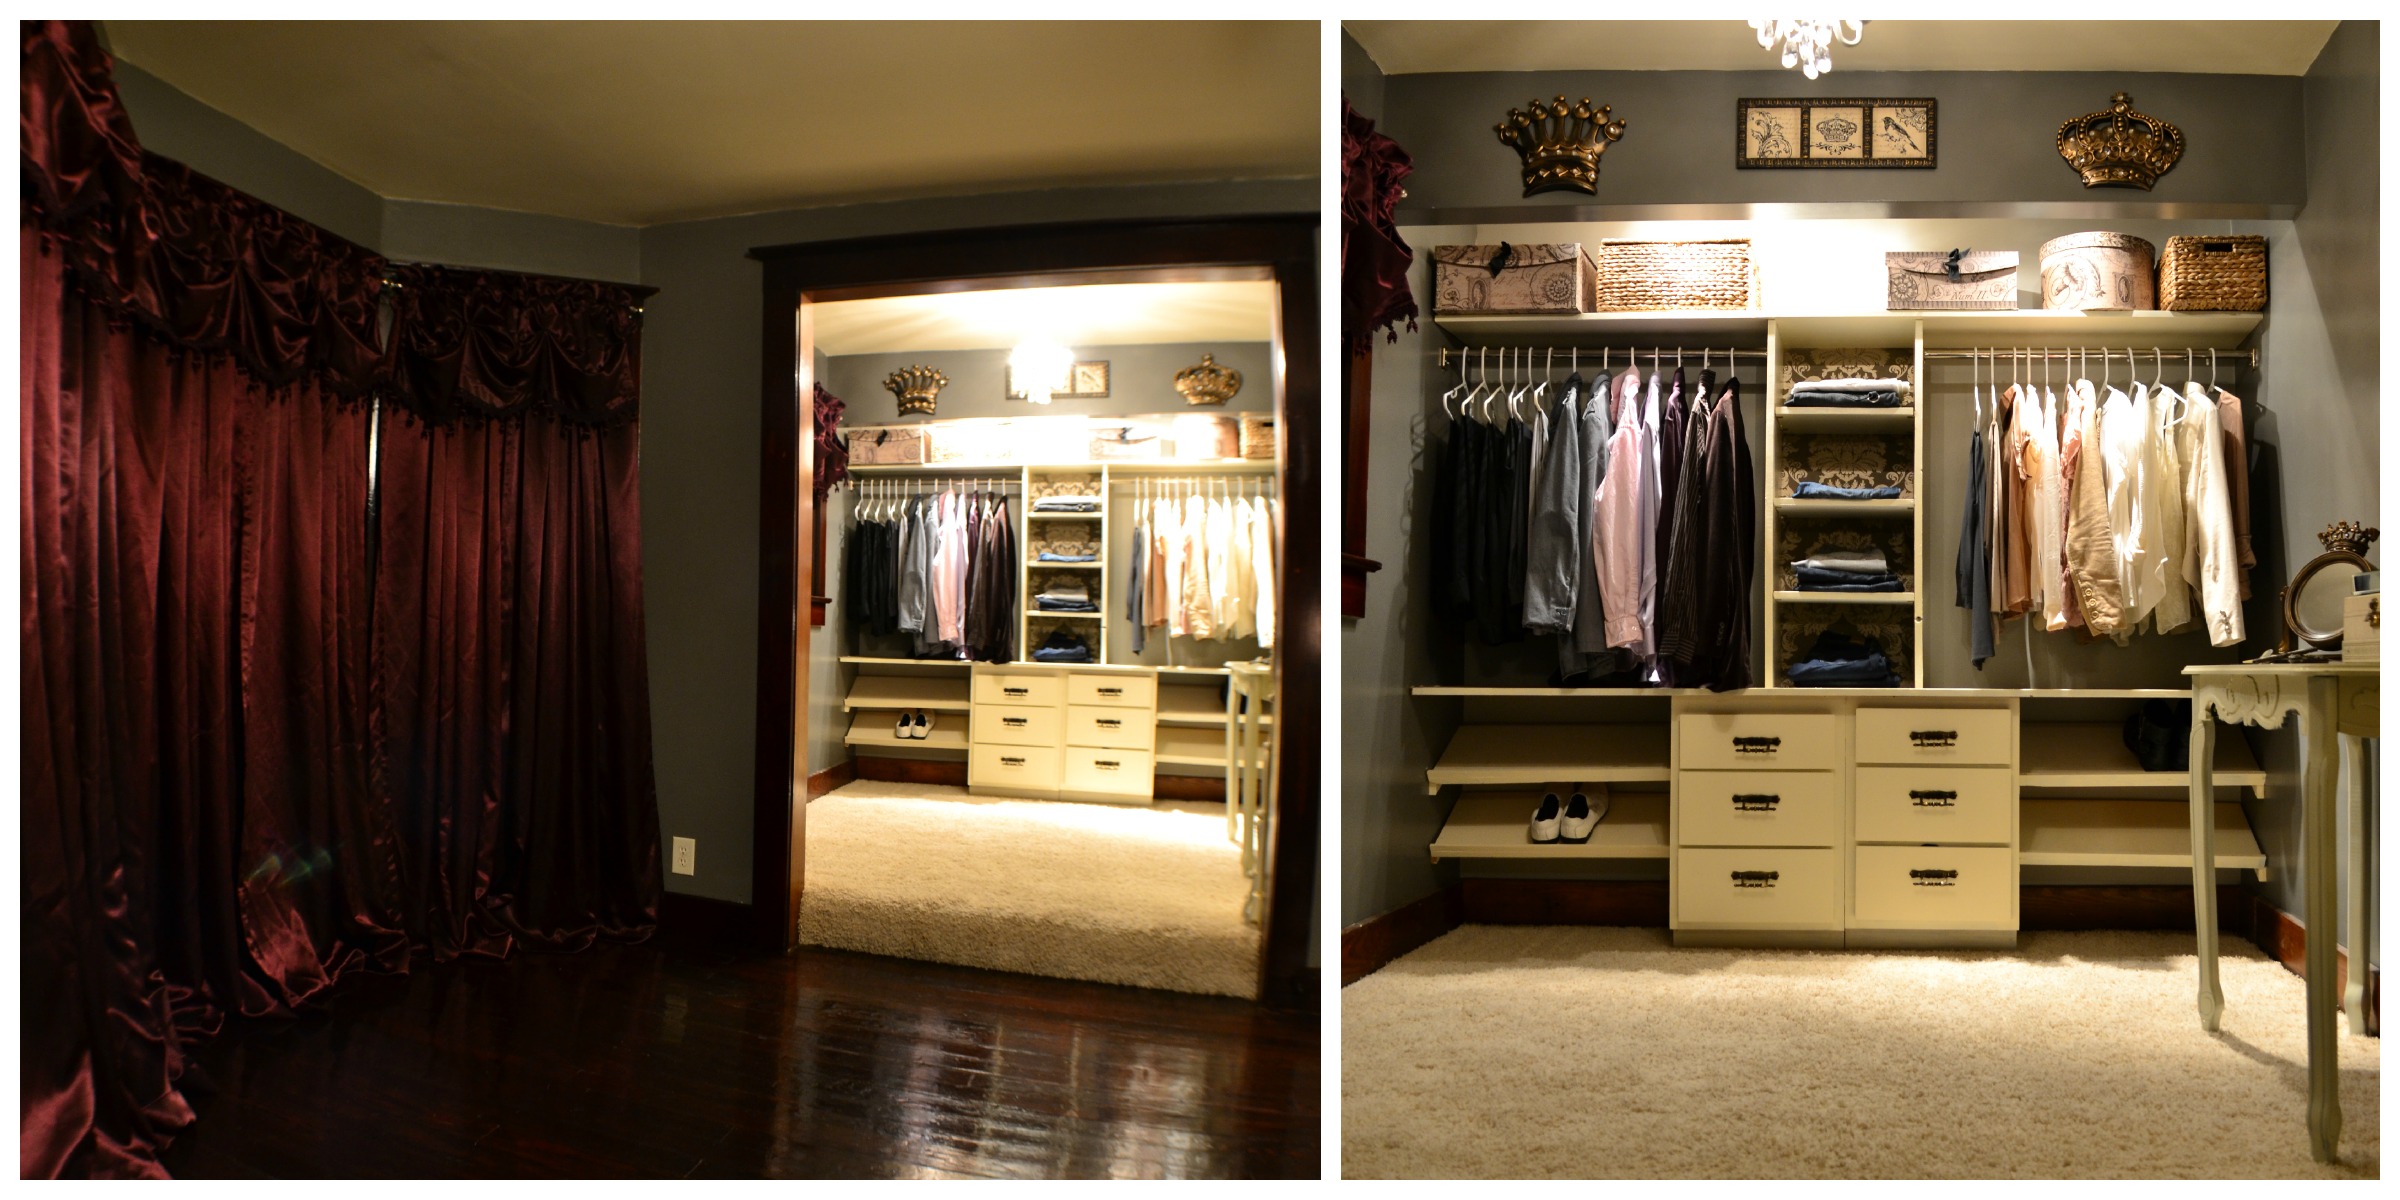
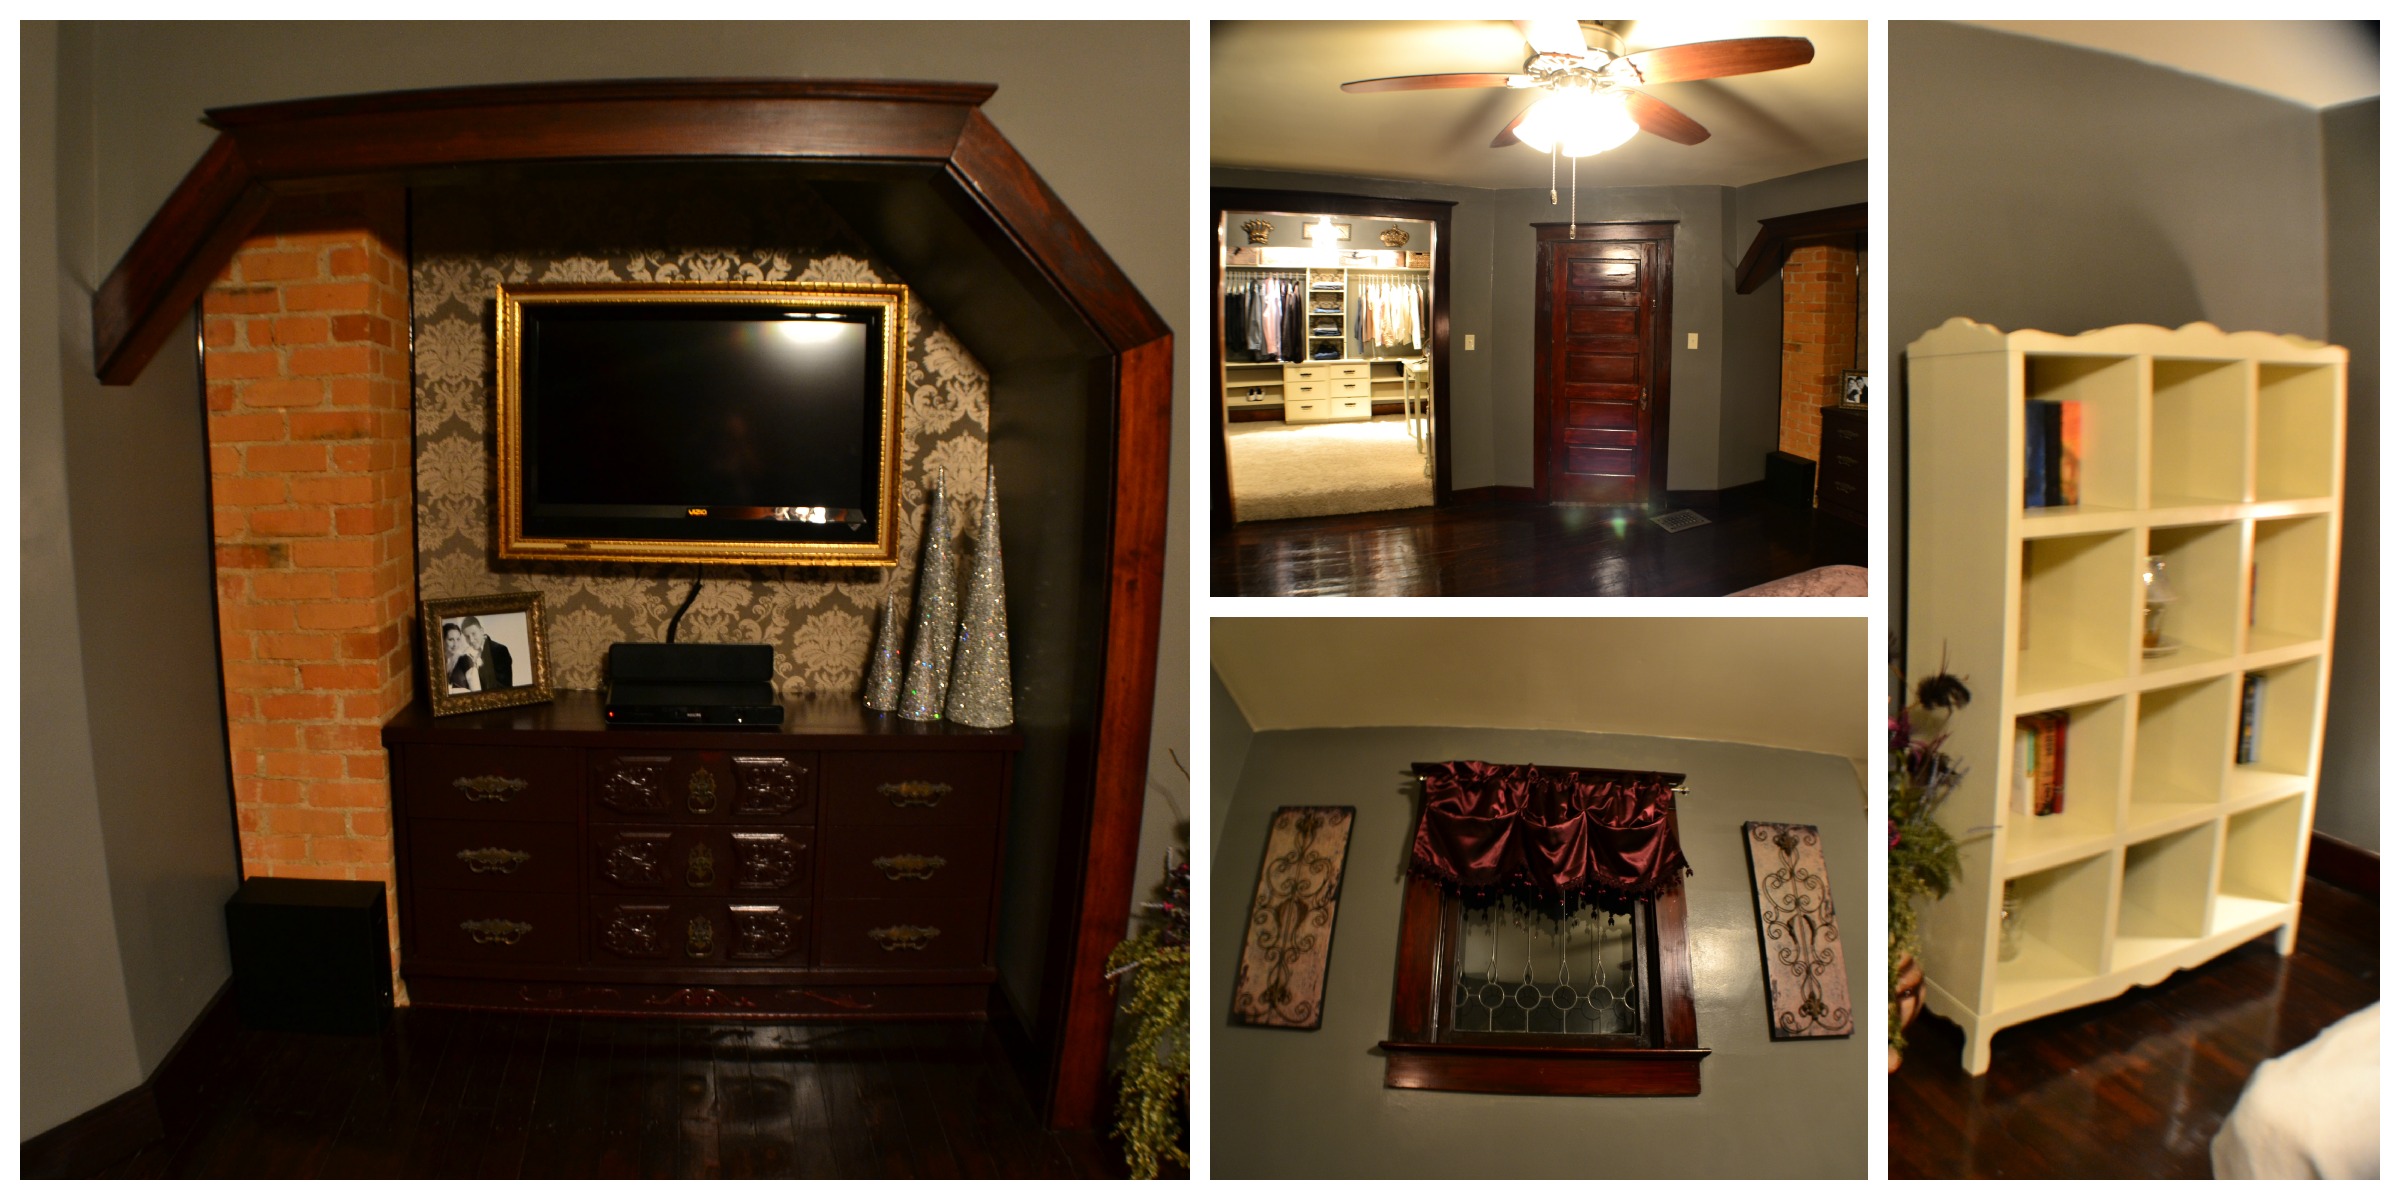
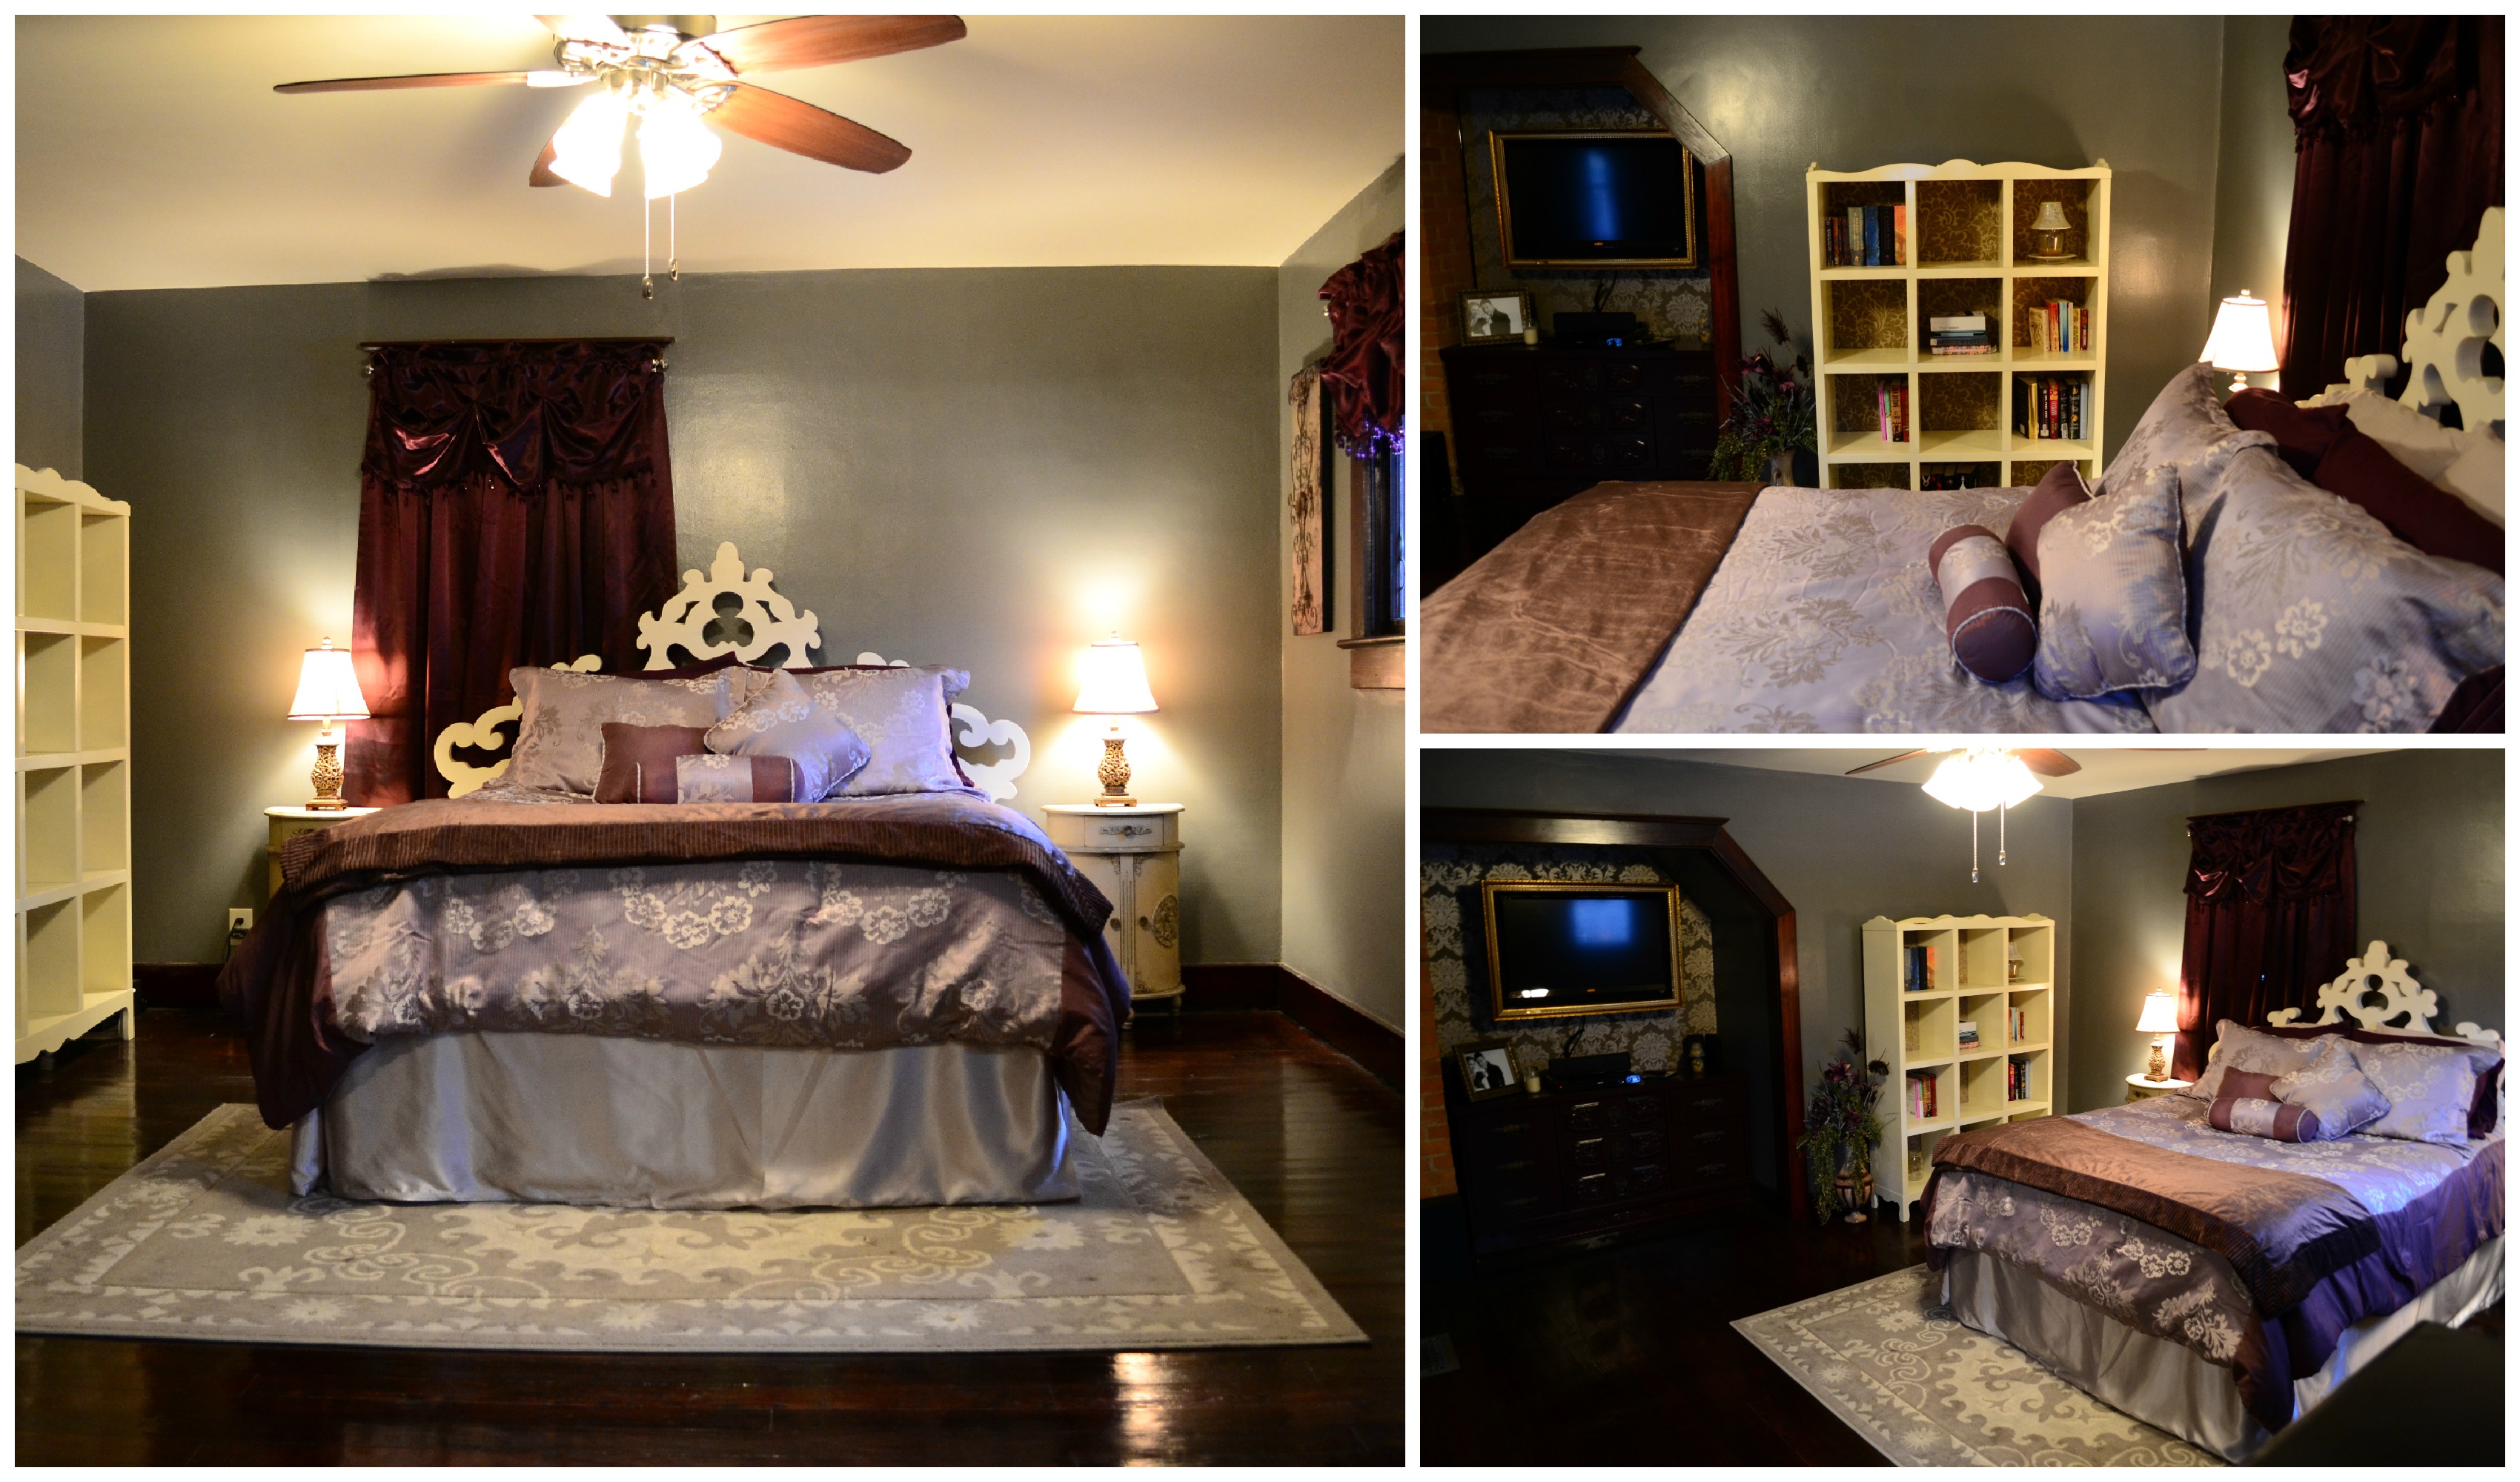
Check out the picture of the master bedroom and you will understand exactly what I am talking about.

There is more bare drywall than paint!! You can’t even see the floor anymore!  And I feel like I haven’t been properly clean for weeks, despite my 3 showers a day.

So, naturally, we decided that we needed to really dig in and scrub this place from top to bottom- or in our case, from bottom to top since we did start in the dining room and work our way up the stairs 😉

Everyone knows that when you want something cleaned right, you gotta call in the big guns. Granny Big Guns, that is.  My lovely, wonderful, Grammy came down armed with a mop and plenty of windex and set right in to work.

She also made a great lunch for us! Yum!! THANK YOU!

My mom pitched in, too and showed off her own prowess with the mop.

The results were Ah-mazing. Look at the before and after of the master bedroom floor where we did the majority of the drywall application and dreaded sanding.

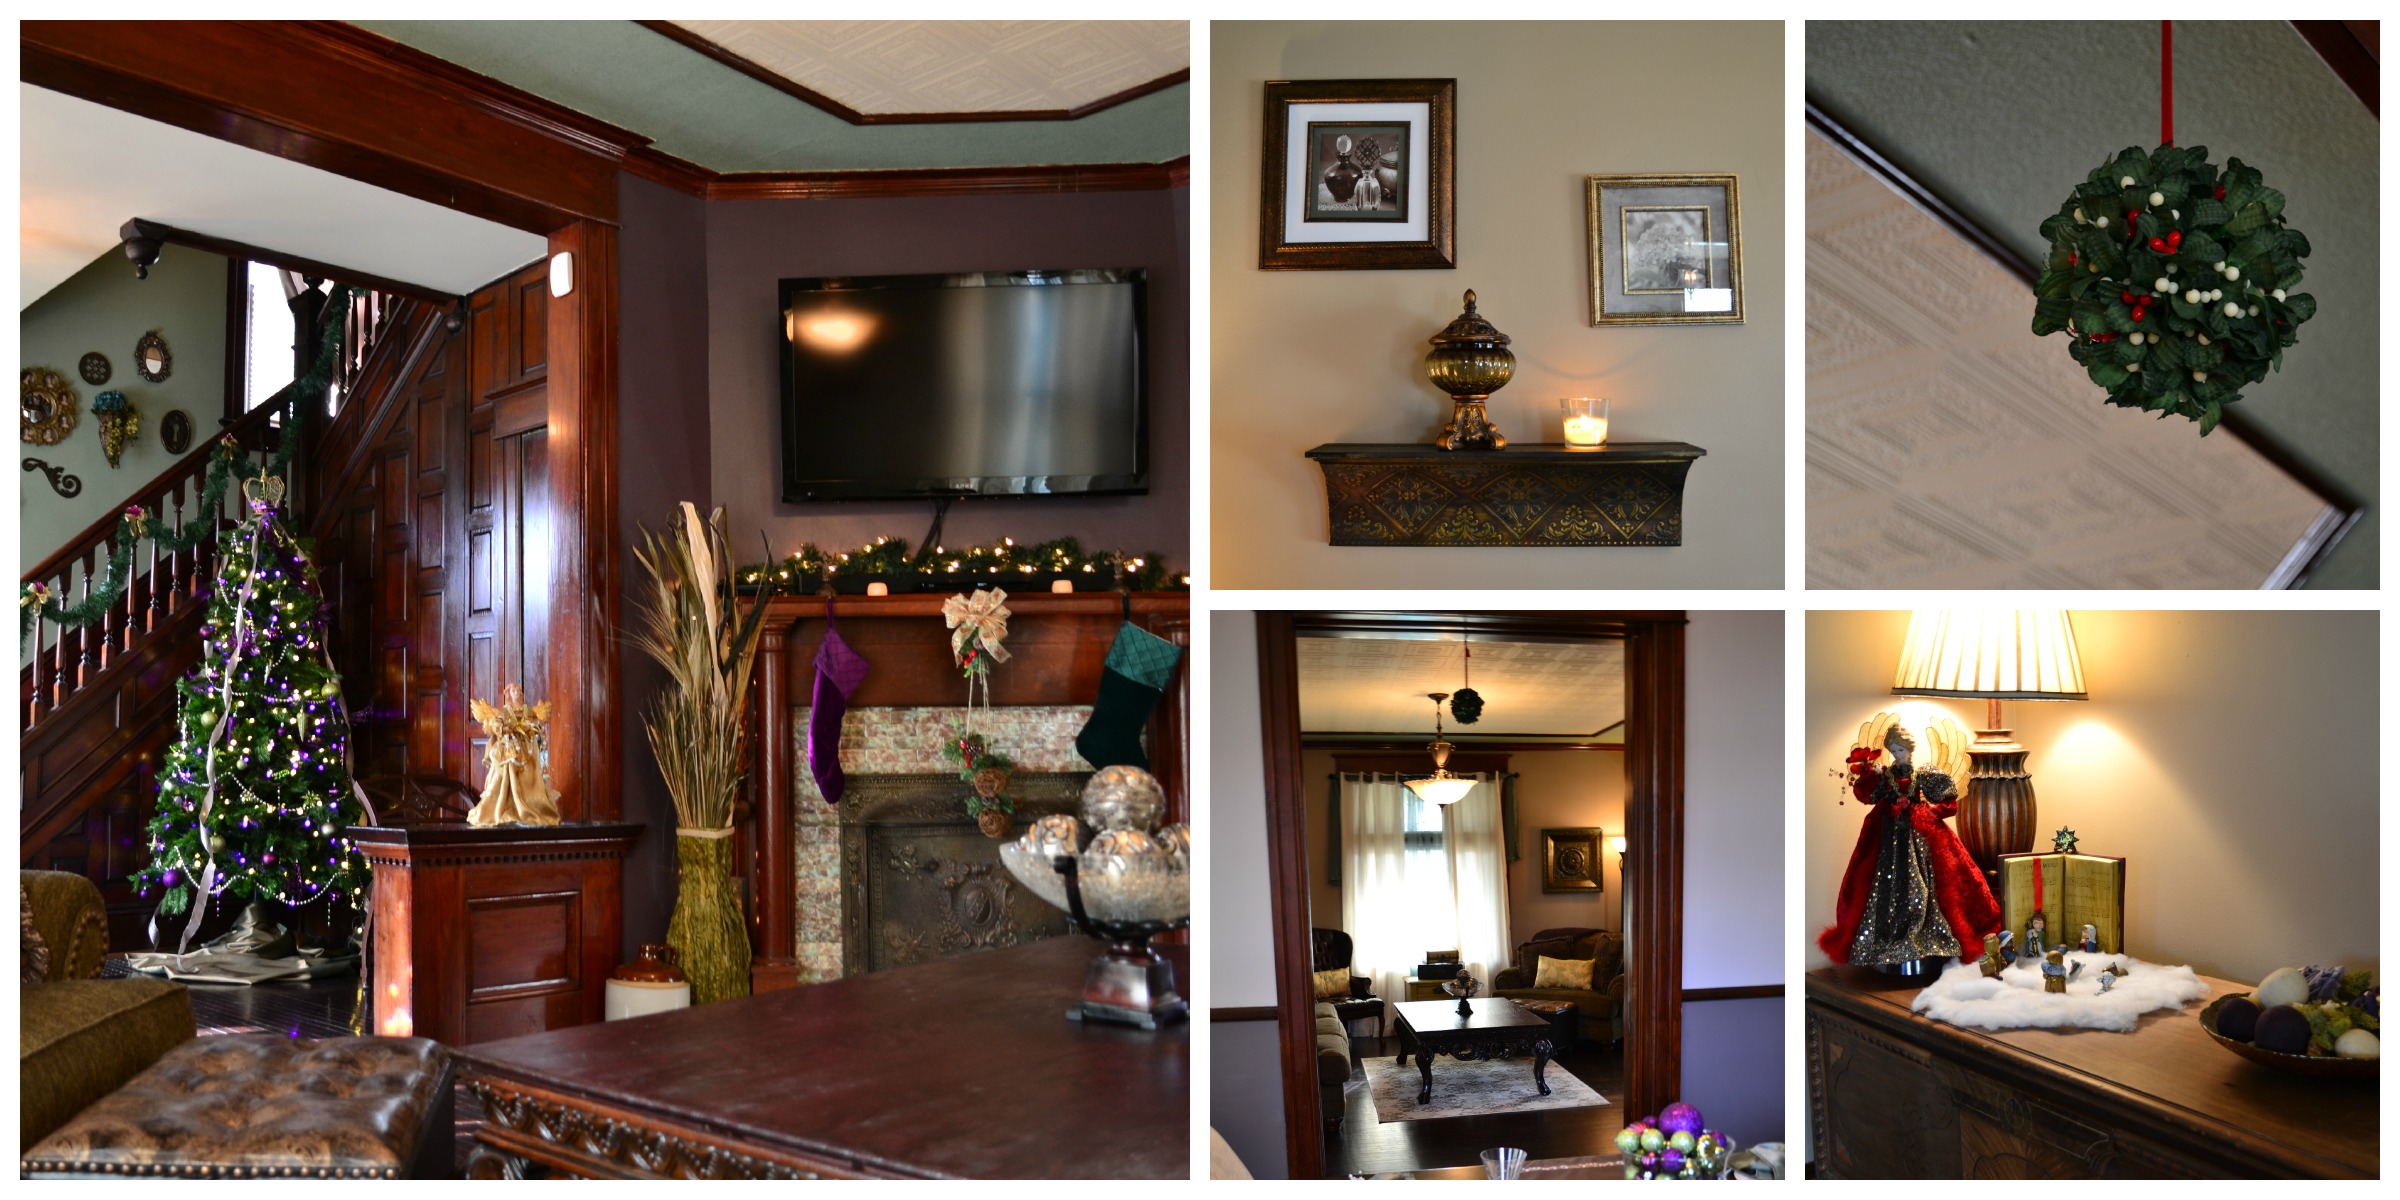
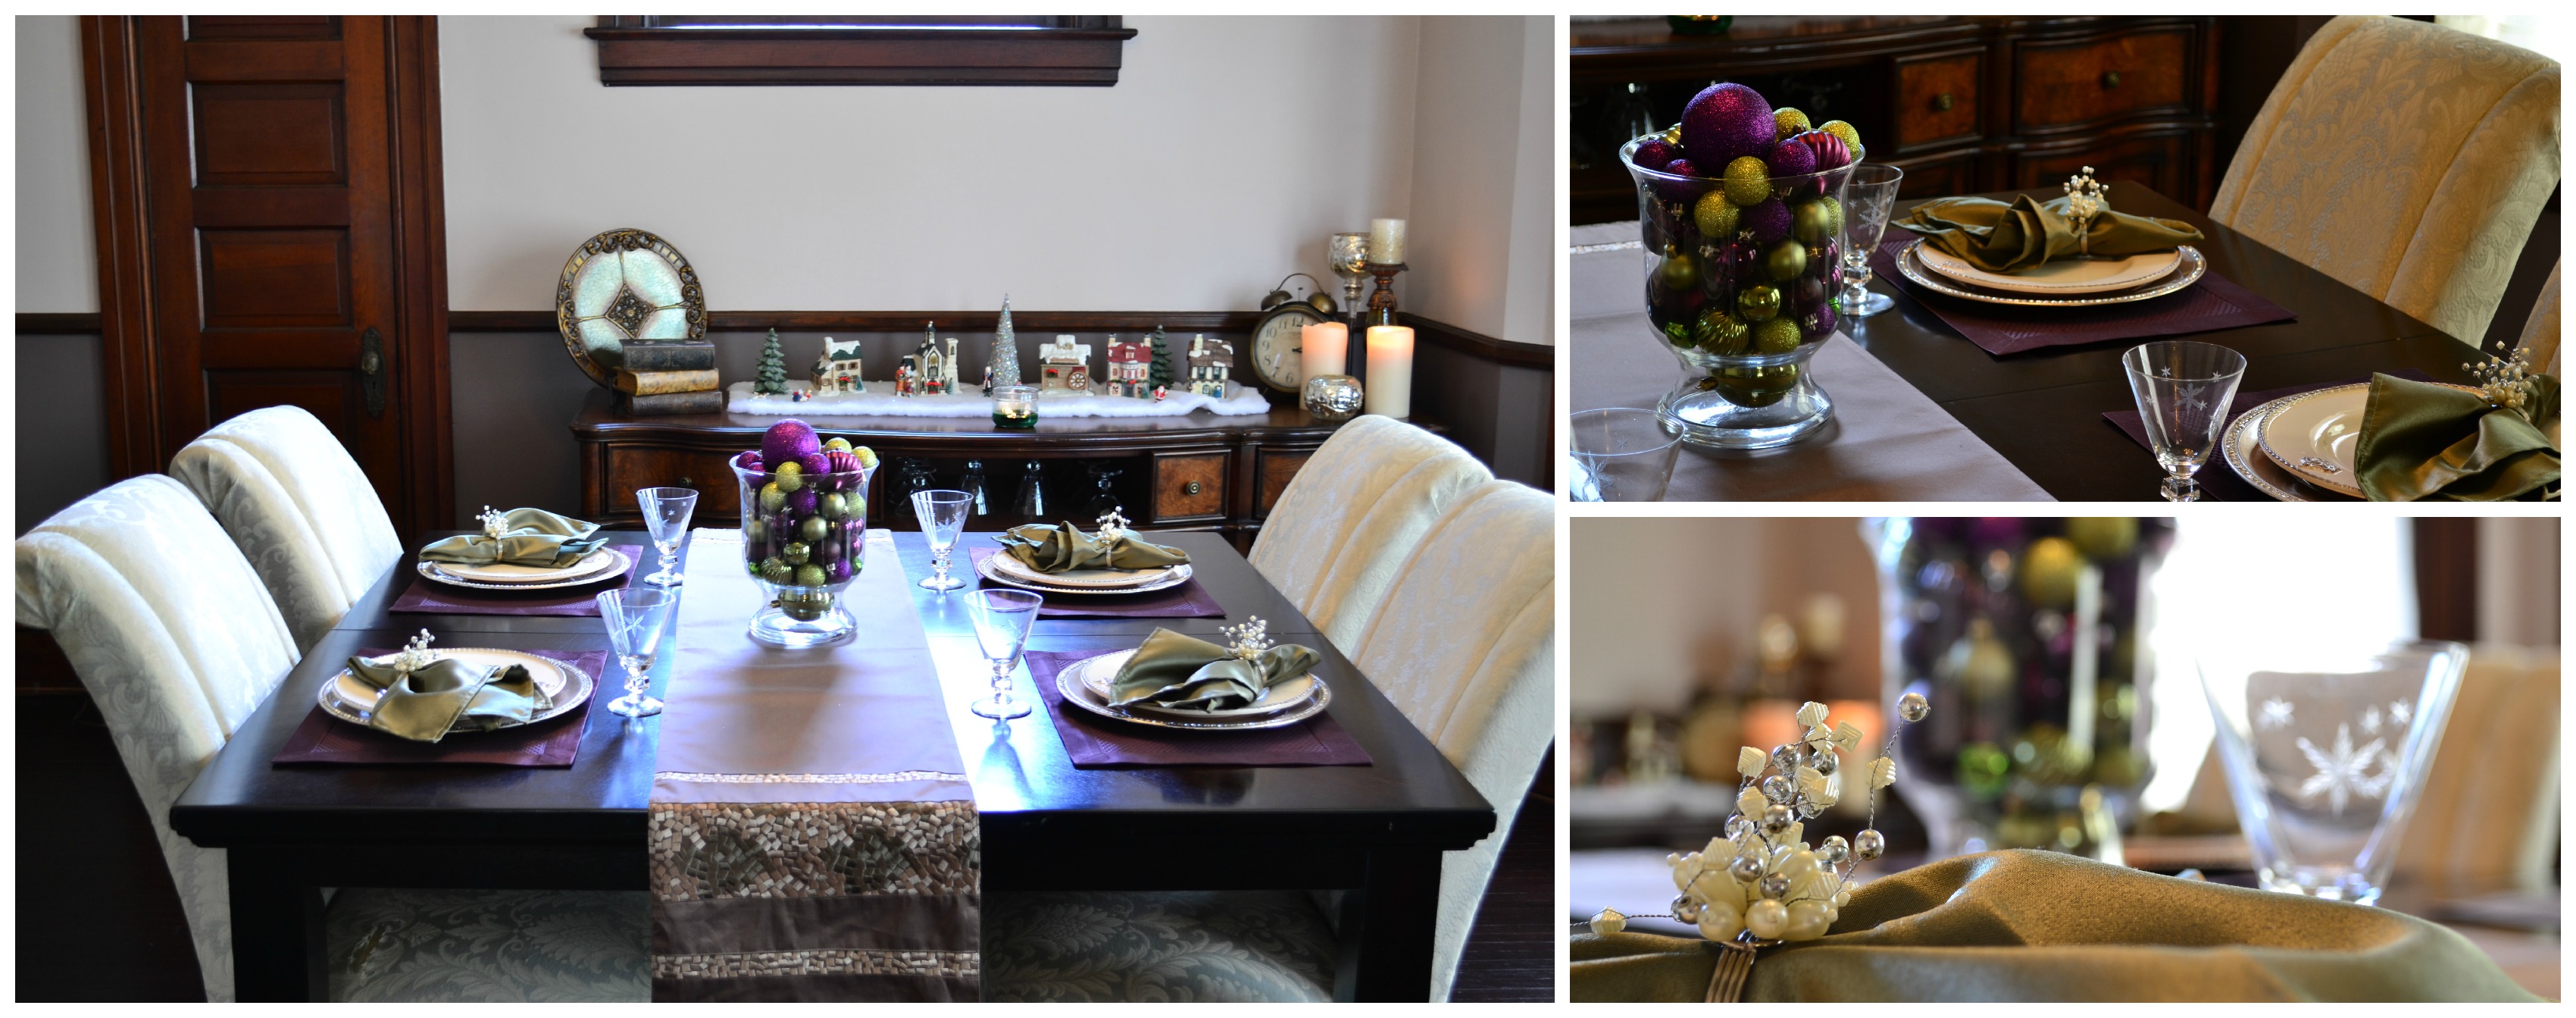
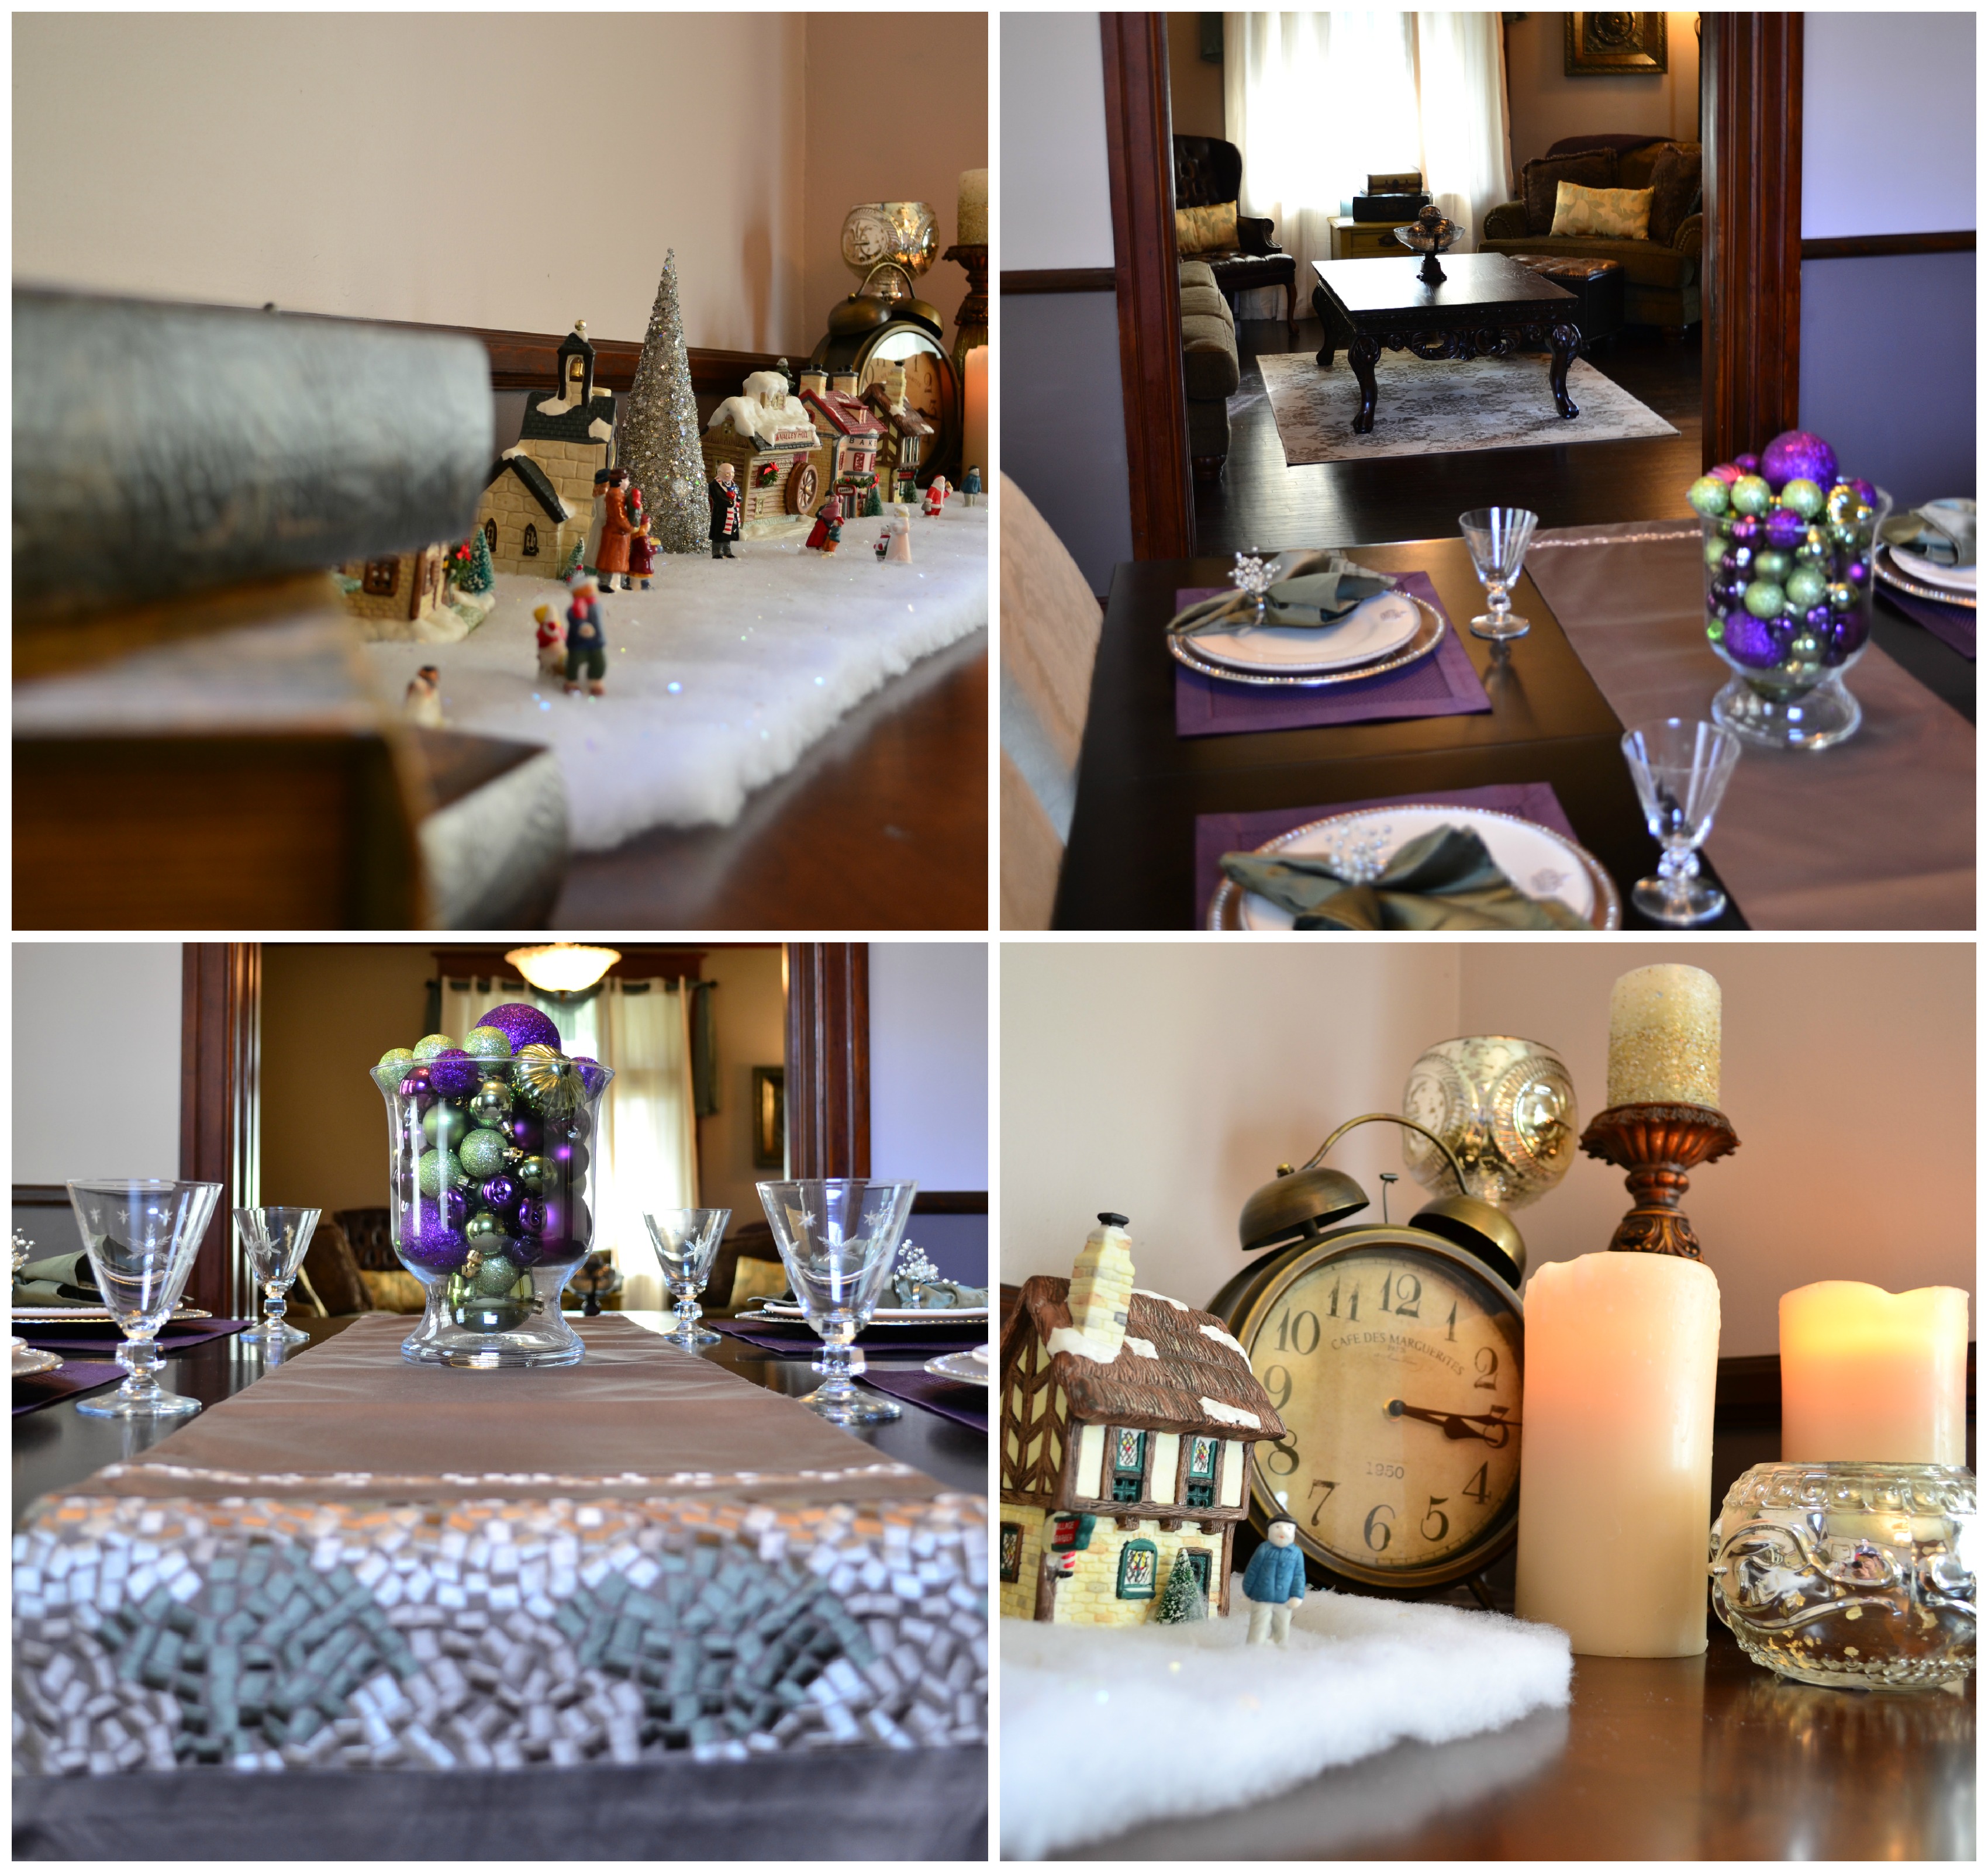
The dining room fairly sparkled after they tackled all the woodwork with qtips, toothbrushes, and plenty of Murphy’s oil.

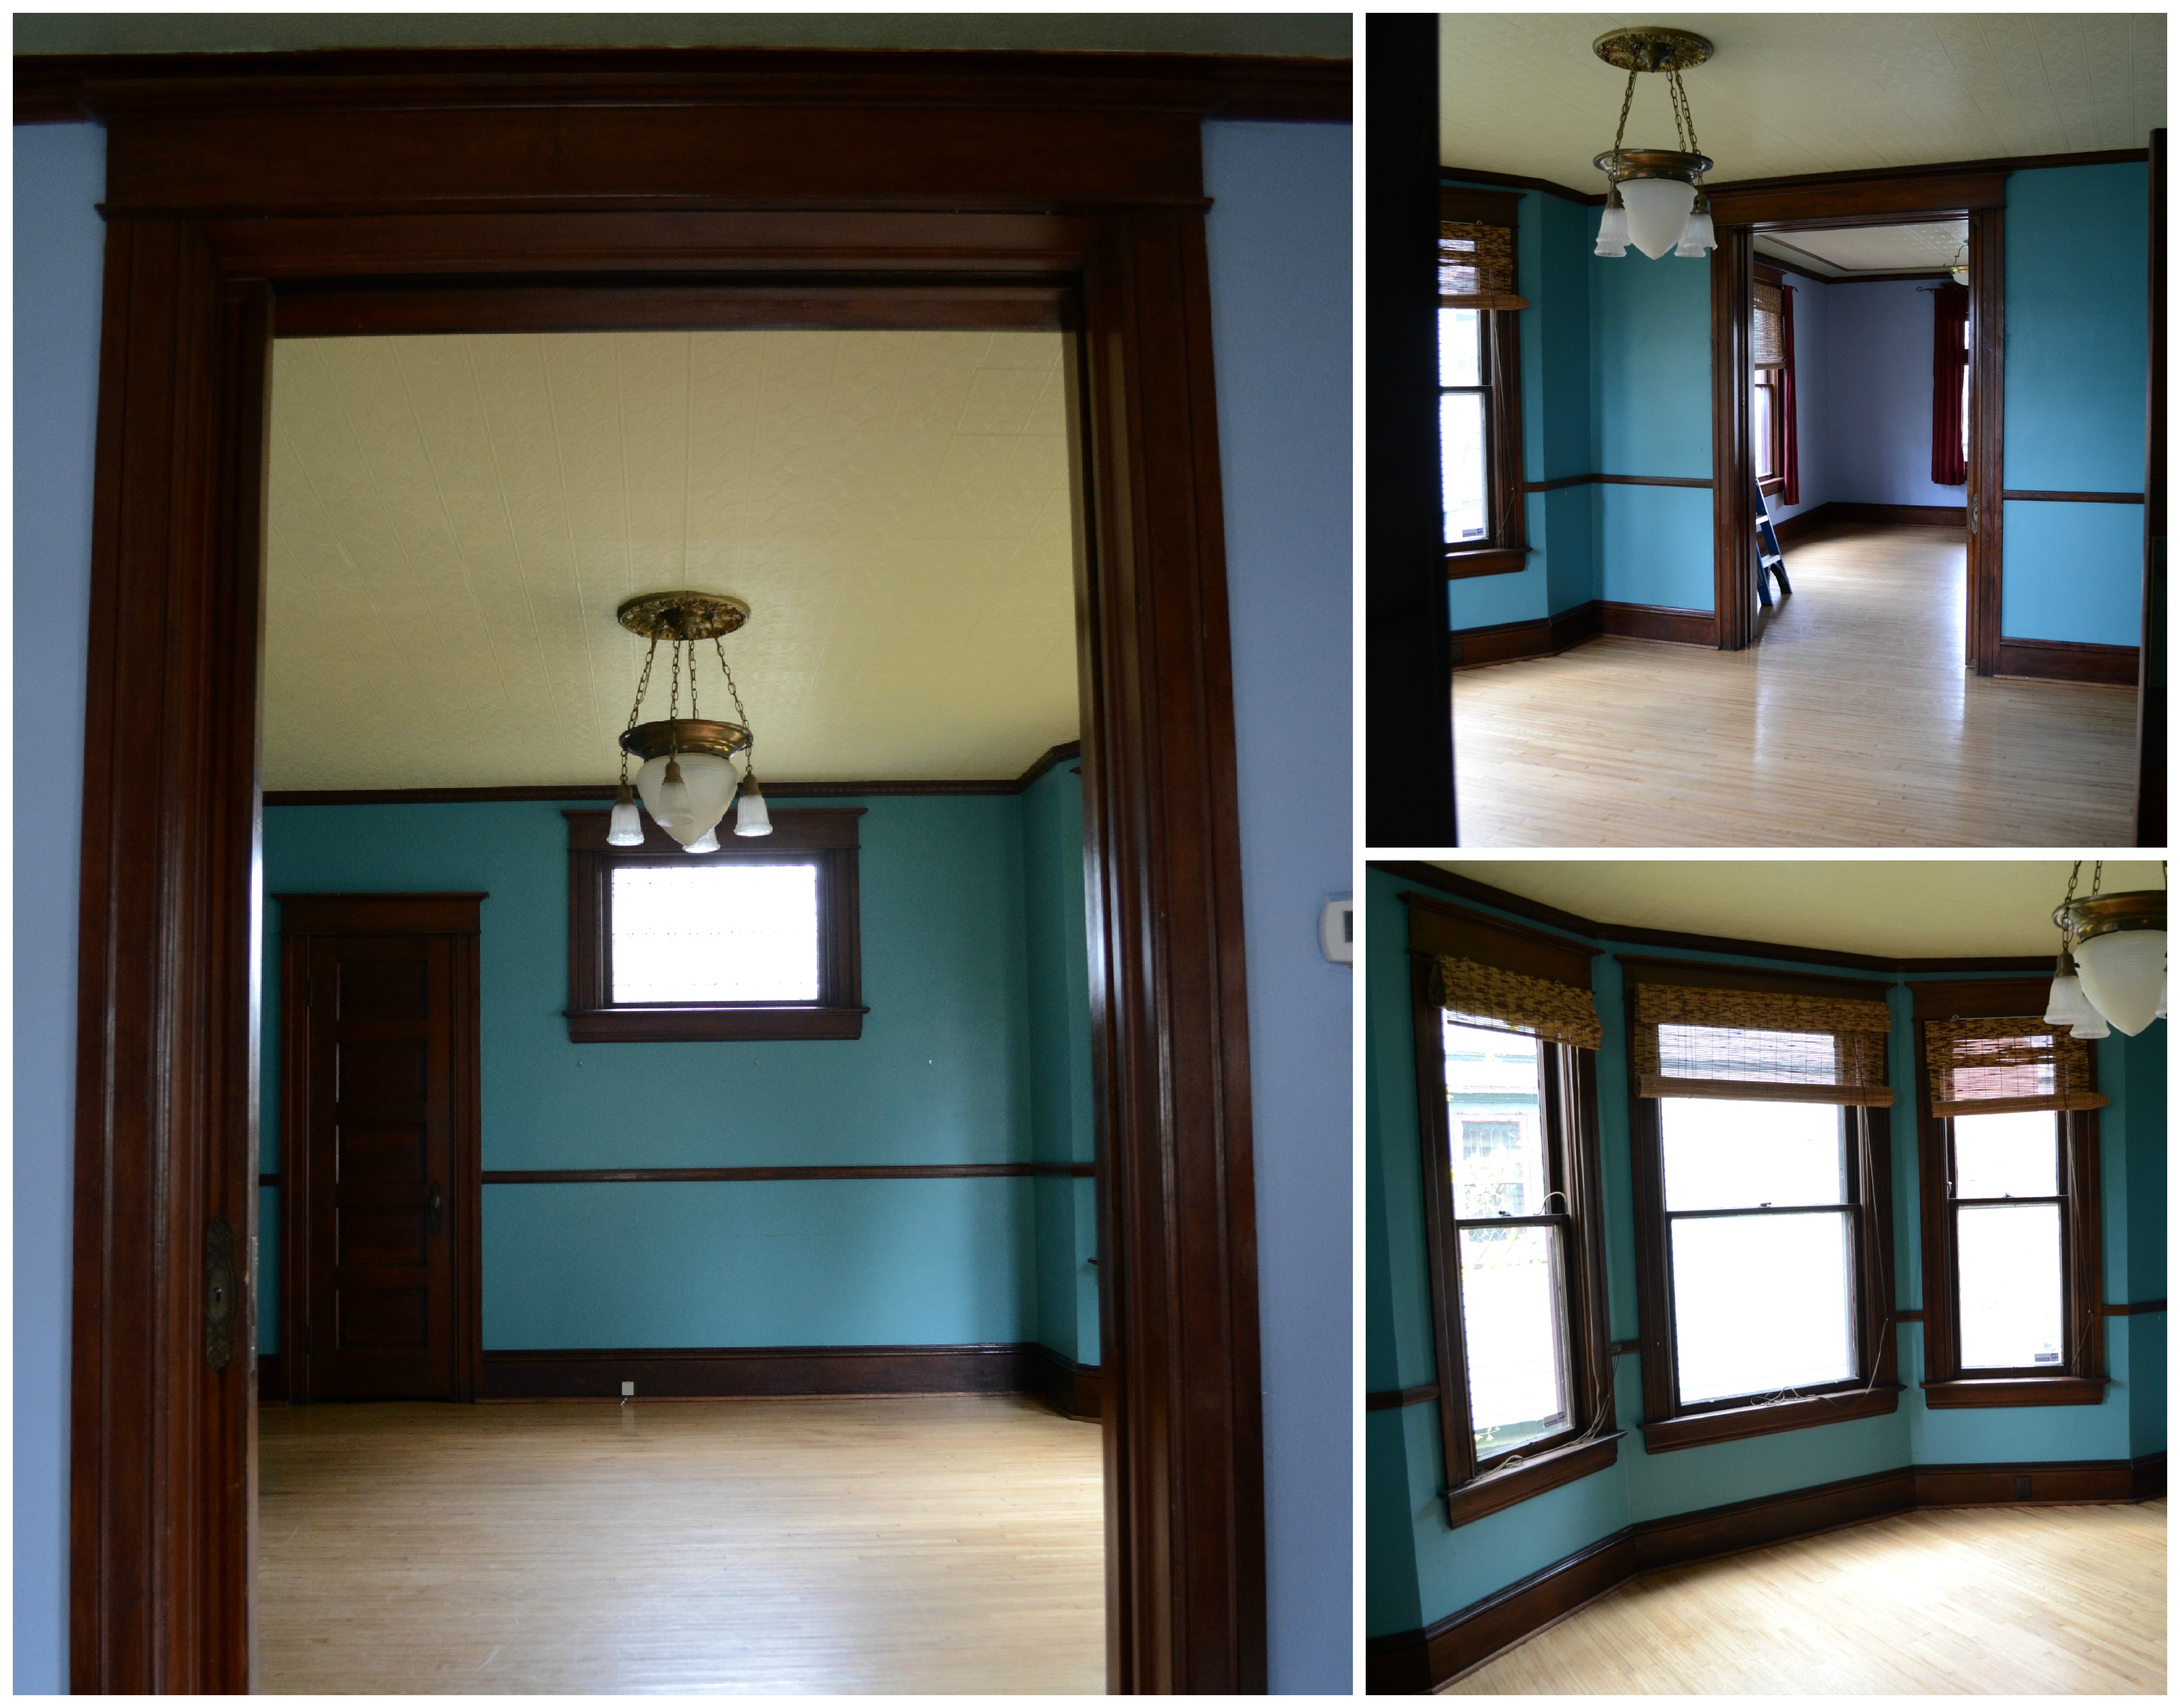
Oh! And you can also check out my awesome new paint job in the dining room! Thank you Susan and Joe for all the help you gave me in there a couple of weeks ago!! I loooove the way it turned out! I will definitely get better pictures soon but the bottom half is a dark grey almost purple and the top half is a light lilac color. It looks great with the dark woodwork.

Raul’s mom, Margarita took on the ungodly task of cleaning the oven. The previous owners must have never, and I mean, NEVER cleaned this thing because it was absolutely covered in burnt food and grease. Even though we are not planning on keeping these appliances, we do need to use them for at least a couple of months so Margarita offered to shine them up a little.

Believe it or not, the boys even pitched in and did their parts to get the house looking spic and span, too.

My dad polished these 100-year-old doorknobs and the difference was amazing!

You can even see my reflection if you look hard enough! 😉

Raul defied his acrophobic mama and climbed out on the roof to scratch paint off the windows with a razor blade and spray them down with a coat of glass cleaner…or two. The amount of light that was being blocked out by the layer of dust and grime that coated these windows is gone and the difference is incredible! These babies even sparkle from the street! The only bad thing is that now I know we need curtains like ASAP!

Yes, he’s for hire!

Cleaning up the house meant starting to strip away layers of old paint, too. And I have one thought on that process. Ladies and gentlemen if I am ever elected president (which was my dream job according to my 5th grade journal) I will make it a punishable crime to paint antique doors and floors!!! The paint removal process takes hours of time and boatloads of patience. It is not a pleasant task. If you ever find yourself doing this my advice to you is to spend a few extra bucks and get the really, really potent stripper. I bought two different kinds and the $30 gallon was infinitely better than the $20 one. Spending a little extra will save you lots of time and energy. Plus a stronger stripper can prevent excessive sanding after you get the paint off. Stripping can be expensive (we are already through 3 gallons of this stuff) but I think that the impact of returning the floors and doors to their original sheen will totally be worth the effort.

In total we have 8 door fronts to strip plus a hallway, the floor of the 3rd bedroom, and several feet of trim board.  It is gonna be a loo-ooo-oooo-ng process. Also, the stripper burns like a you-know-what when it gets on your skin. It literally ate away my fingertips when I was working on removing the paint from the individual door panels with a razor blade. I promise you all that a manicure is my first stop as soon as we finish this house!

For now though I just feel sooo much better with the dust gone and the few steps that we have made toward a living space that we can actually inhabit!

HELP!!! Vote for the wallpaper that YOU like best!

I think I am the world’s worst decision maker! No, but seriously. I have spent hours, days, WEEKS pouring over websites and wallpaper samples. Everything that I found was either the wrong color or ridiculously expensive (like $195.00 a roll expensive) Then, while purchasing some Benjamin Moore paint for the bathroom vanity today, I stumbled across some fabulous wallpaper books. First of all, let me preface this blog post by pointing out that this isn’t your grandma’s wallpaper. I am going for something textured and metallic. Something that will give the room a splash of style. Something that will bridge the gap between modern and vintage.  My plan is to find a great wallpaper to paste in the small nook wall behind the TV and also carry that wallpaper over to the dressing room.  Now, keep in mind that the bedroom walls are being painted dark gray, the furniture is cream colored, the woodwork is dark brown, there is reddish brown exposed brick to deal with, my accents are brushed nickel, and the flooring is long cream colored shag carpet. OH! and I also have to keep this room masculine enough so that Raul doesn’t run away screaming.  Friends, help me pick a wallpaper!!!!

Post your favorite in the comments section!! And  be quick about it, too! 20% off sale ends at Connolly’s on May 1st!

xo

It’s gettin’ hot in herrrrre

Our house has one fireplace that originates in the livng room and extends all the way through the master bedroom, the 3rd floor attic space and out the roof.  The tiles on the fireplace are really cool. It is a purple and green marbled look that we used to establish the paint scheme for the whole downstairs. There is also a really cool covering on the fireplace which adds a unique vintage feel to the room.

The mantle definitely needs some work though.  There is a huge gap (about 1″) between the wall and the fireplace which needs covered by…something!

The chimney runs through what was originally a closet in the master bedroom.  We knocked out the walls of the closet to create a nook space for the TV and also for a built in dresser. Originally we had plans to create an “exposed chimney” look.  The chimney, however, had been covered with cement and plaster so it wasn’t looking too naked 😉

I had the brilliant idea to create the exposed look by covering the chimney with thin brick or z-brick and then adding mortar.  Alas, my plan was doomed from the start. I think I searched every home improvement and tile store in the city but no one had exactly what I was looking for.  Either the product didn’t exist or it was the wrong color or it was too..fake looking for fake bricks. I found dozens of sites online but the total cost was ridiculous, especially when I would request pricing for a mere 22 ft².

While sanding the inside of the nook on Saturday I noticed that a bit of the cement and plaster had chipped away from the bottom of the chimney. I thought I might just try to remove a bit of the material covering my chimney.  A few (hundred) hammer strokes later and I had myself an original, turn of the century, genuine exposed chimney in the master bedroom! The process was extremely messy, not to mention painful (I walked away with at least 4 blisters on my hands and a nose full of gray gook), but I did save myself a few hundred bucks so it was well worth it!

We cleaned the bricks with water and soap to get the dust off of them but it looks like we may need to apply a mild acid to restore them to their original color.

I love the finished look. It really will provide the inspiration for the design of the master bedroom. Check it out below!

Gettin’ down and dirrrrrrty

This house being over a century old and all, I had guarded some hope of finding hidden treasure. Maybe a rare coin. A forgotten savings bond. A suitcase full of cash. Whatever.  So naturally, breaking down old walls and digging holes tends to make me a little excited. I hardly thought that the biggest treasure we would uncover would be in the master bedroom closet.

The bedroom has a little alcove off it that has some built in closet shelving and drawers.  There is even a cool old guide with rotating piece that directs men on how to pair a suit, tie, and shirt and make sure all three are color coordinated! 😉  However they are really old…and ugly. So out they had to come.

Phil and Tyler stopped by to help again with the demolition and with the aid of a couple hammers and crowbar we got down to work. Pretty soon the mirror and shelves were gone and we were left with just one drawer.  Phil dug in…and that’s when we struck big.

HIDDEN TREASURE!

Take a look at the surprise that we found.

What theeee….!!!!!!!!!!!!!!!!!!!

Of all the possible things I could possibly find, I find this!!! And there’s not even a pack of batteries included?!

LOL

Tyler wanted to know what all the commotion was about so we told him it was just a toothbrush case (good one, phildo)…obviously.

But let’s just put this into perspective. Before we purchased the house, a woman lived here alone…with just her 5 kids for company. And good lovin’ ain’t cheap 😉

Don’t worry, I put on my hazmat suit before I picked that up and put it in the trash.

With all the shelving removed my Mom and I got to start my least favorite job- removing all the nasty wallpaper.

Luckily, after 2 billion years of being glued to the wall, it was relatively easy to remove.

Now the walls will have to be washed with bleach water (notice the mold?) and then filled with mud and sanded (ugh, more sanding?!).  Then, we can lay a few 2×6’s and a sheet of plywood down in order to make a platform and transform this alcove into my dressing area.  I’ve already got a great 6′ mirror with antique detail that will be the centerpiece for the space and I spotted a great little chandelier for a reasonable price at Menard’s last night during an emergency trip to purchase a new bathtub. But, that, my friends, is a story for another time!

Have  a great Easter/Passover! XOXO


How to enlist FREE help!

With a house this size and tons of work to do, we quickly realized that we needed to reach out to friends and family..and fast.  So what’s the easiest way to enlist FREE  help you ask? Why a great movie and dinner before the work starts! Oh, and beer! Lots of beer!

Our friends Phil and Sarah and also Jason (who drove all the way from Indianapolis woo hoo!!!) answered the call to arms and we turned Saturday into a day of destruction.  And by destruction I mean that we completely demolished several large burritos at Cebolla’s (mucho buenoooo) and even managed to take down a wall or two! Before all that though, we did make a 3 hour pit stop at the Rave to watch the Hunger Games, which I highly recommend…though the book is way better. It always is.  After that, it was time for a quick bite to eat at Cebolla’s to satisfy our favorite out-of-towner’s Mexican cravings and then we were on our way to the house for the grand tour.

Sarah had little Maliah in tow who is just the most adorable baby you ever did see and Phil brought his #1 helper, his son Tyler.  Jason must have misread the memo because he only brought canine reinforcements but little Bentley stayed out of the way and sunned on the porch all afternoon.

I was a little nervous about showing my friends the house.  Whenever I give someone the tour for the first time I find myself saying “This is the bedroom. I know it needs this and this and this and can you believe that they put that over there?! But just wait til we buy this and that. Then it will be fabulous!” I feel like I have to schmooze over the ugly, dirty parts of the house and make everyone see “The Vision ” (cue organ music now). It turns out there was no need for worrying. Everyone responded with enthusiasm.  They all loved the house just like we did.

Introductions over (house meet friends, friends meet house), it was time to get to work.  Phil, Tyler, Raul and my dad all headed up to the master bedroom with several sheets of drywall to begin hanging the new ceiling while my mom, Jason, and I began to paint the living room and entry way.  I had been debating for months on what I would paint this house.  Luckily, I found this great color pallette site on Pinterest and it helped me realize what kind of color vibe I was going for. Check out some of the color combinations that I played around with.

We ended up going with a neutral tan color for the living room which really helped bring out the awesome purple and green marble fire place.  The entry way and staircase were done in a light jade green which went we with the dark woodwork and made a great combination with the living room and fireplace.  With Jason and I rolling and my mom using a brush to cut in we had the job done in a couple of hours.

After we were finished, we headed upstairs to inspect the handiwork of the boys.  They had finished the ceiling rather quickly. Let it be known here that a drywall lift makes hanging a ceiling muuucchh easier.  Next came the part that Tyler had been begging for all day- breaking down the wall under the staircase and opening up a closet to make space for a built in dresser and TV nook.  Check out the story in pictures.

and VOILA!

Taking down the wall really opened up the space.  We closed off the staircase with a couple of pieces of drywall and also created an archway with some 2×4’s.  The chimney on the left hand side was mudded and painted over so I have ordered some brick veneer stone blocks to create the “exposed” chimney that I want…you all can keep a secret, riiiigghhtt? 😉

Here’s where we’re at with the project now.

Next step- sanding all that horrible, awful, no good mud!

Until next time…