
Wow! Last time I wrote it was still nice and warm out-the thing about this remodel, or any large scale remodel I imagine, is that it is all consuming. This project has consumed my time, my money, and my energy which means that when we were kicking butt to get it finished, I didn’t have a lot left to give to blog writing. But I’m back now, with lots of goodies to share 🙂
In planning this kitchen renovation, cost was an obvious factor. On top of that, we really wanted to use materials that were authentic to the time period whenever possible. The obvious choice then for our countertops was butcher block.
We decided to be a little ambitious and make our own 🙂 Looking back, it was probably not the easiest way (especially when I got a glimpse at Ikea’s prices) but I can honestly say that our countertops were made from wood that is as old as this house. We were even able to use some lumber that came from a porch tear-down that my dad did in our neighborhood. We started out with several 12′ pieces that looked a little something like this:
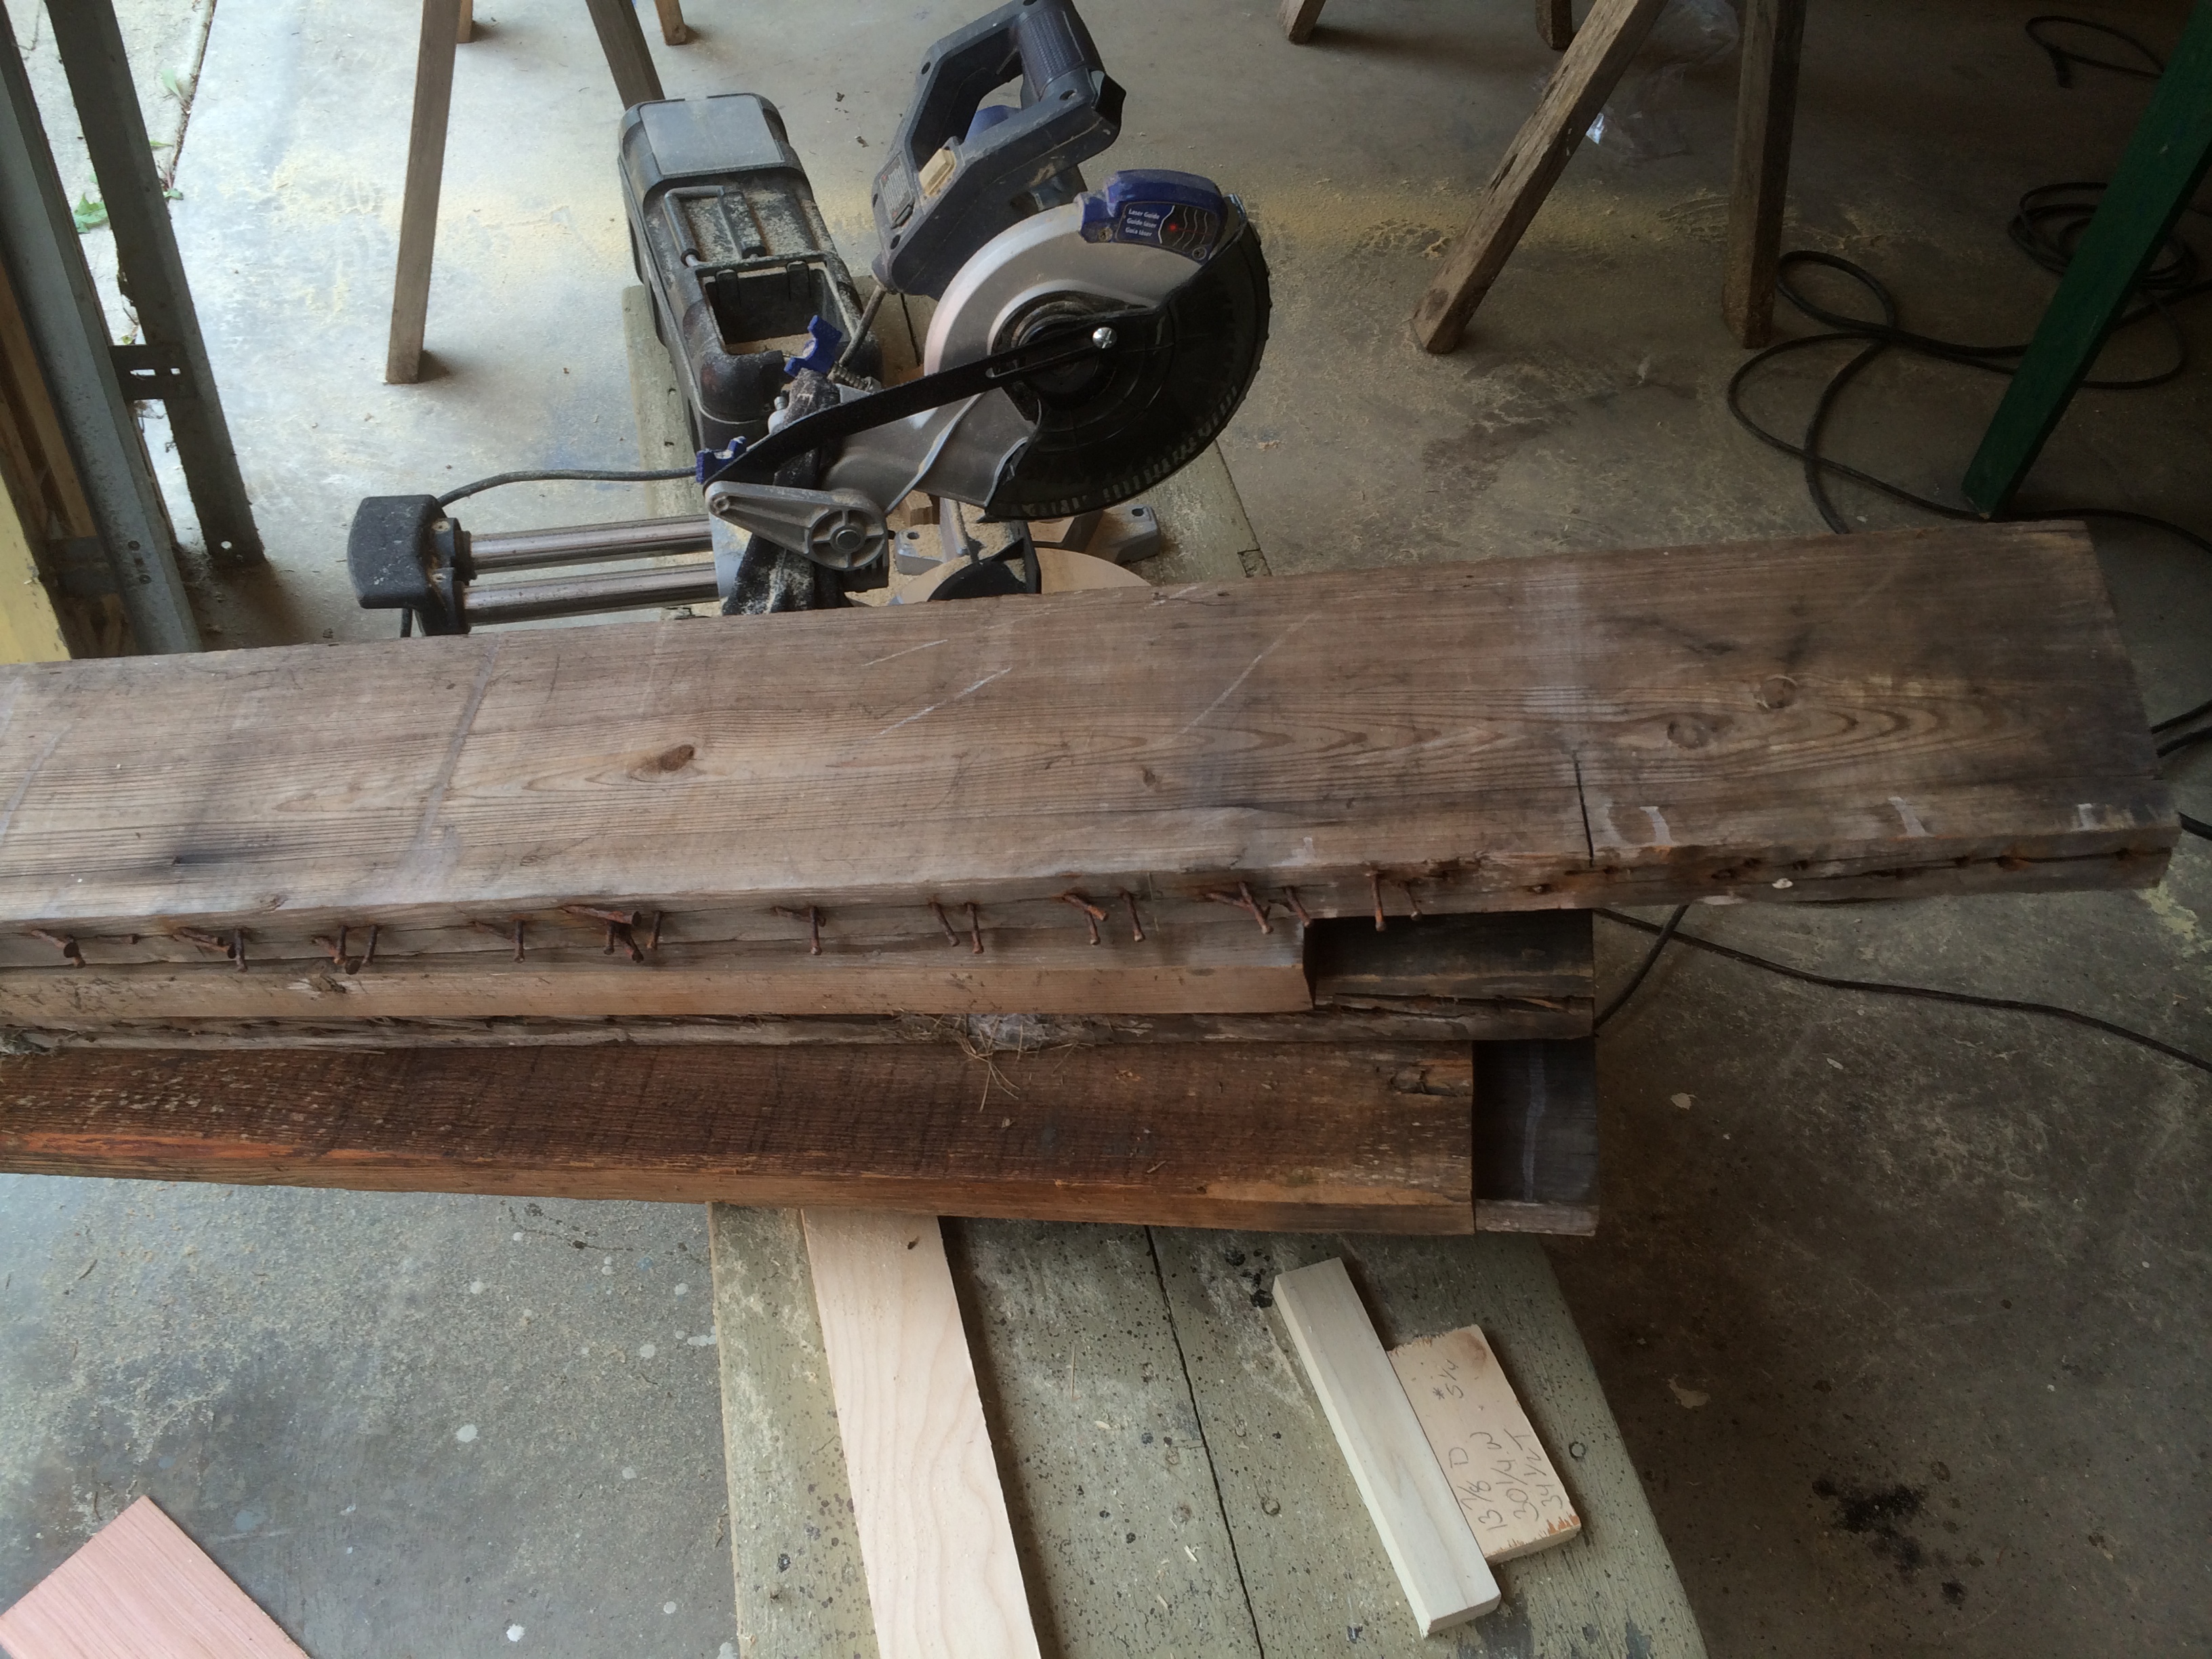
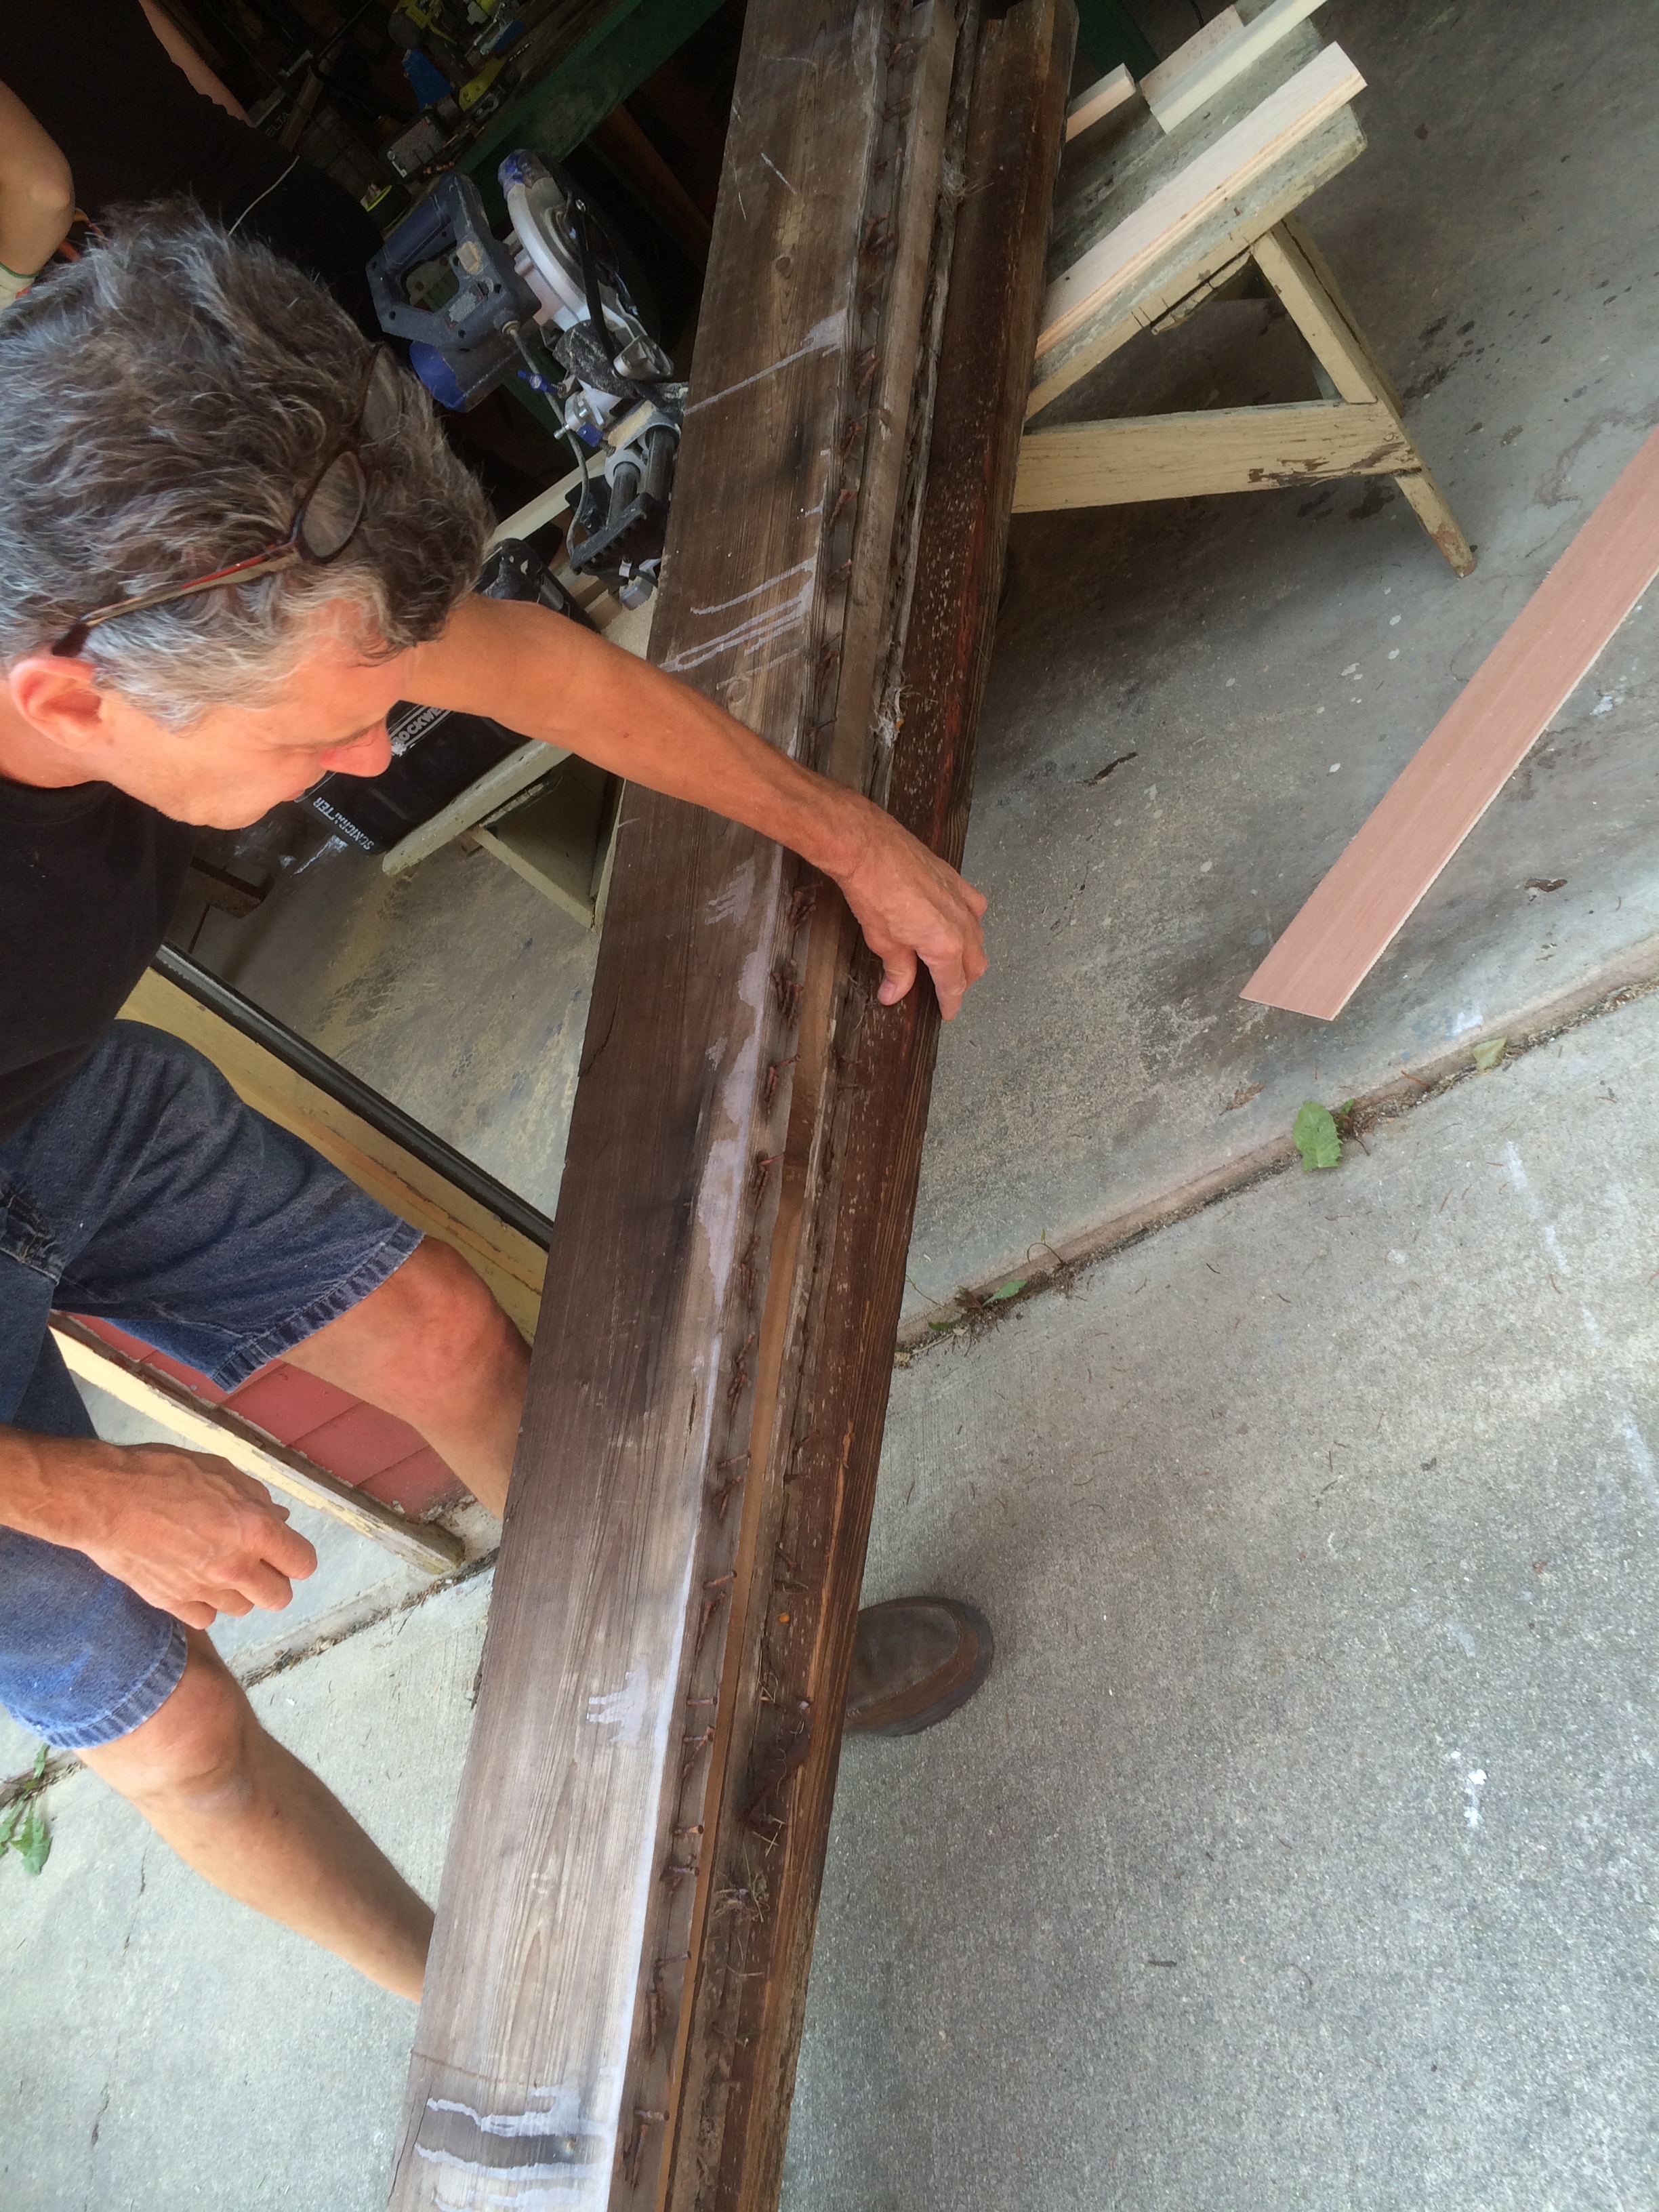
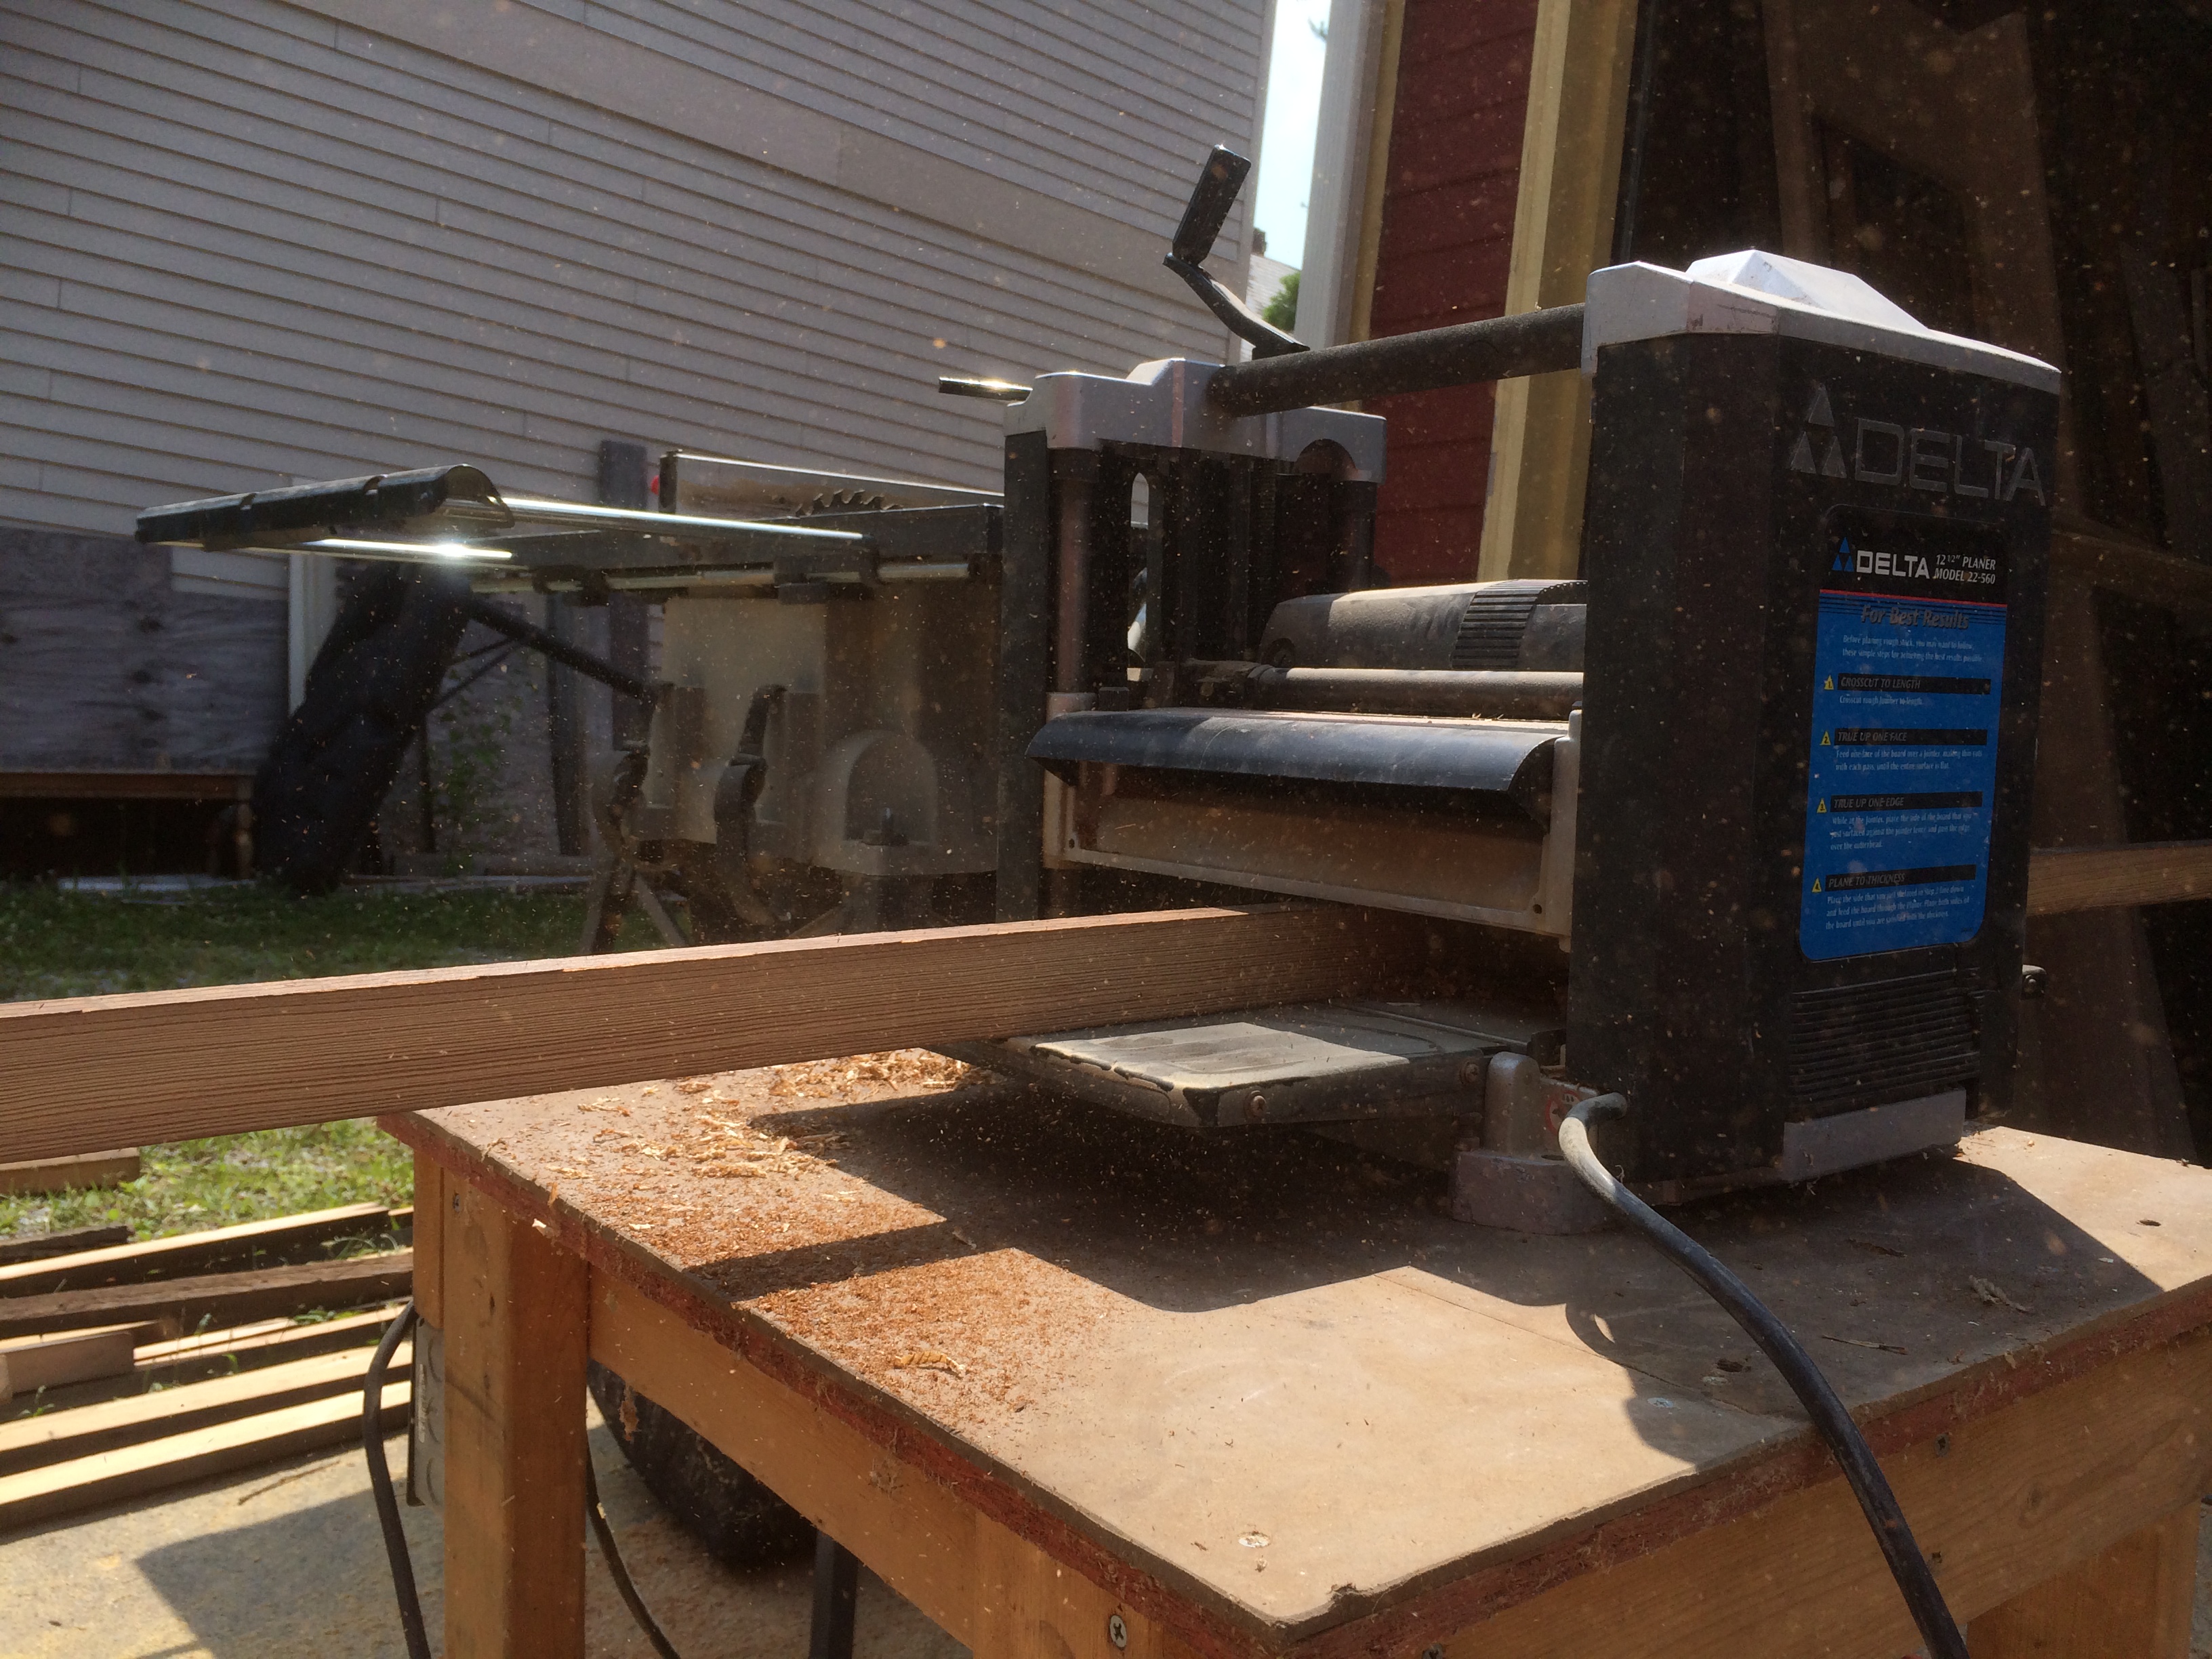
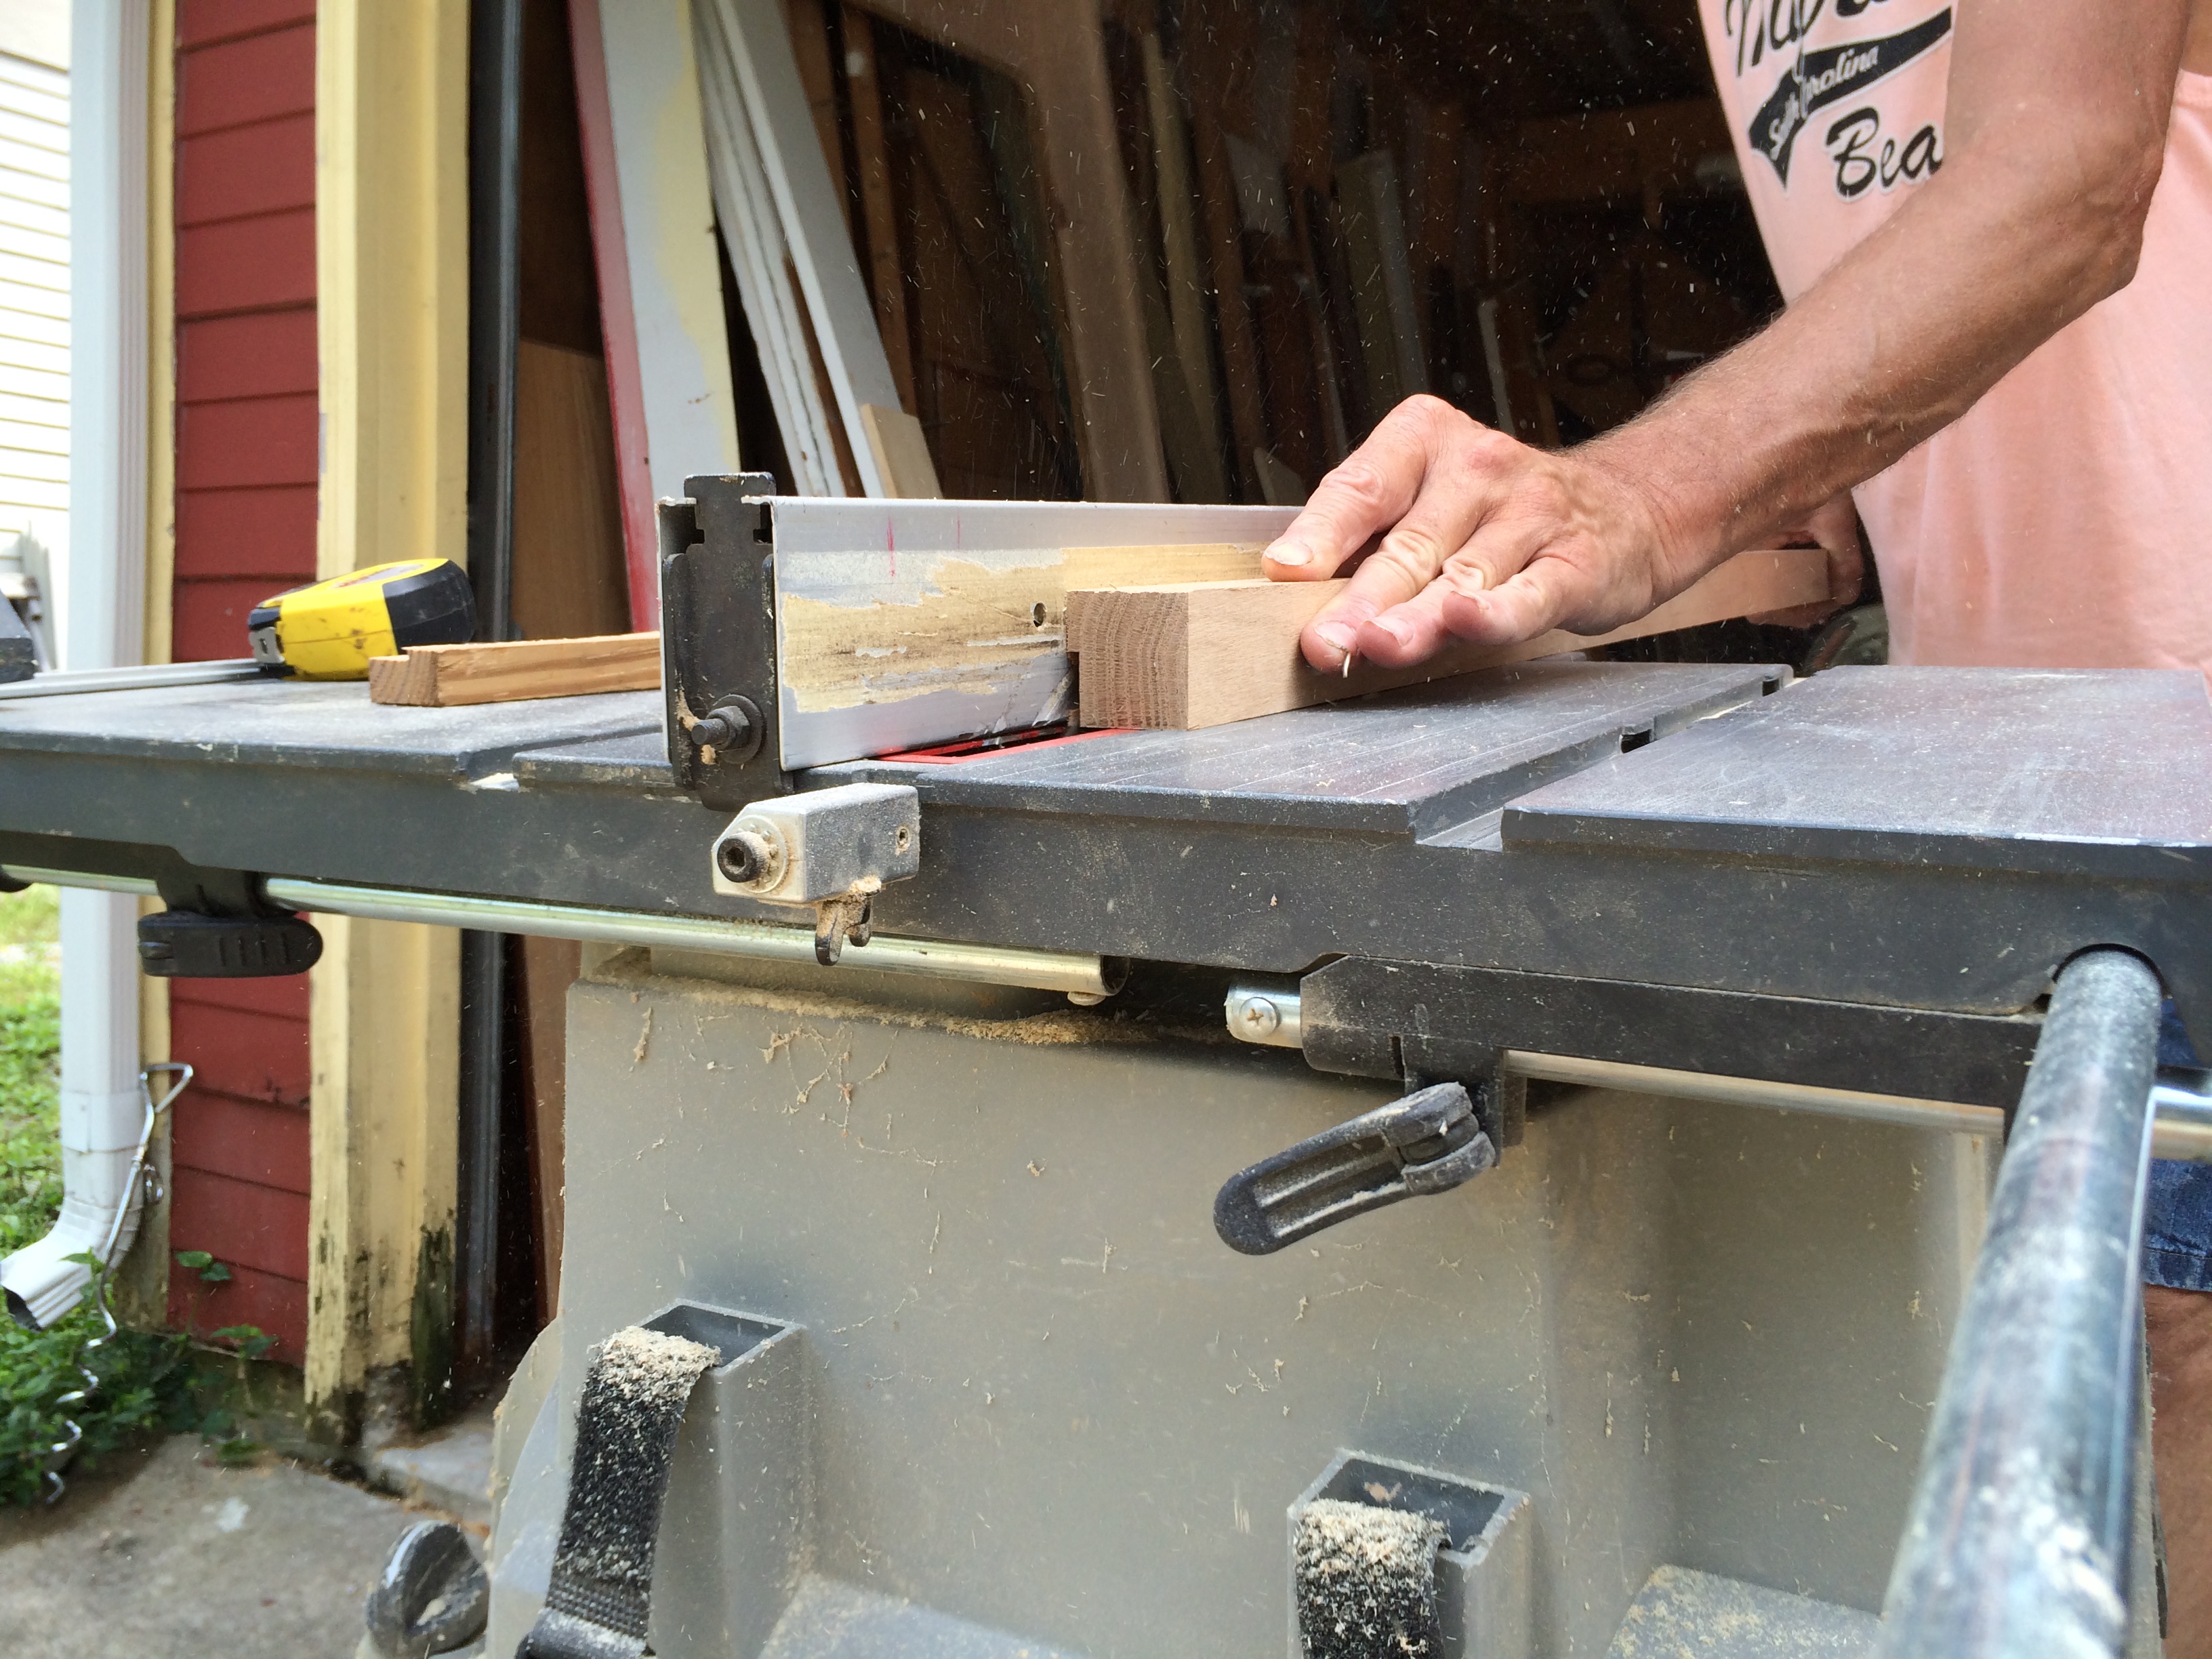
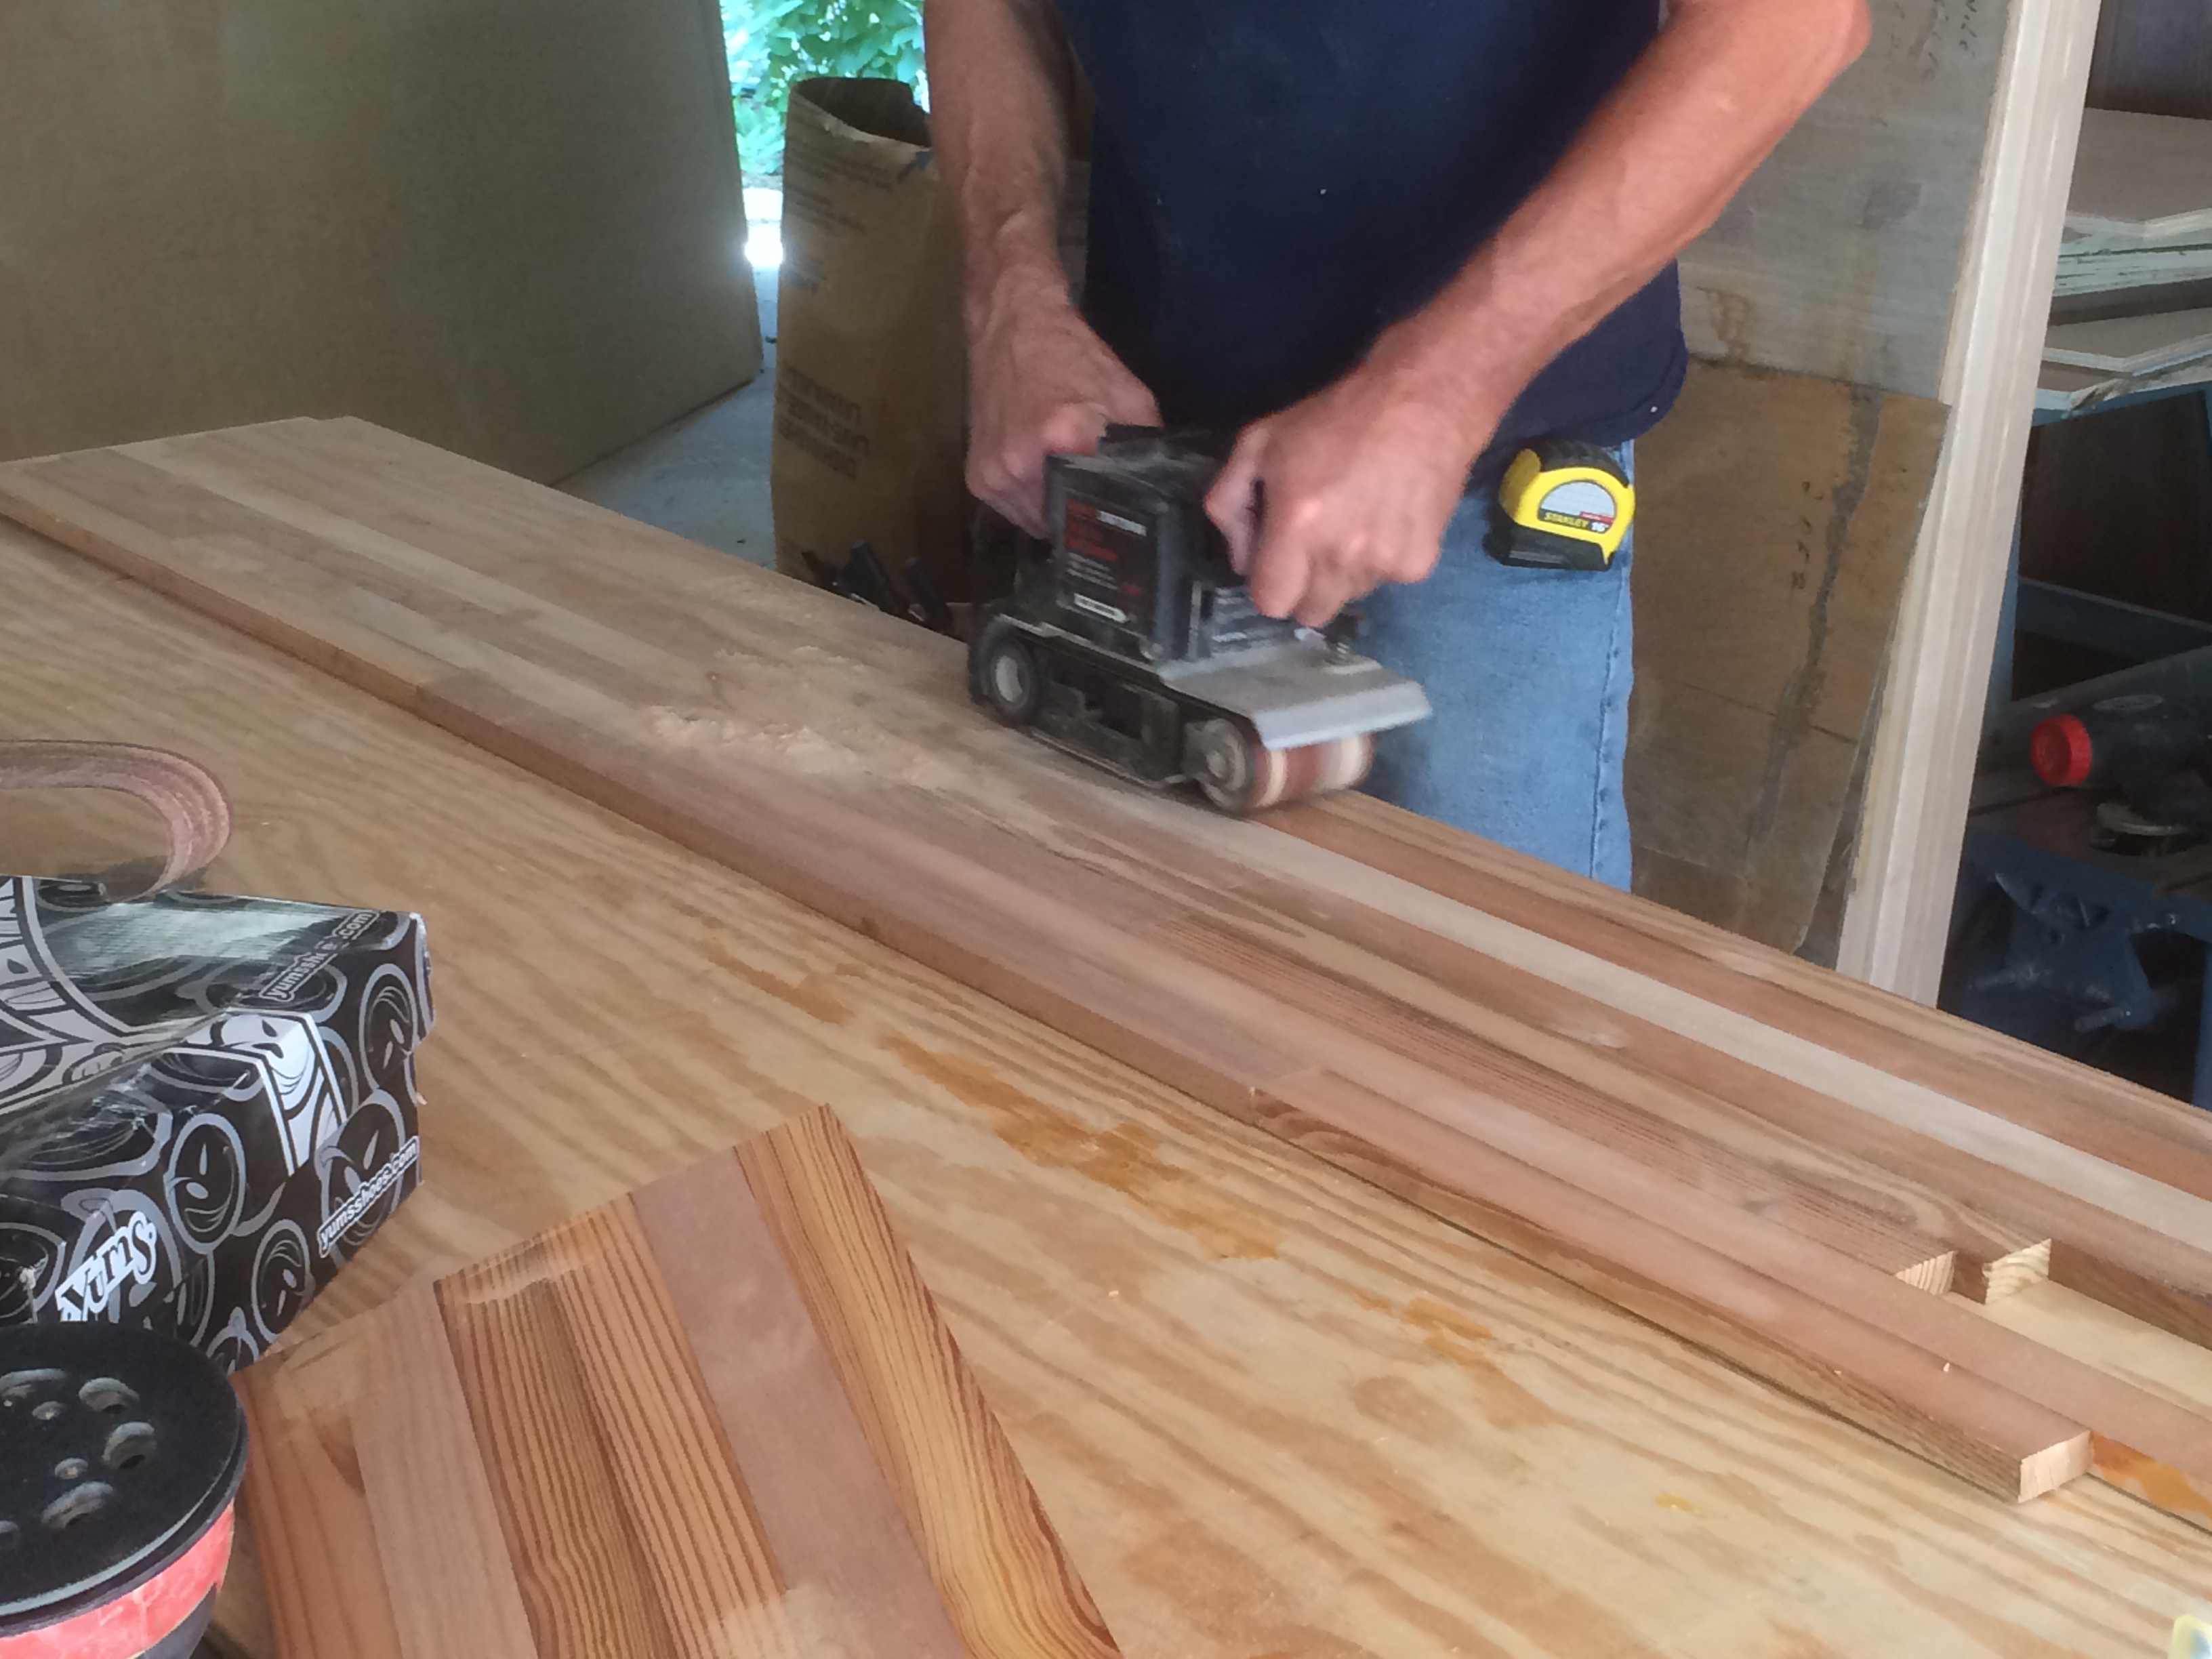
The boards were full of nails and paint and years of exposure but it was nothing a little 12″ planer wouldn’t fix 😉 After removing all the nails (super important!) we cut the boards into 2″ strips using a table saw. Then we ran the boards through the planer so that we could make sure that our countertops would be flat and even. The strips had to be planed on all sides.
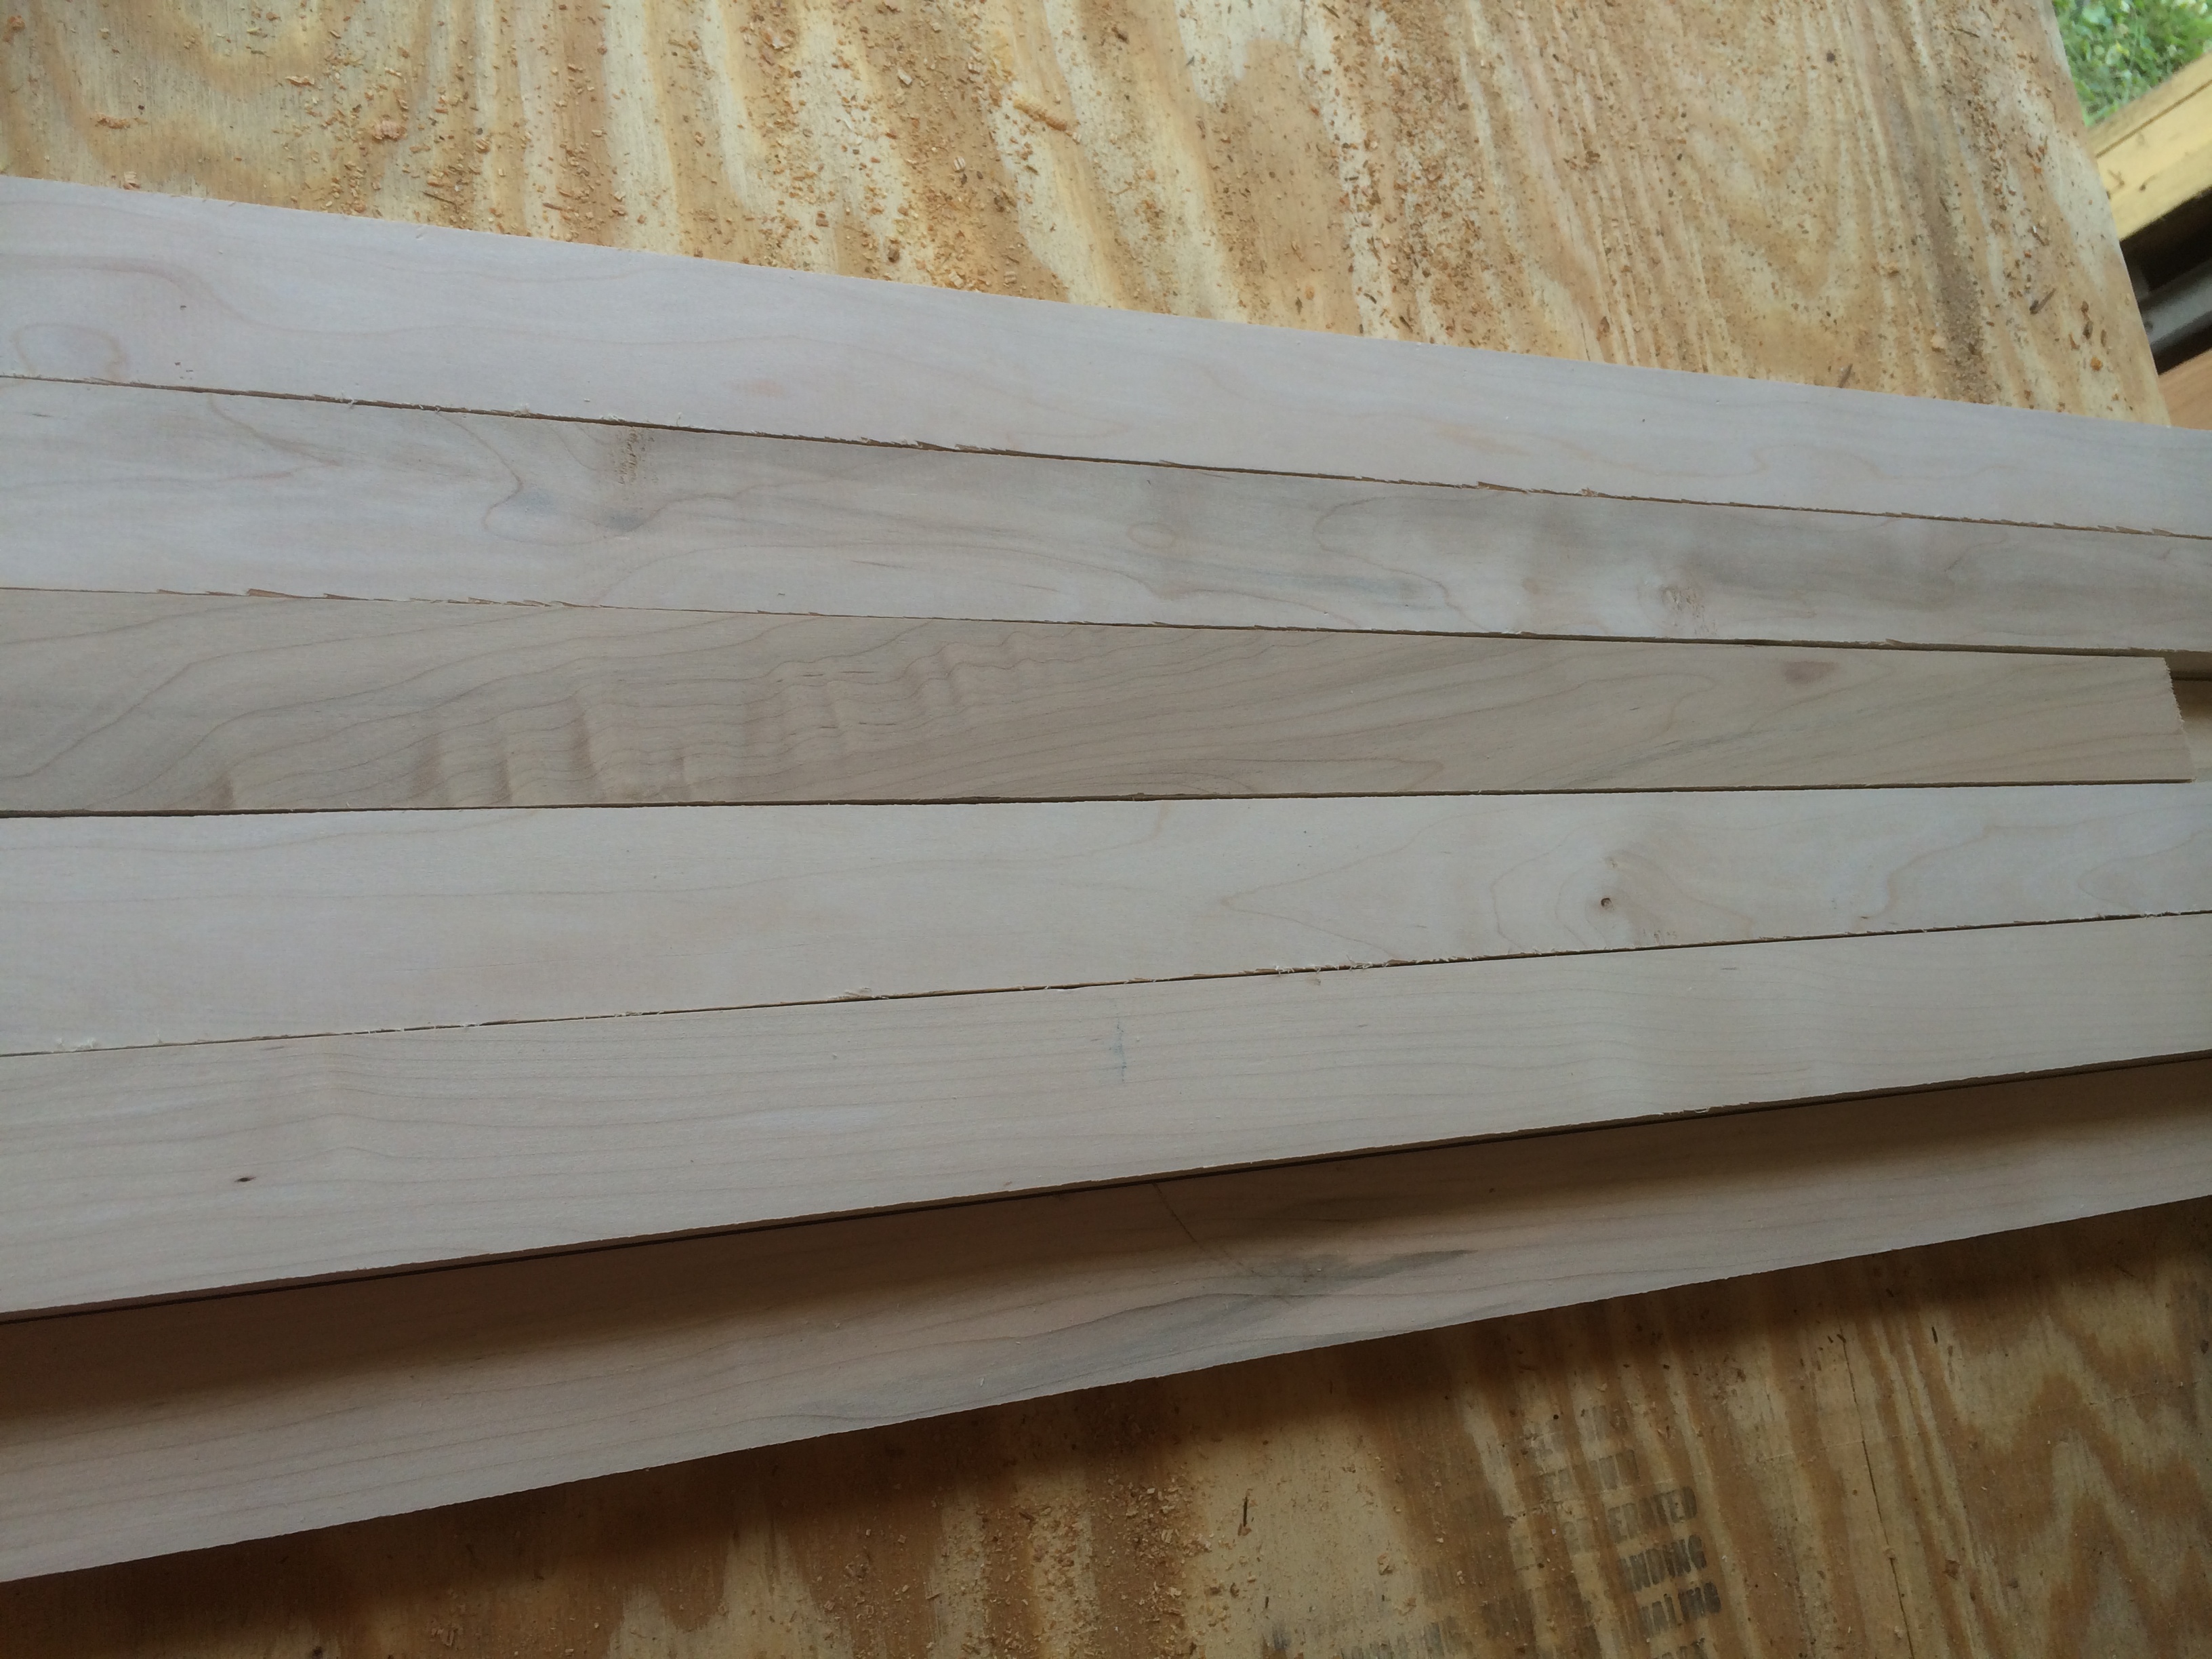
After that, we cut the strips into various sized lengths. There was no exact measurement, we just wanted to make sure that we would have lots of different lengths to choose from when assembling the butcher block. We ended up with a couple piles that looked like this:
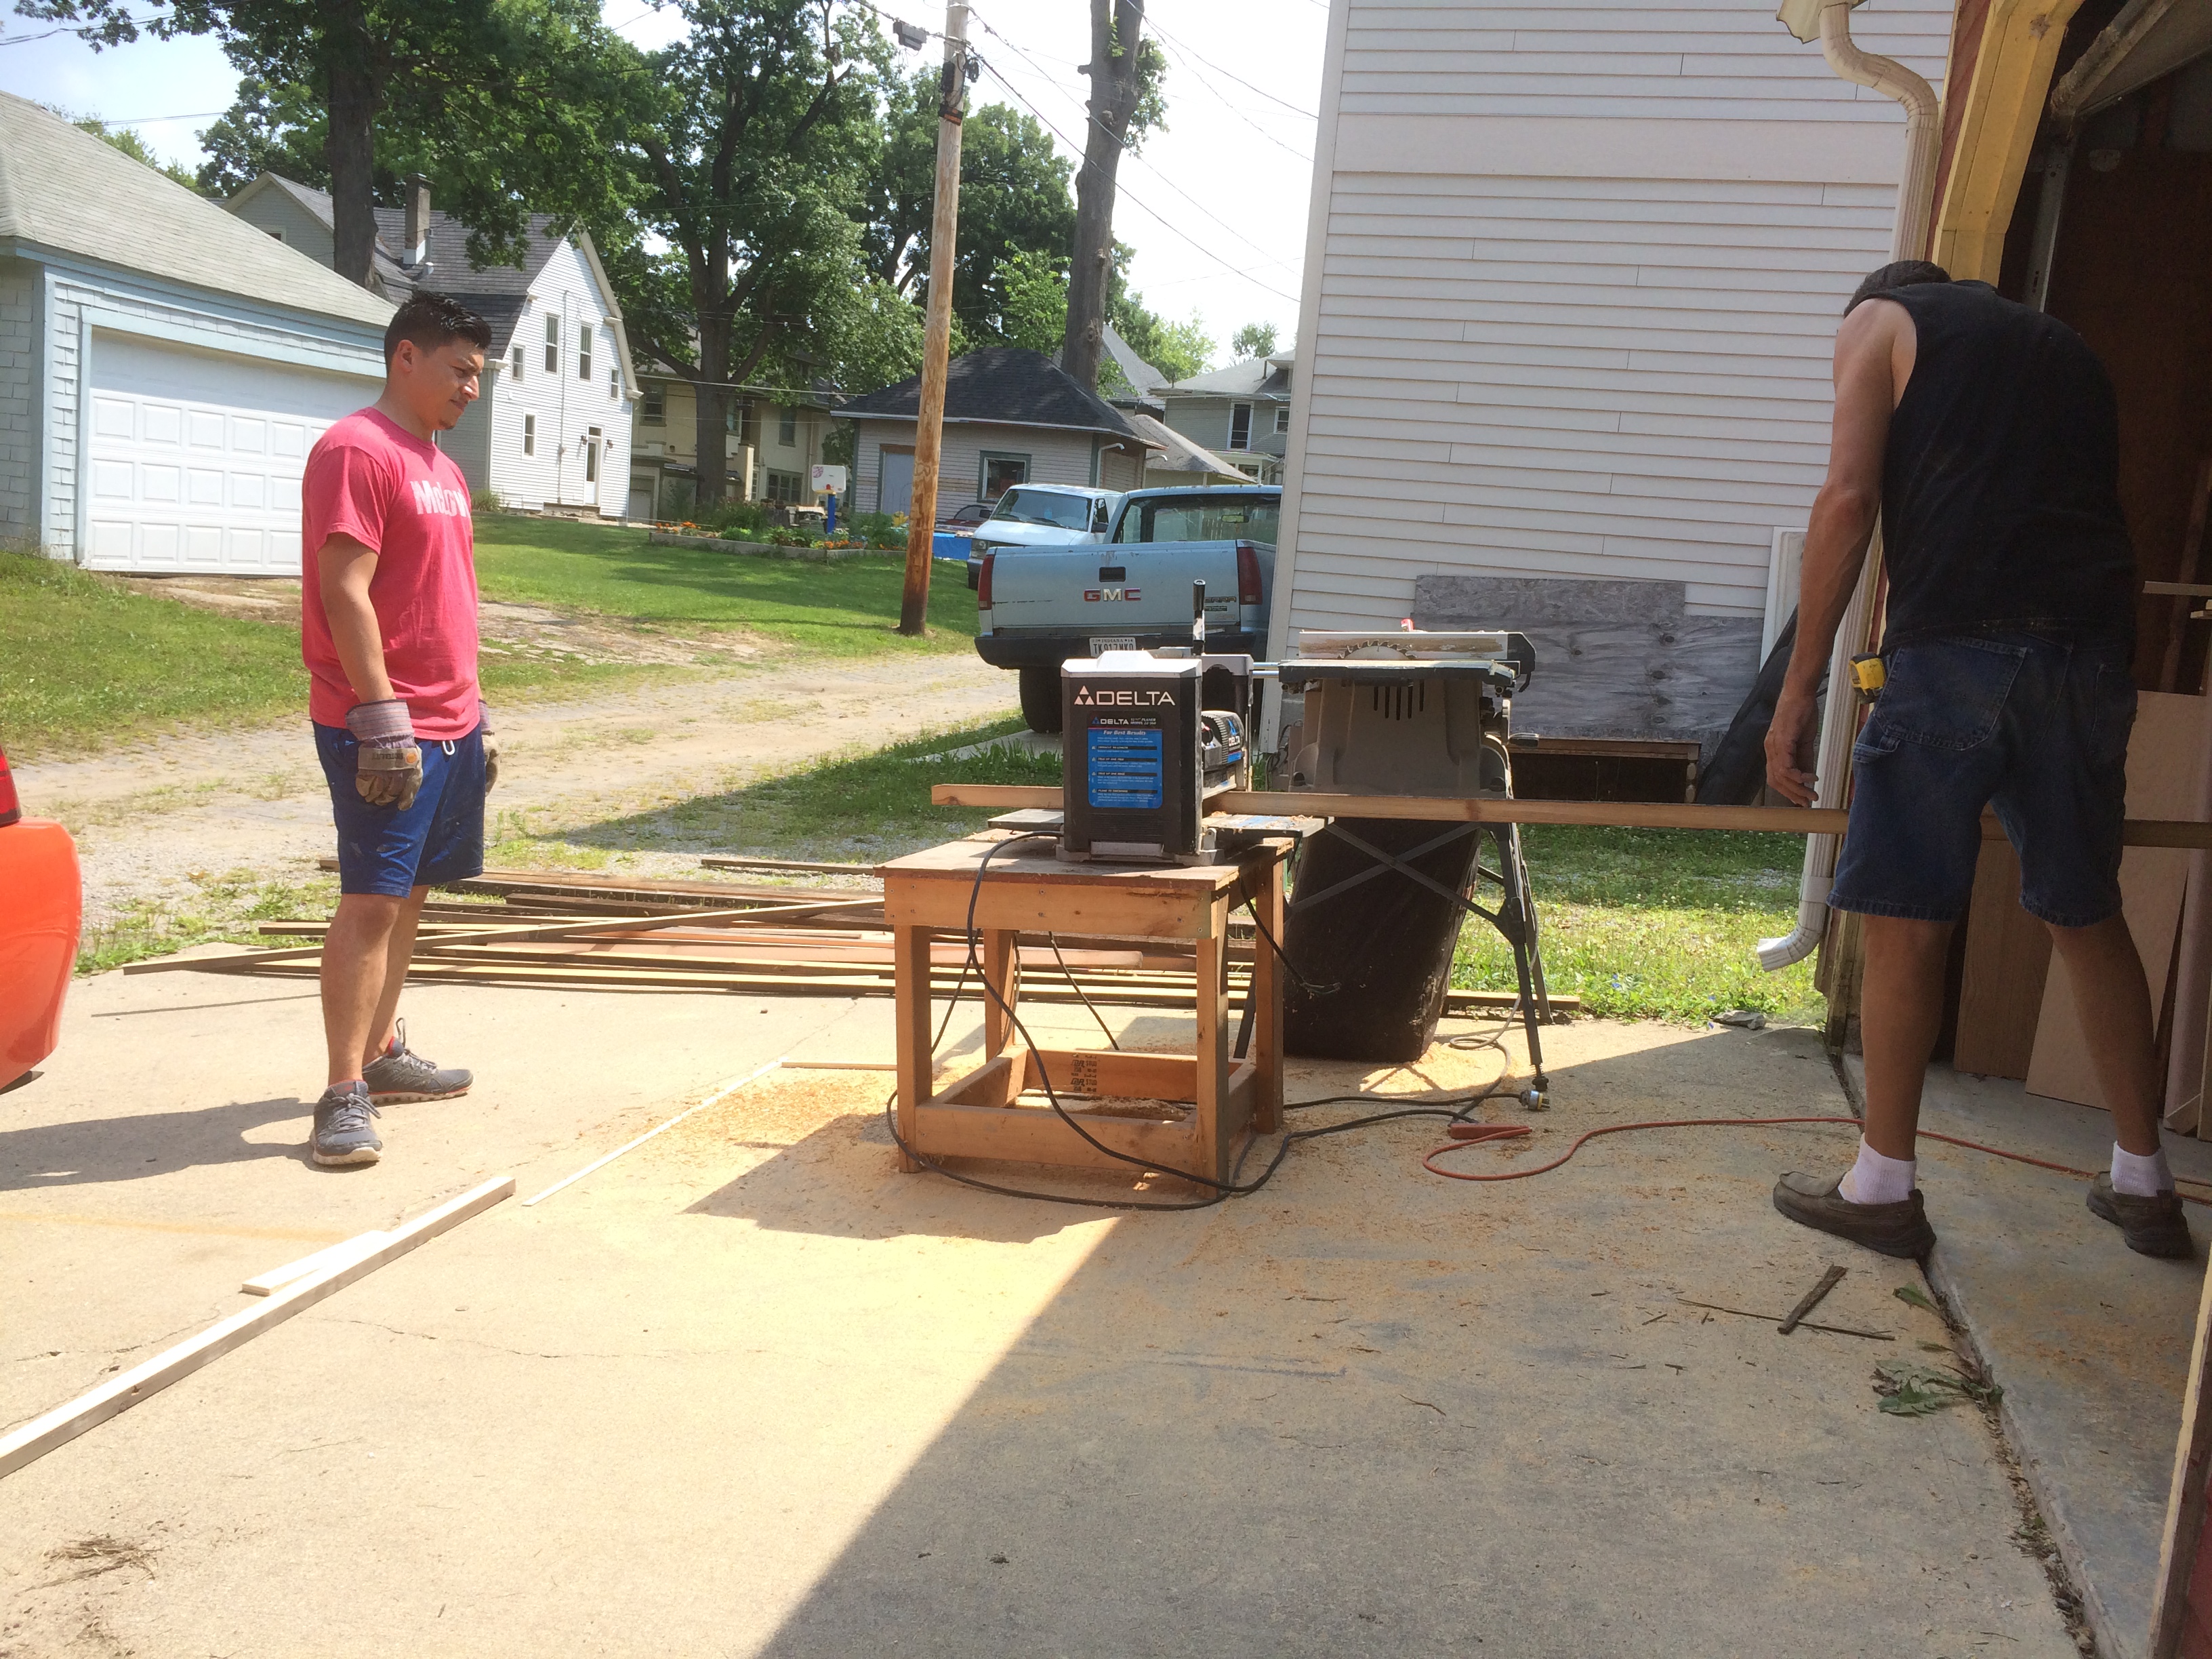
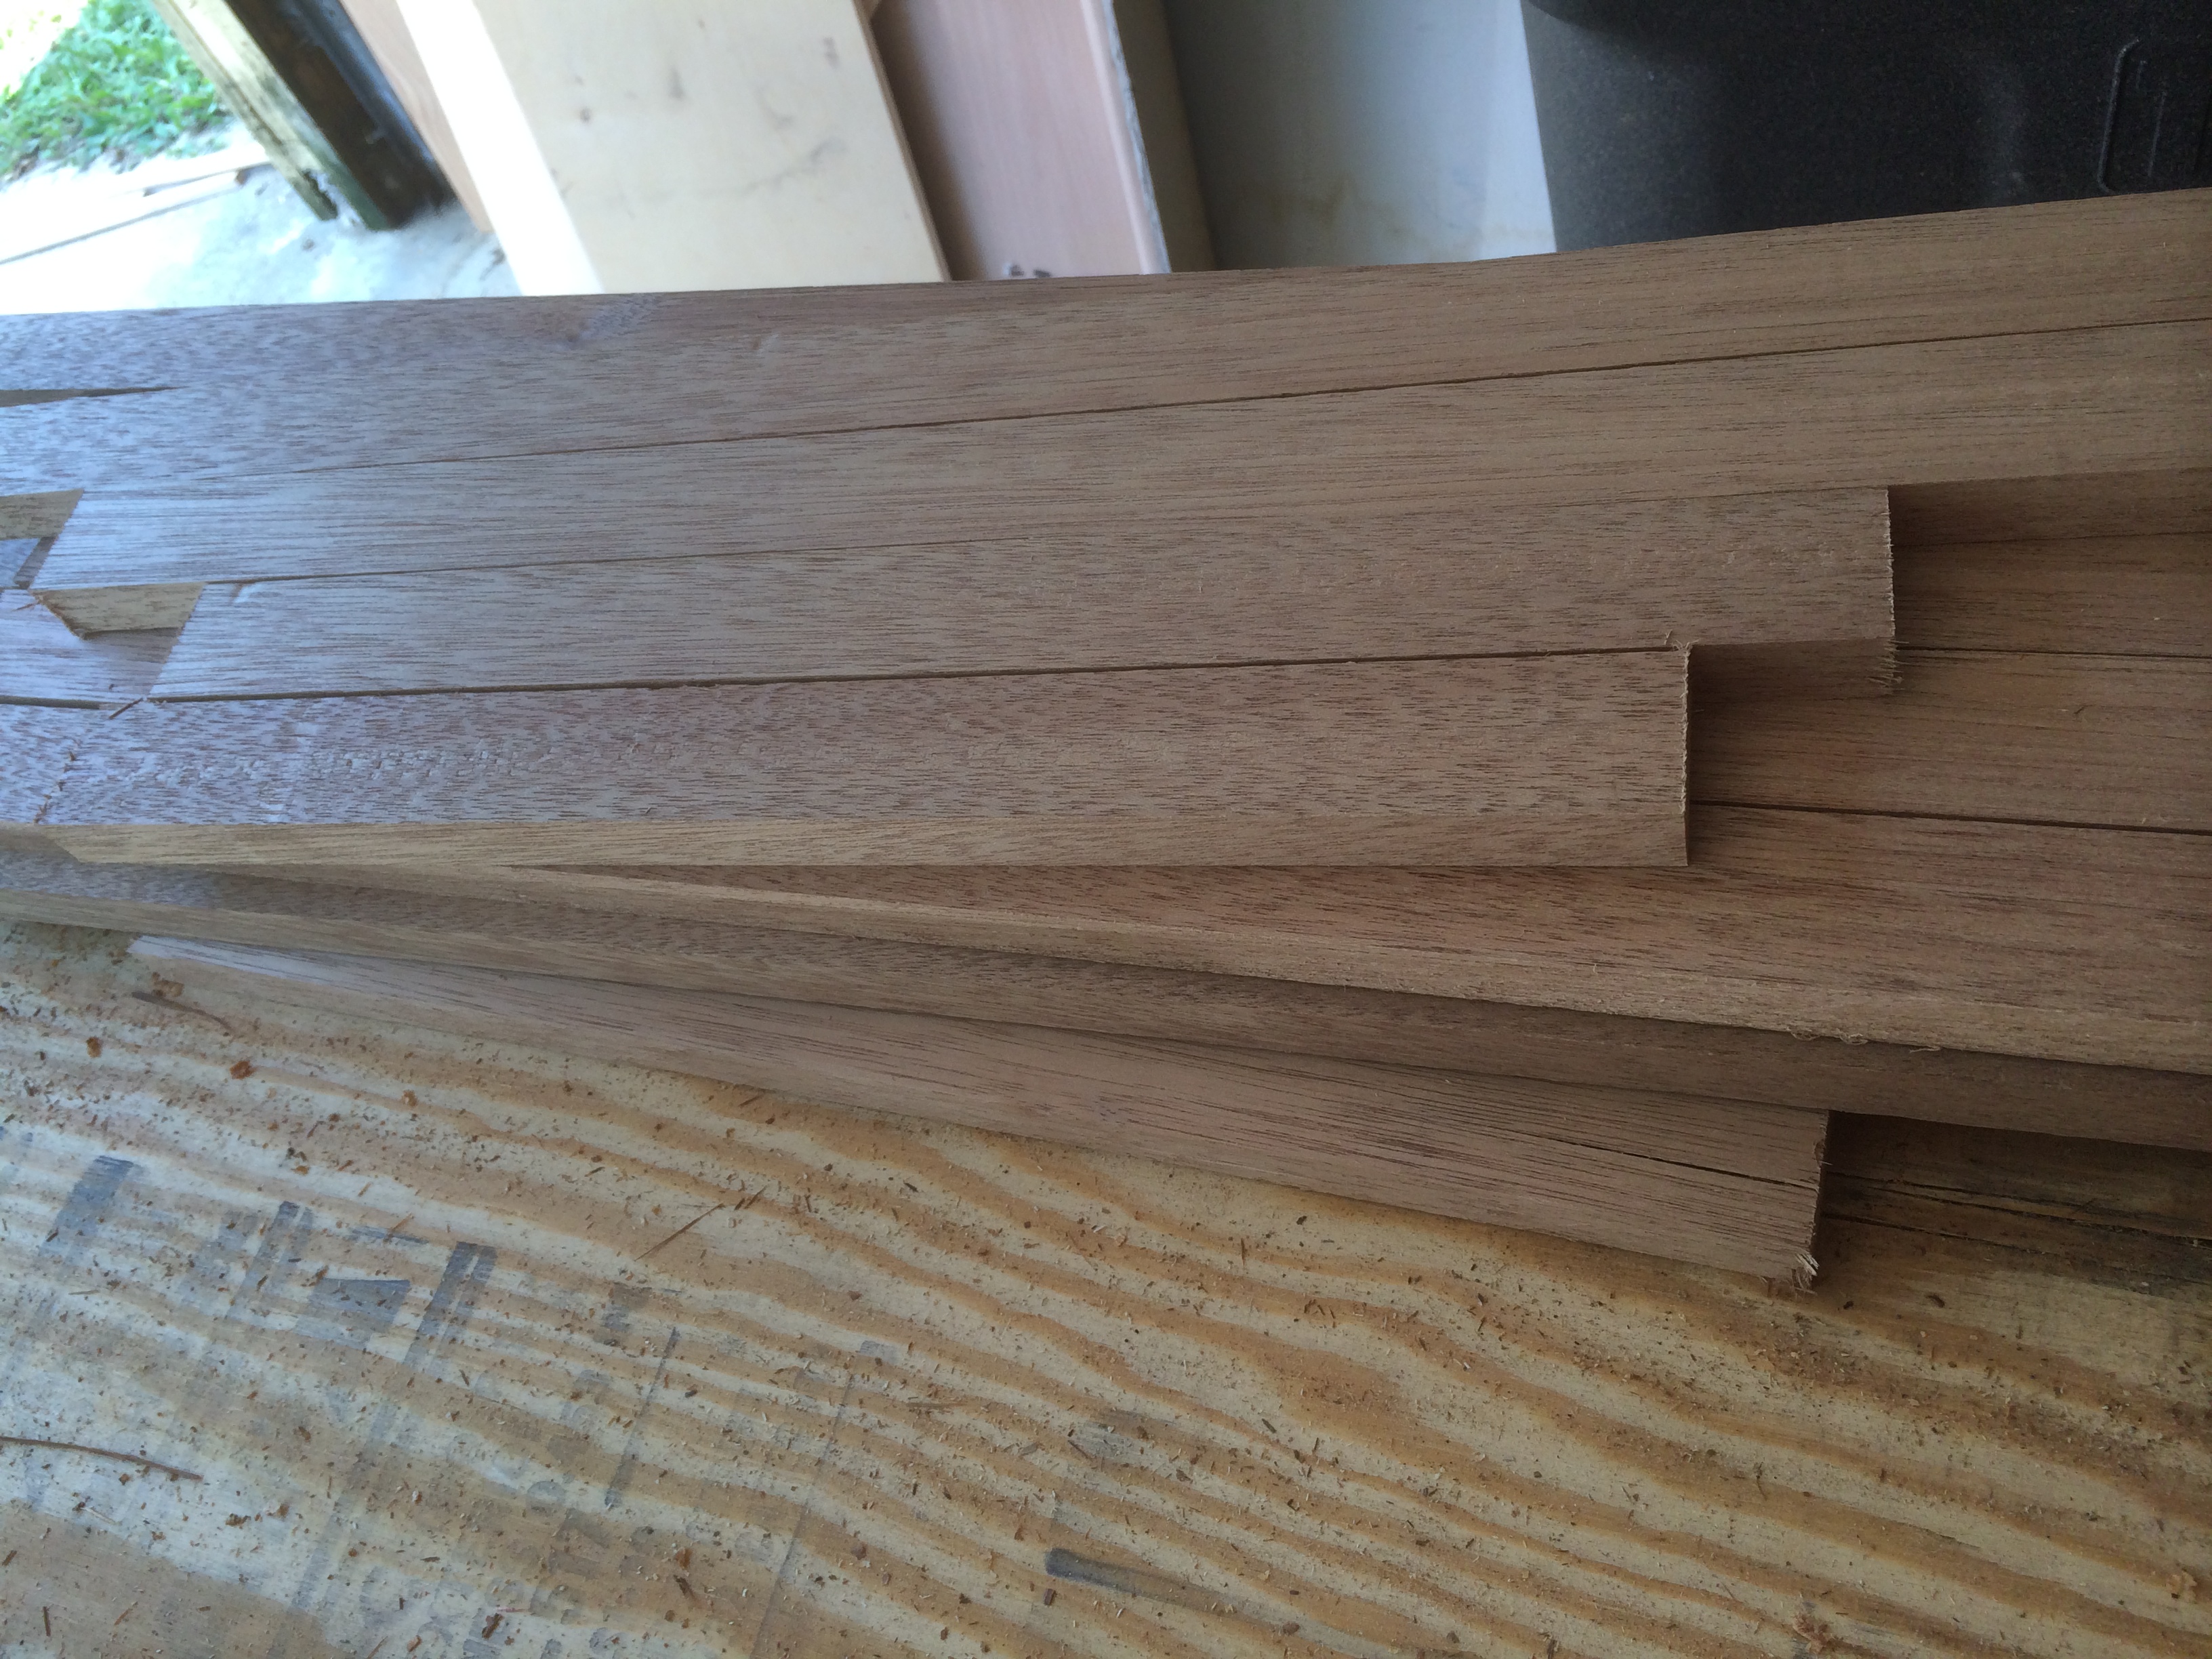
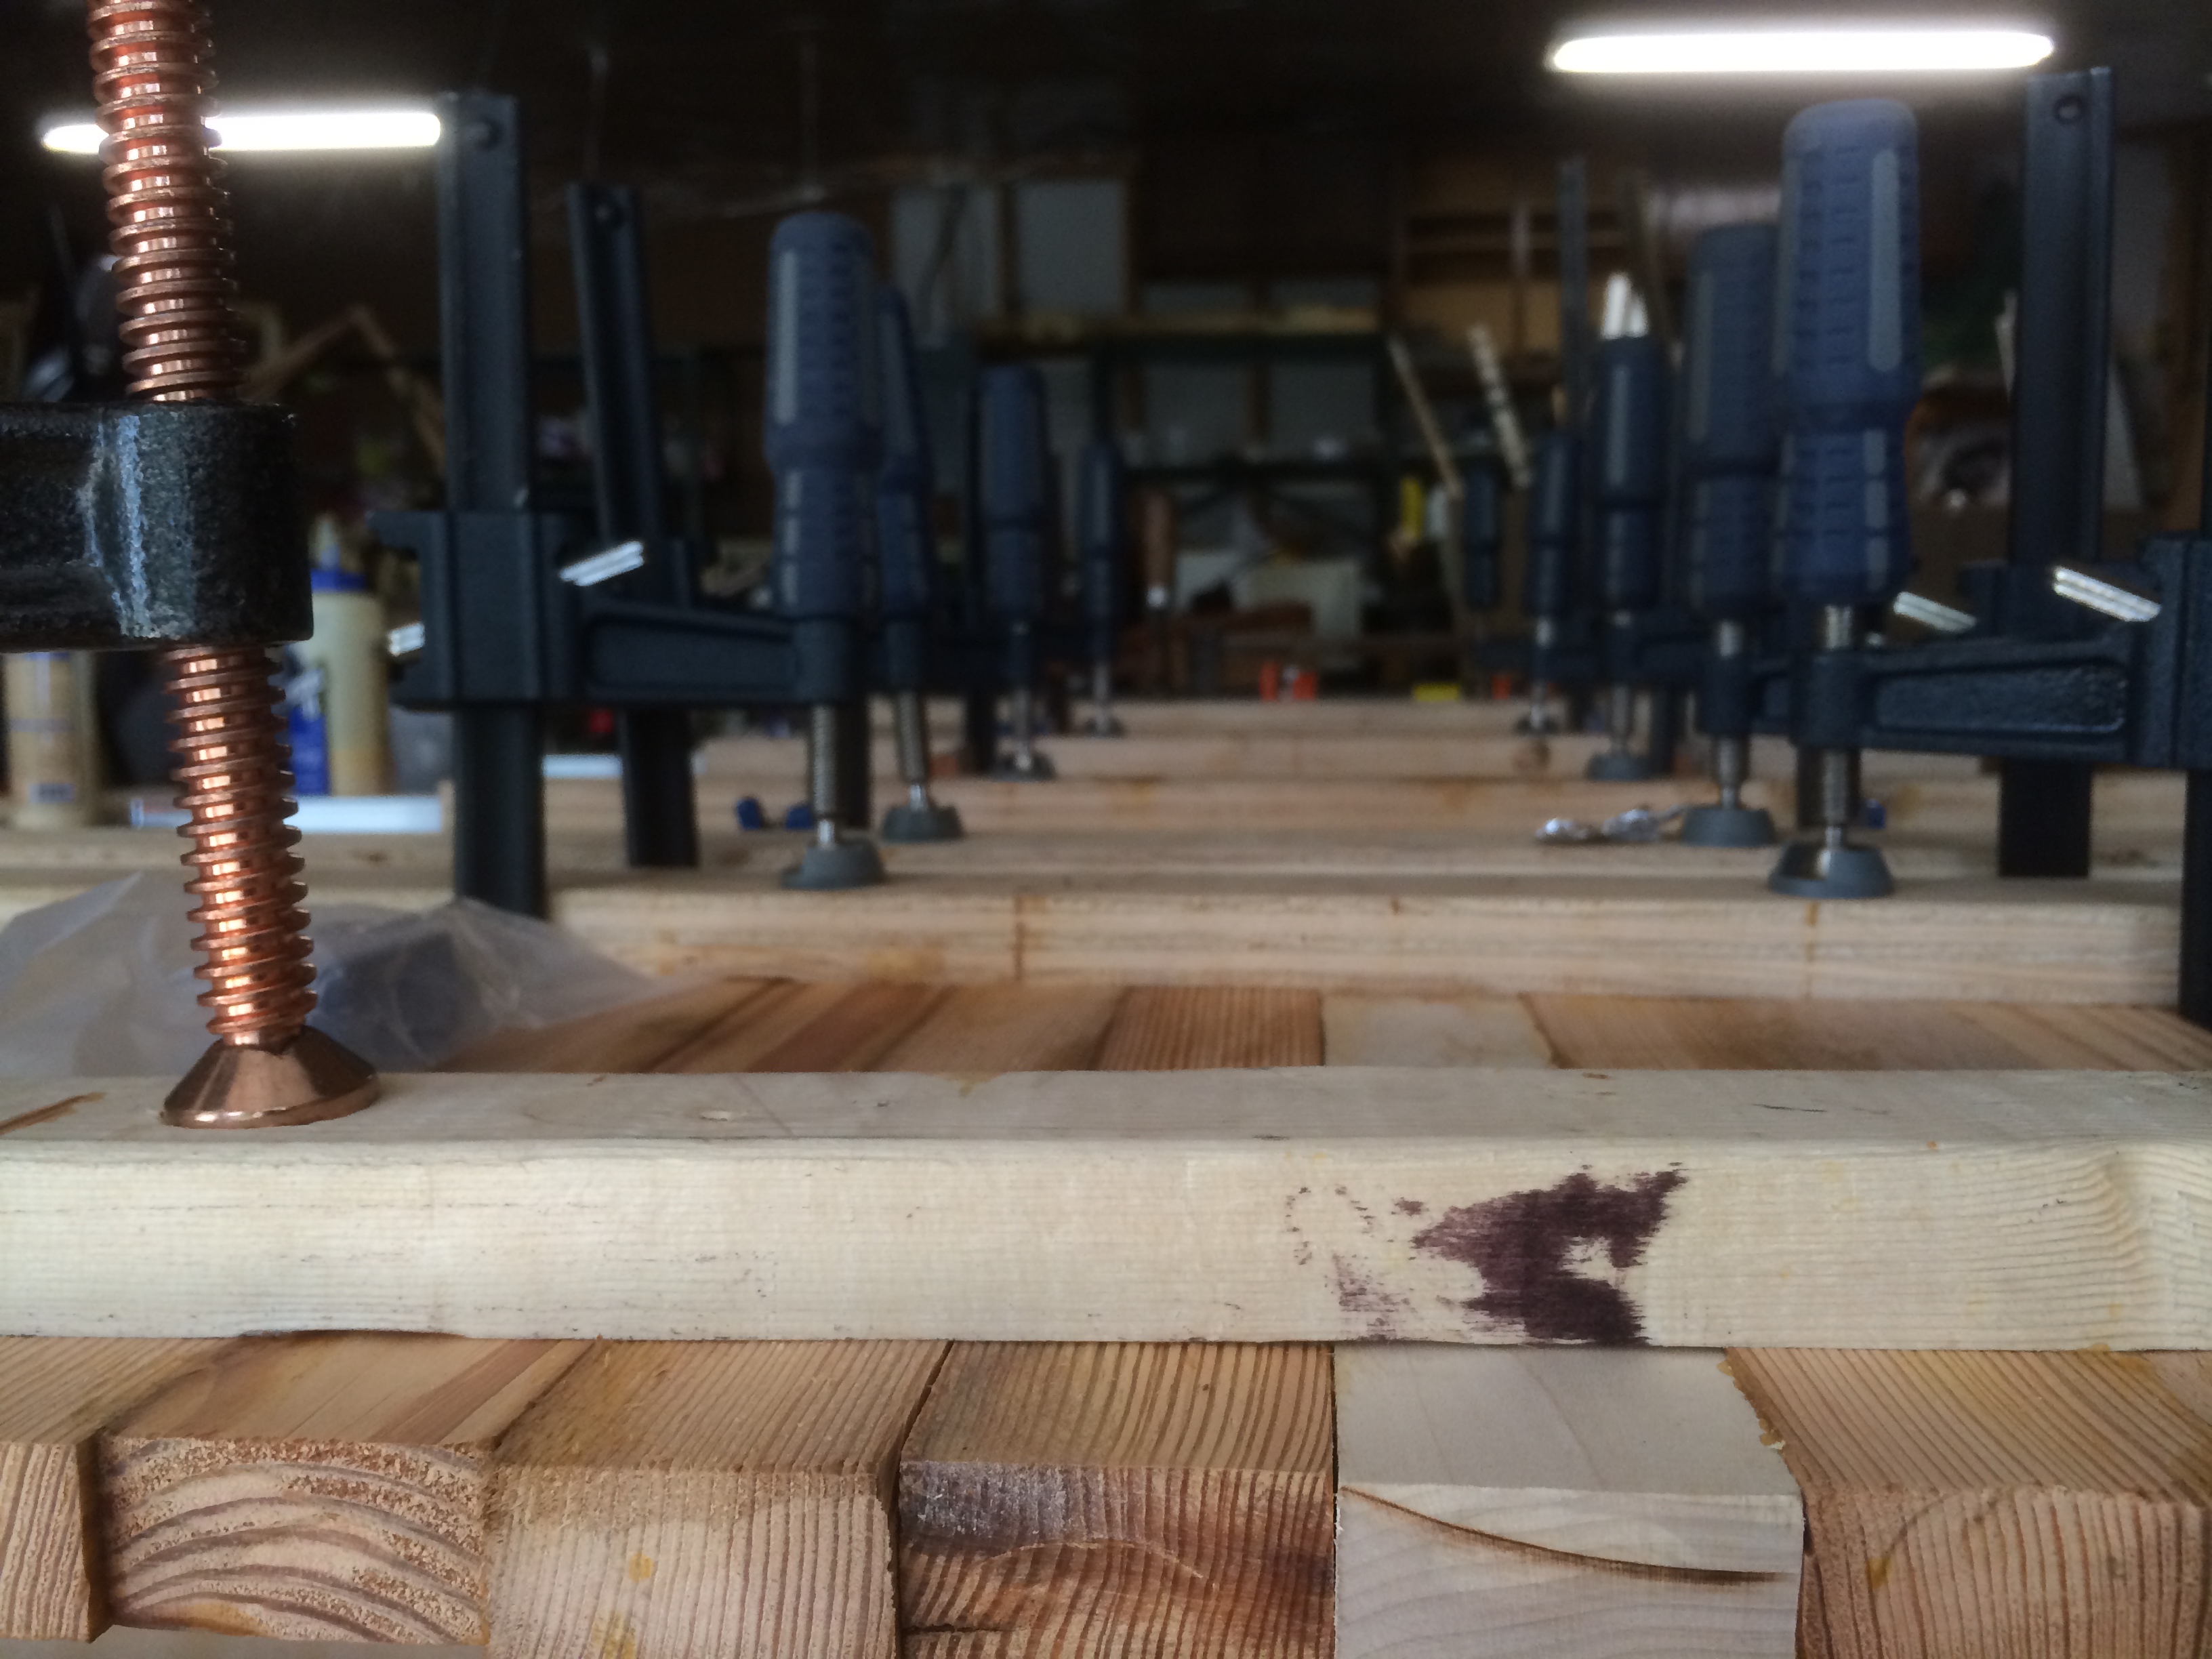
We knew that we would need several feet of countertop so we decided to mix in some new stock maple and mahogany that we purchased from Menard’s. Those boards went through the same process of being cut into 2″ strips and then planed down to size. By mixing the new growth maple and mahogany with the mature pine we were able to salvage, we could ensure that the butcher block would have several beautiful colors when it was stained and finished.
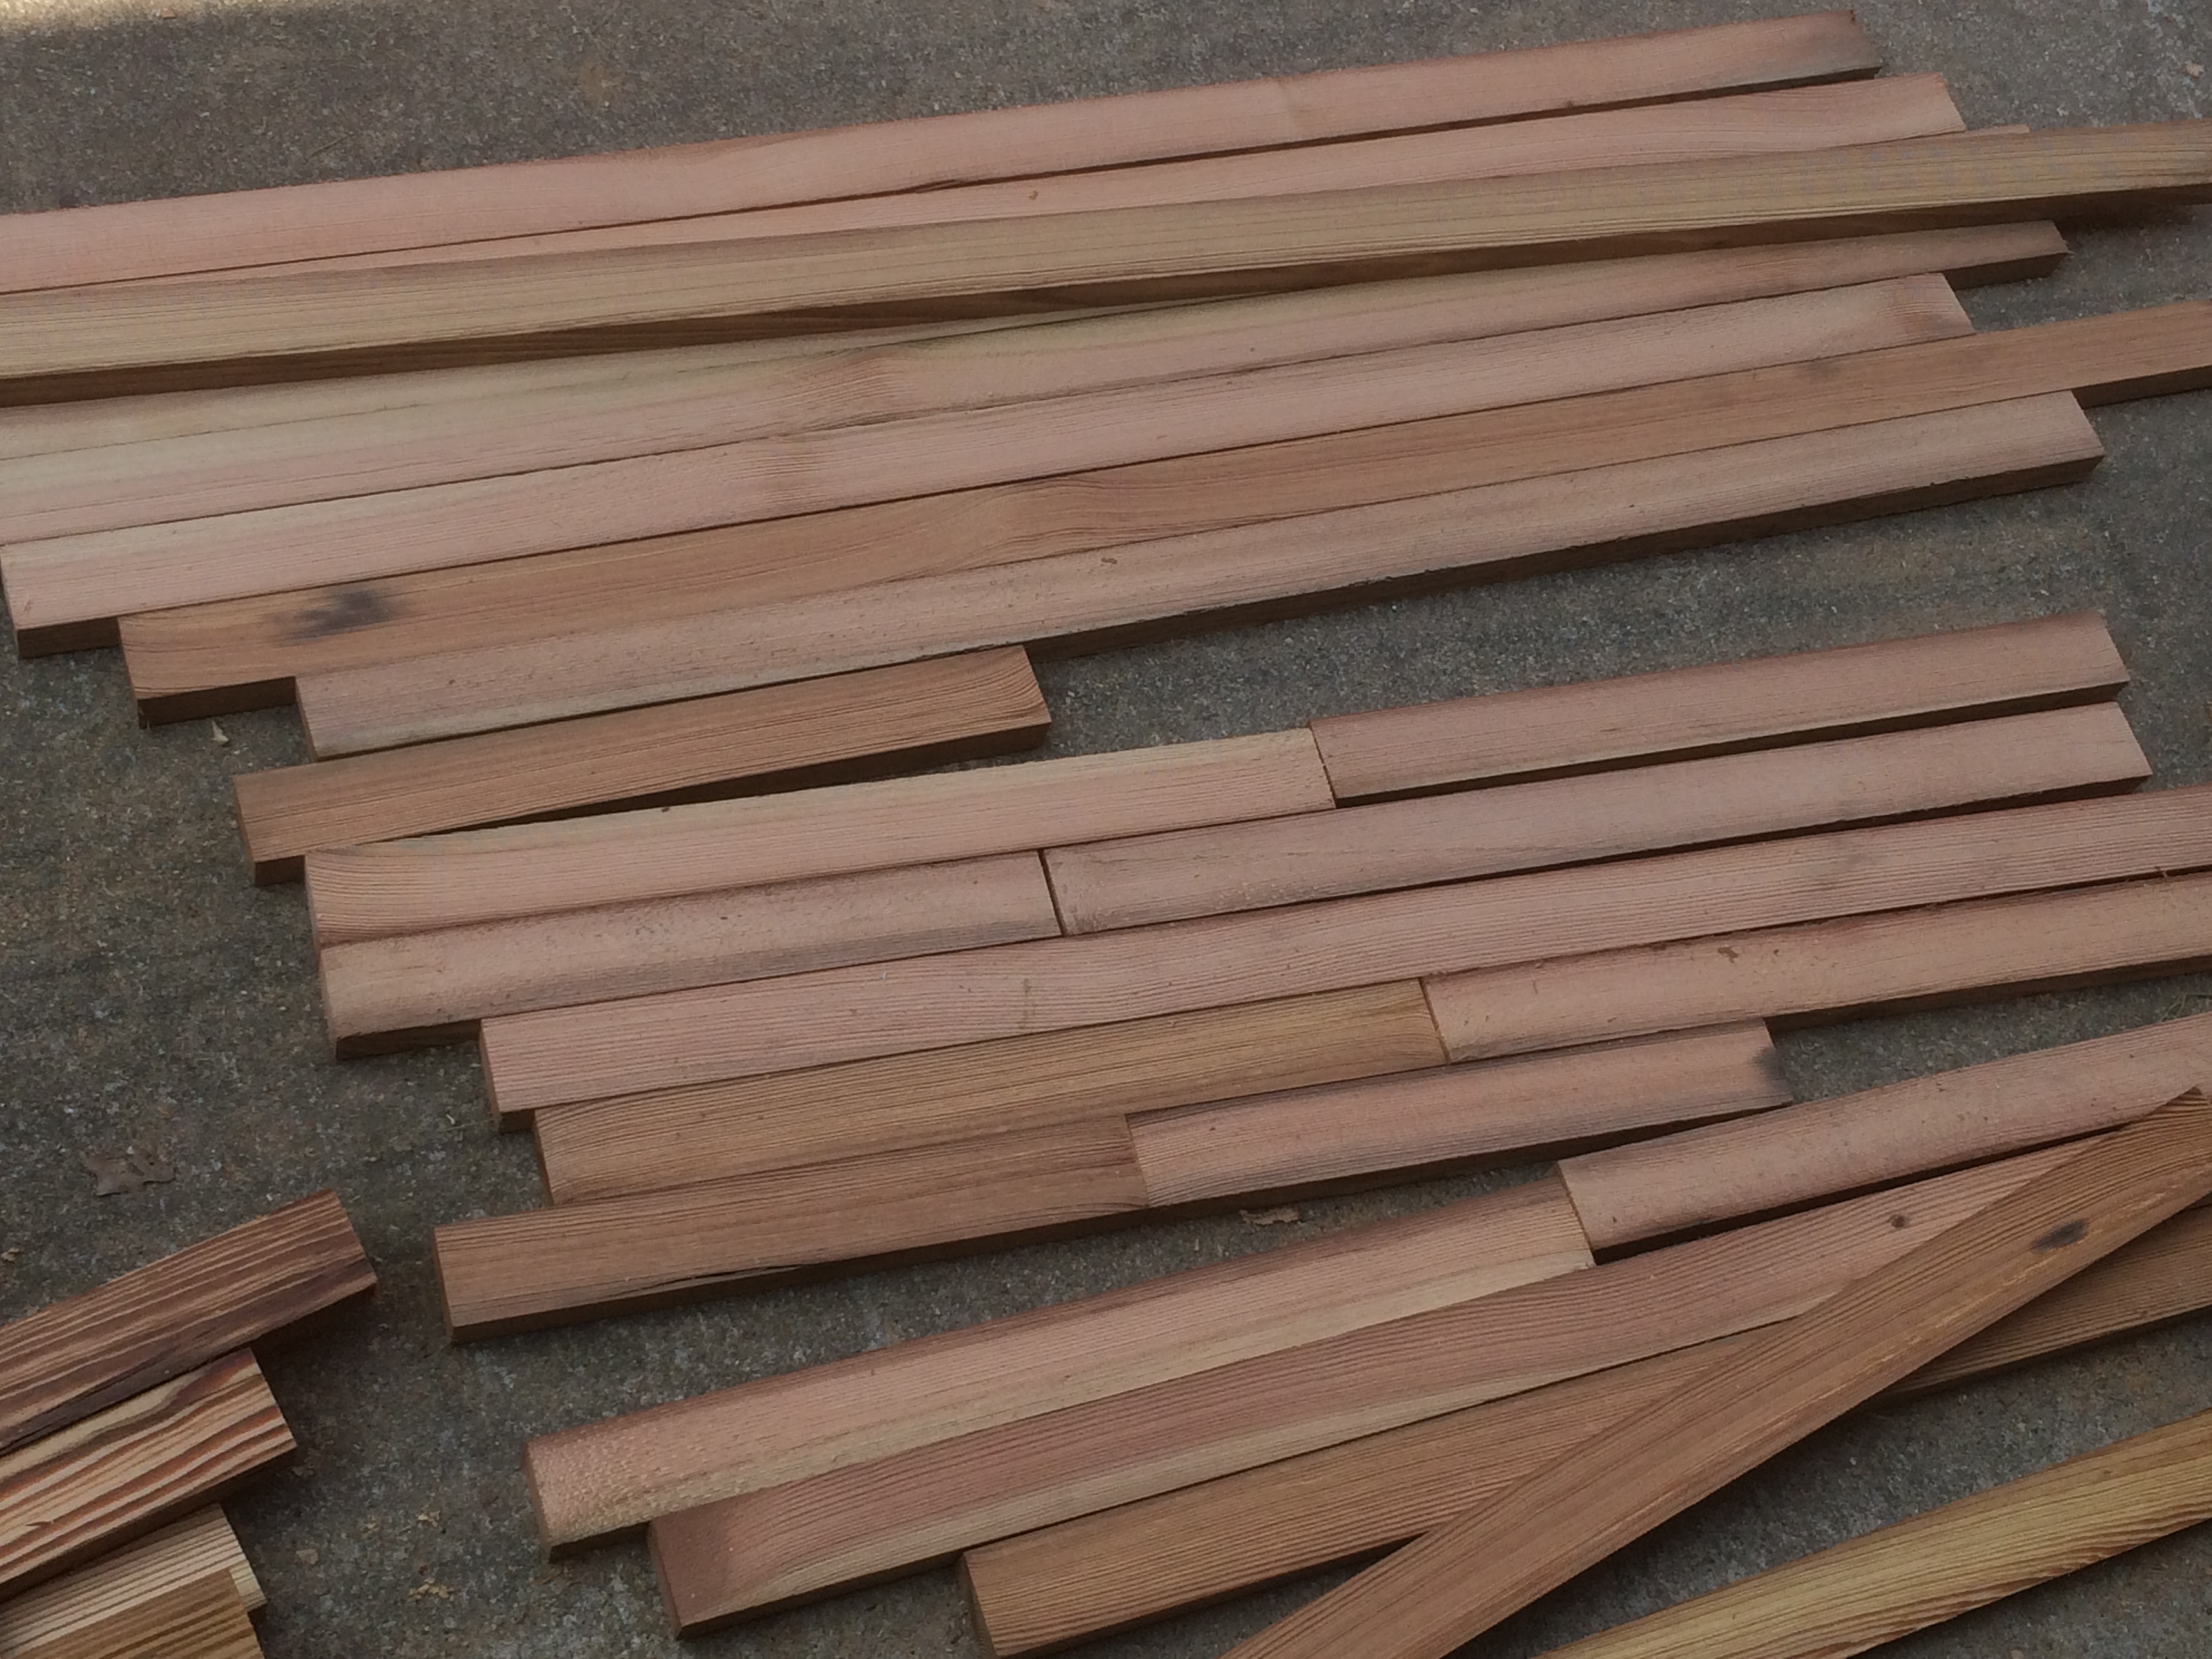
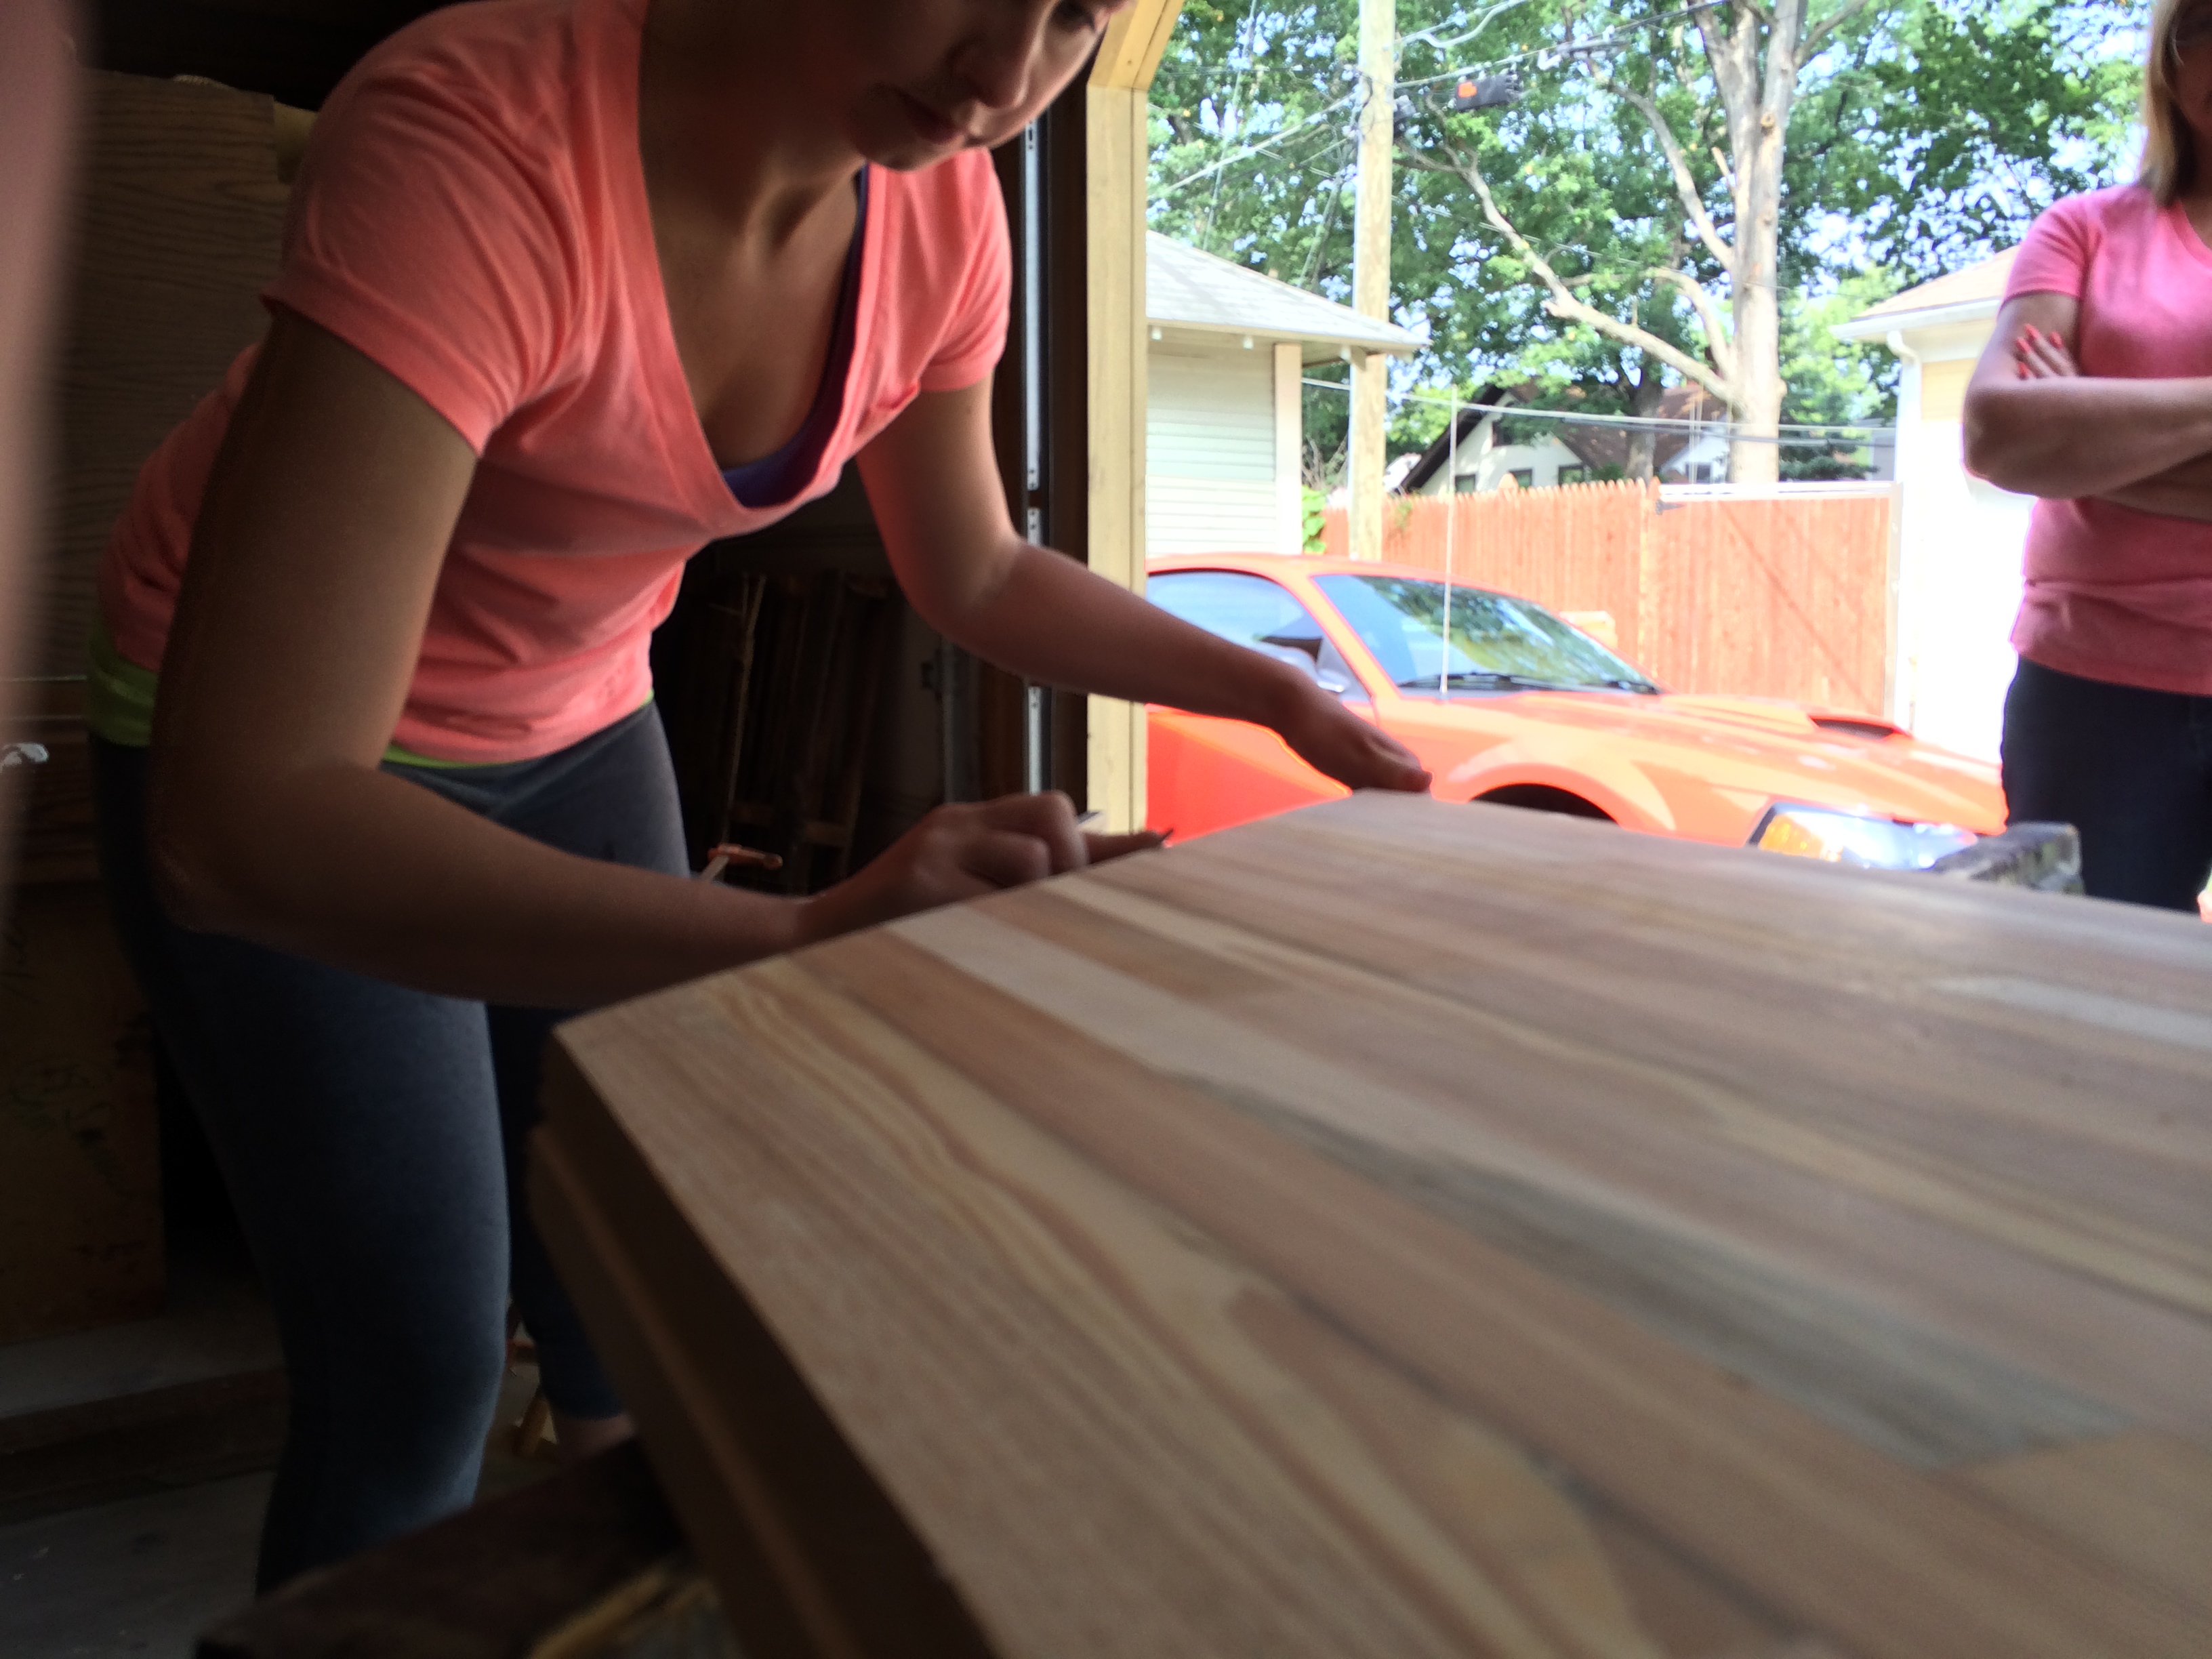
After taking some good measurements and drawing up some rough diagrams for the shape of the countertops we would be creating, we began to intermix the different species of wood to achieve the look we wanted. It was important to lay all the pieces out first WITHOUT glue; we ended up switching several pieces around before we were ready to commit to any particular “color” pattern.
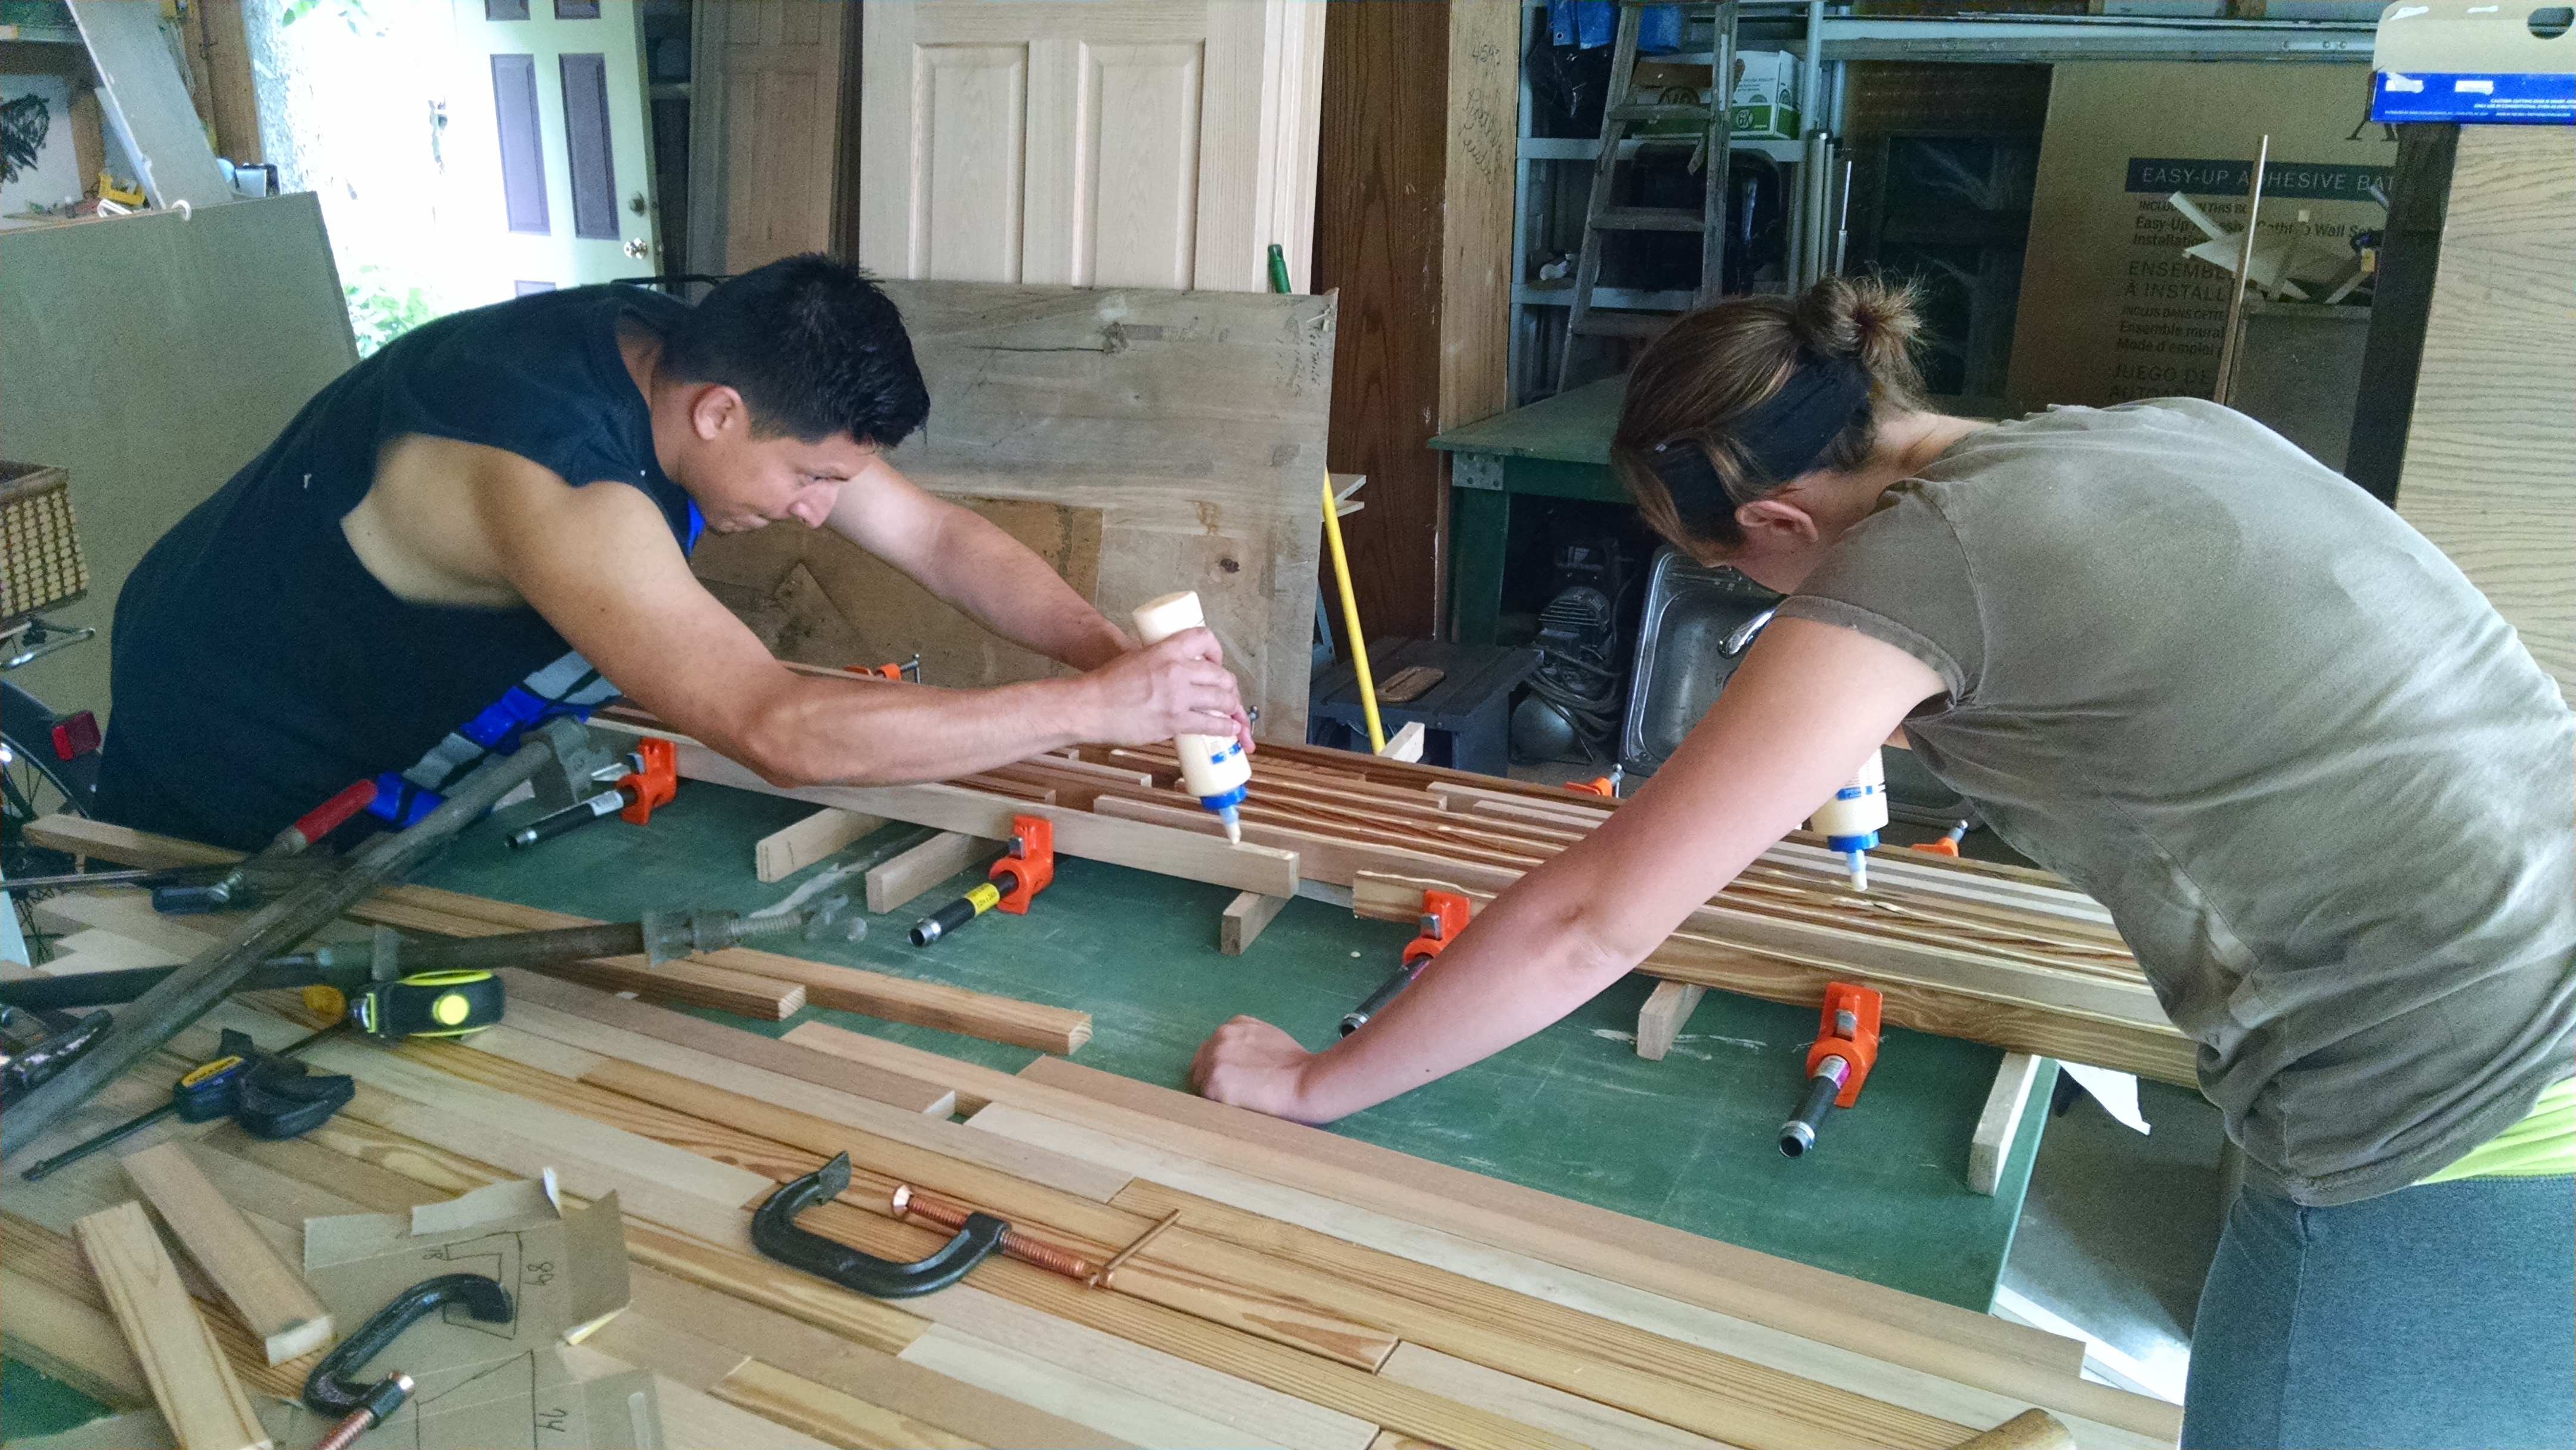
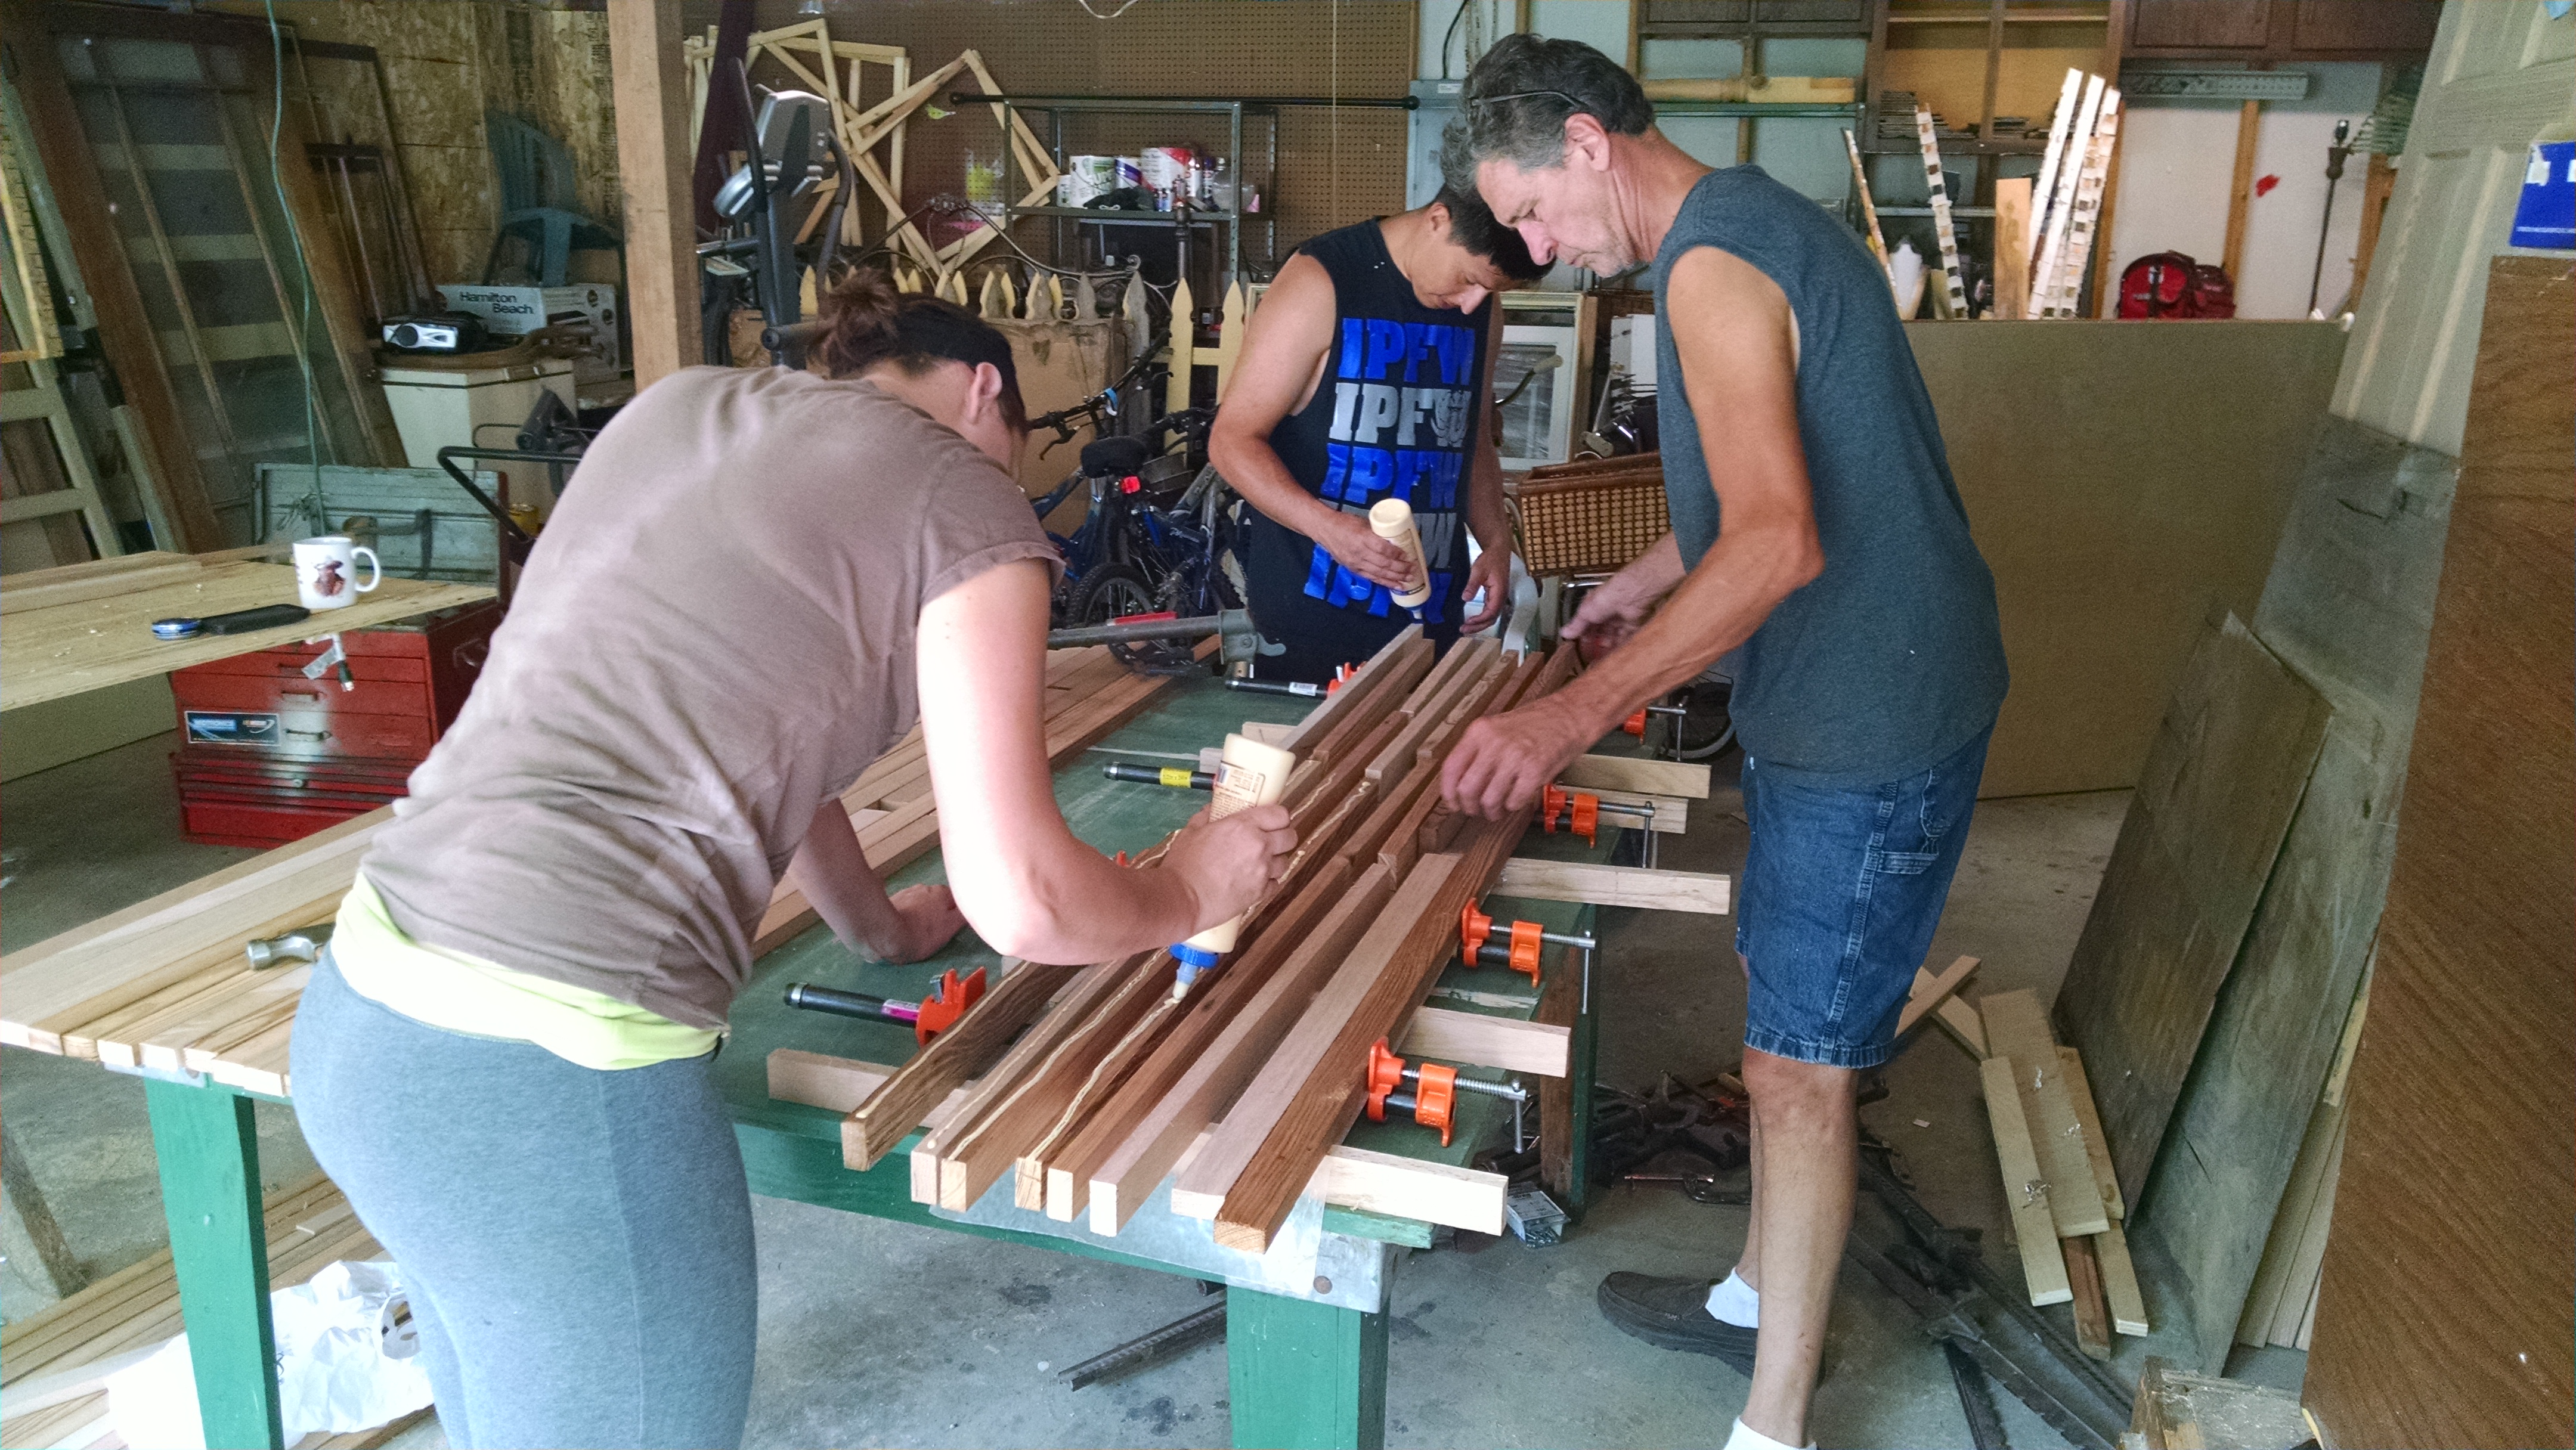
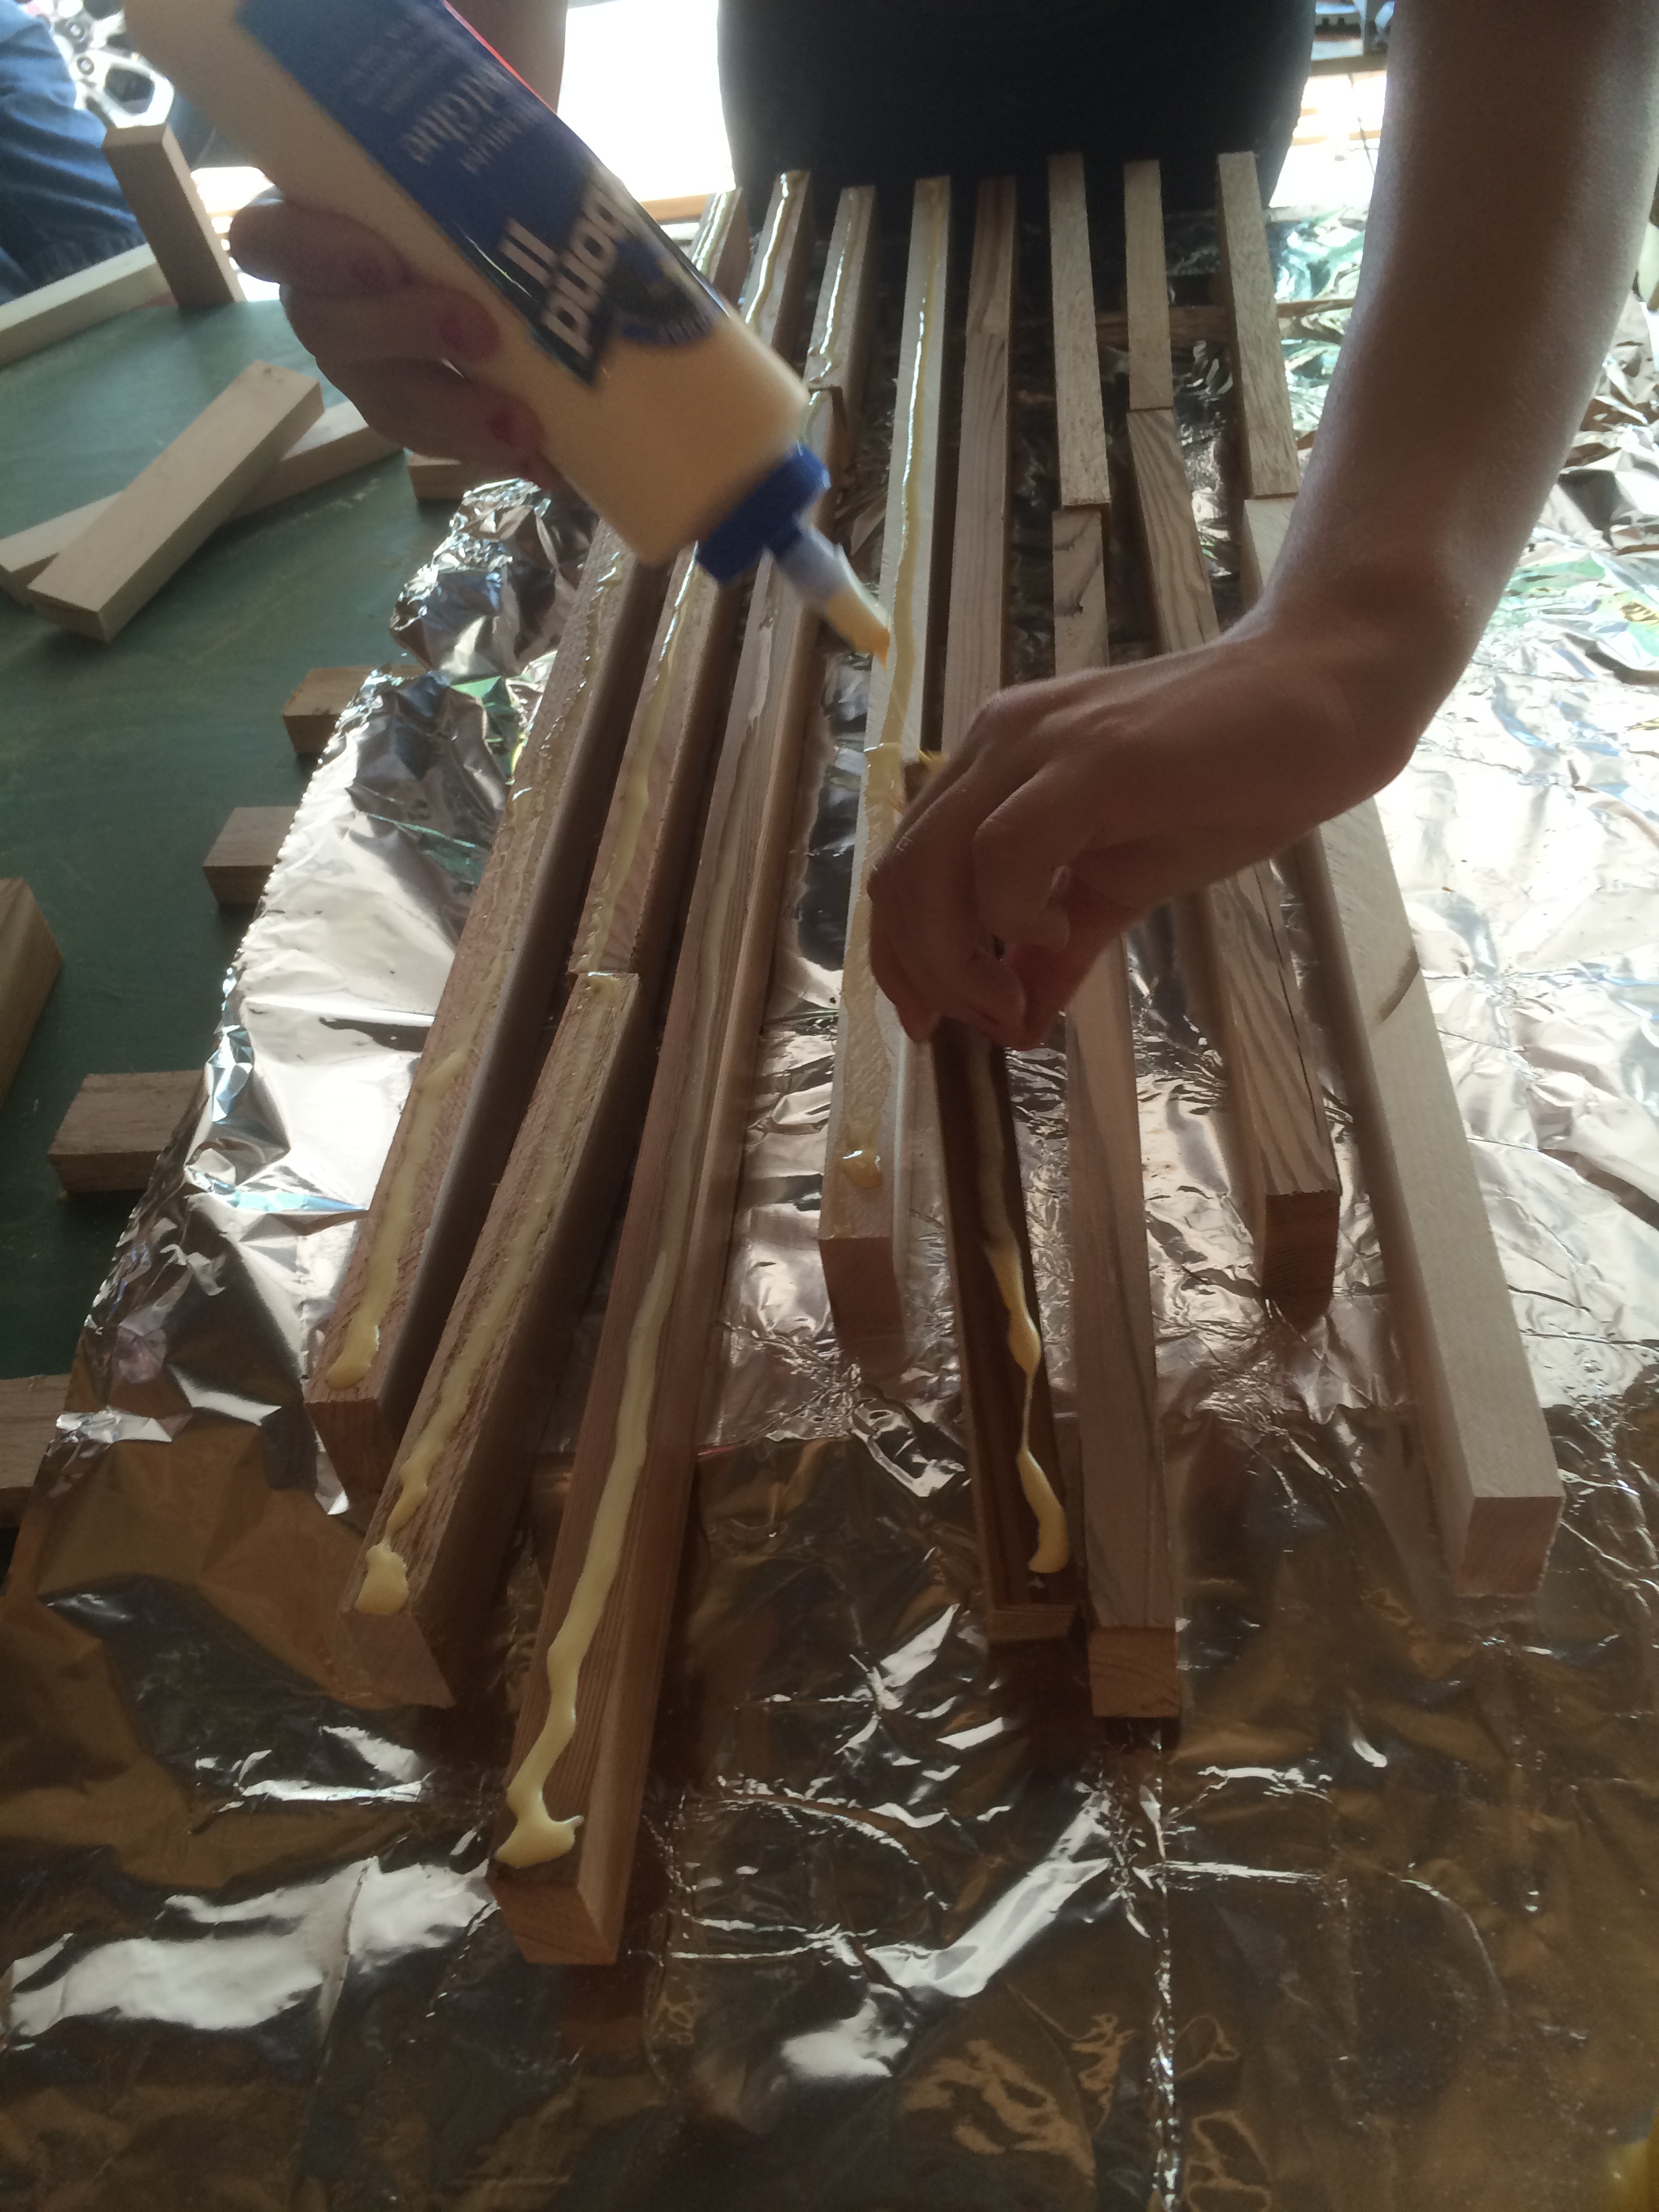
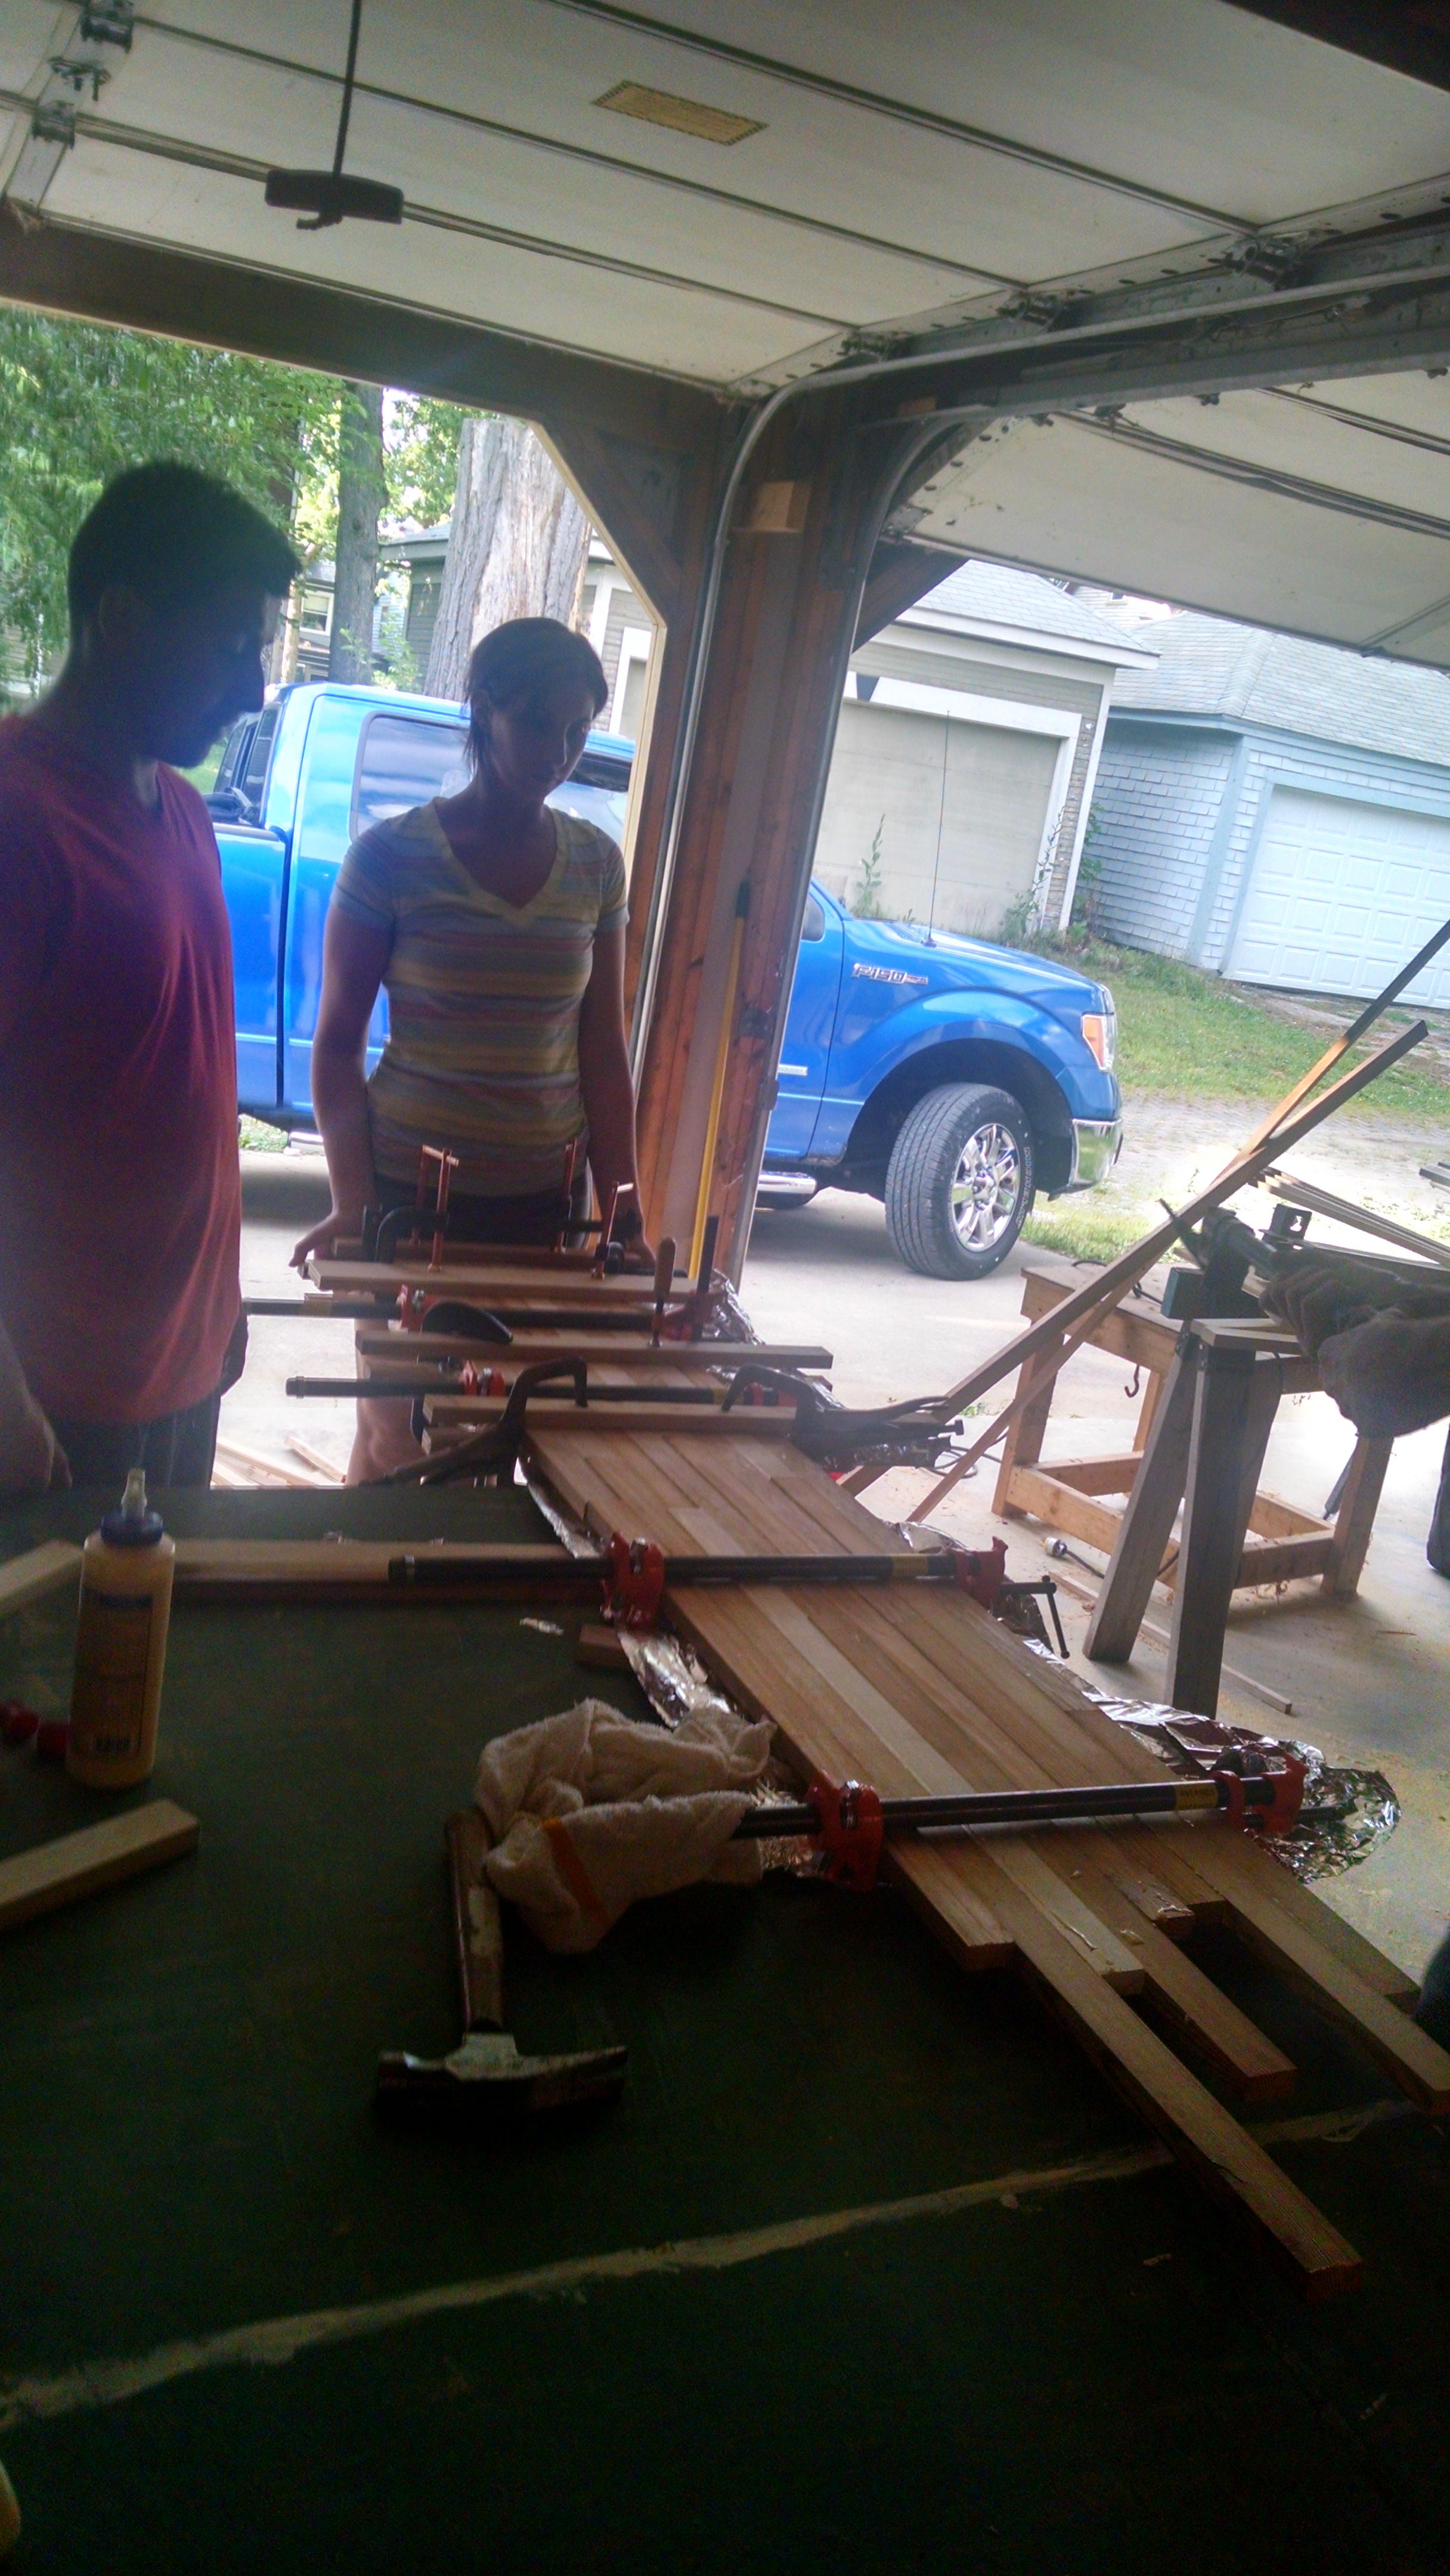
When we were sure we had enough pieces to make all four pieces of countertop that we needed we started to glue them up.
WARNING: if you are crazy like we are and you decide to tackle this project on your own, just know that you will need about a million clamps. No seriously, get as many as you can.
You will need both bar clamps and C-clamps. You will also need some scrap wood to place between the countertop and the clamp so that when pressure is applied the surface of the countertop is not dented. We placed aluminum foil between the countertop and our work surface to prevent glue from getting all over. Since it is very likely that you will be using water around your kitchen countertops make sure that the glue you use to assemble the pieces together is waterproof.
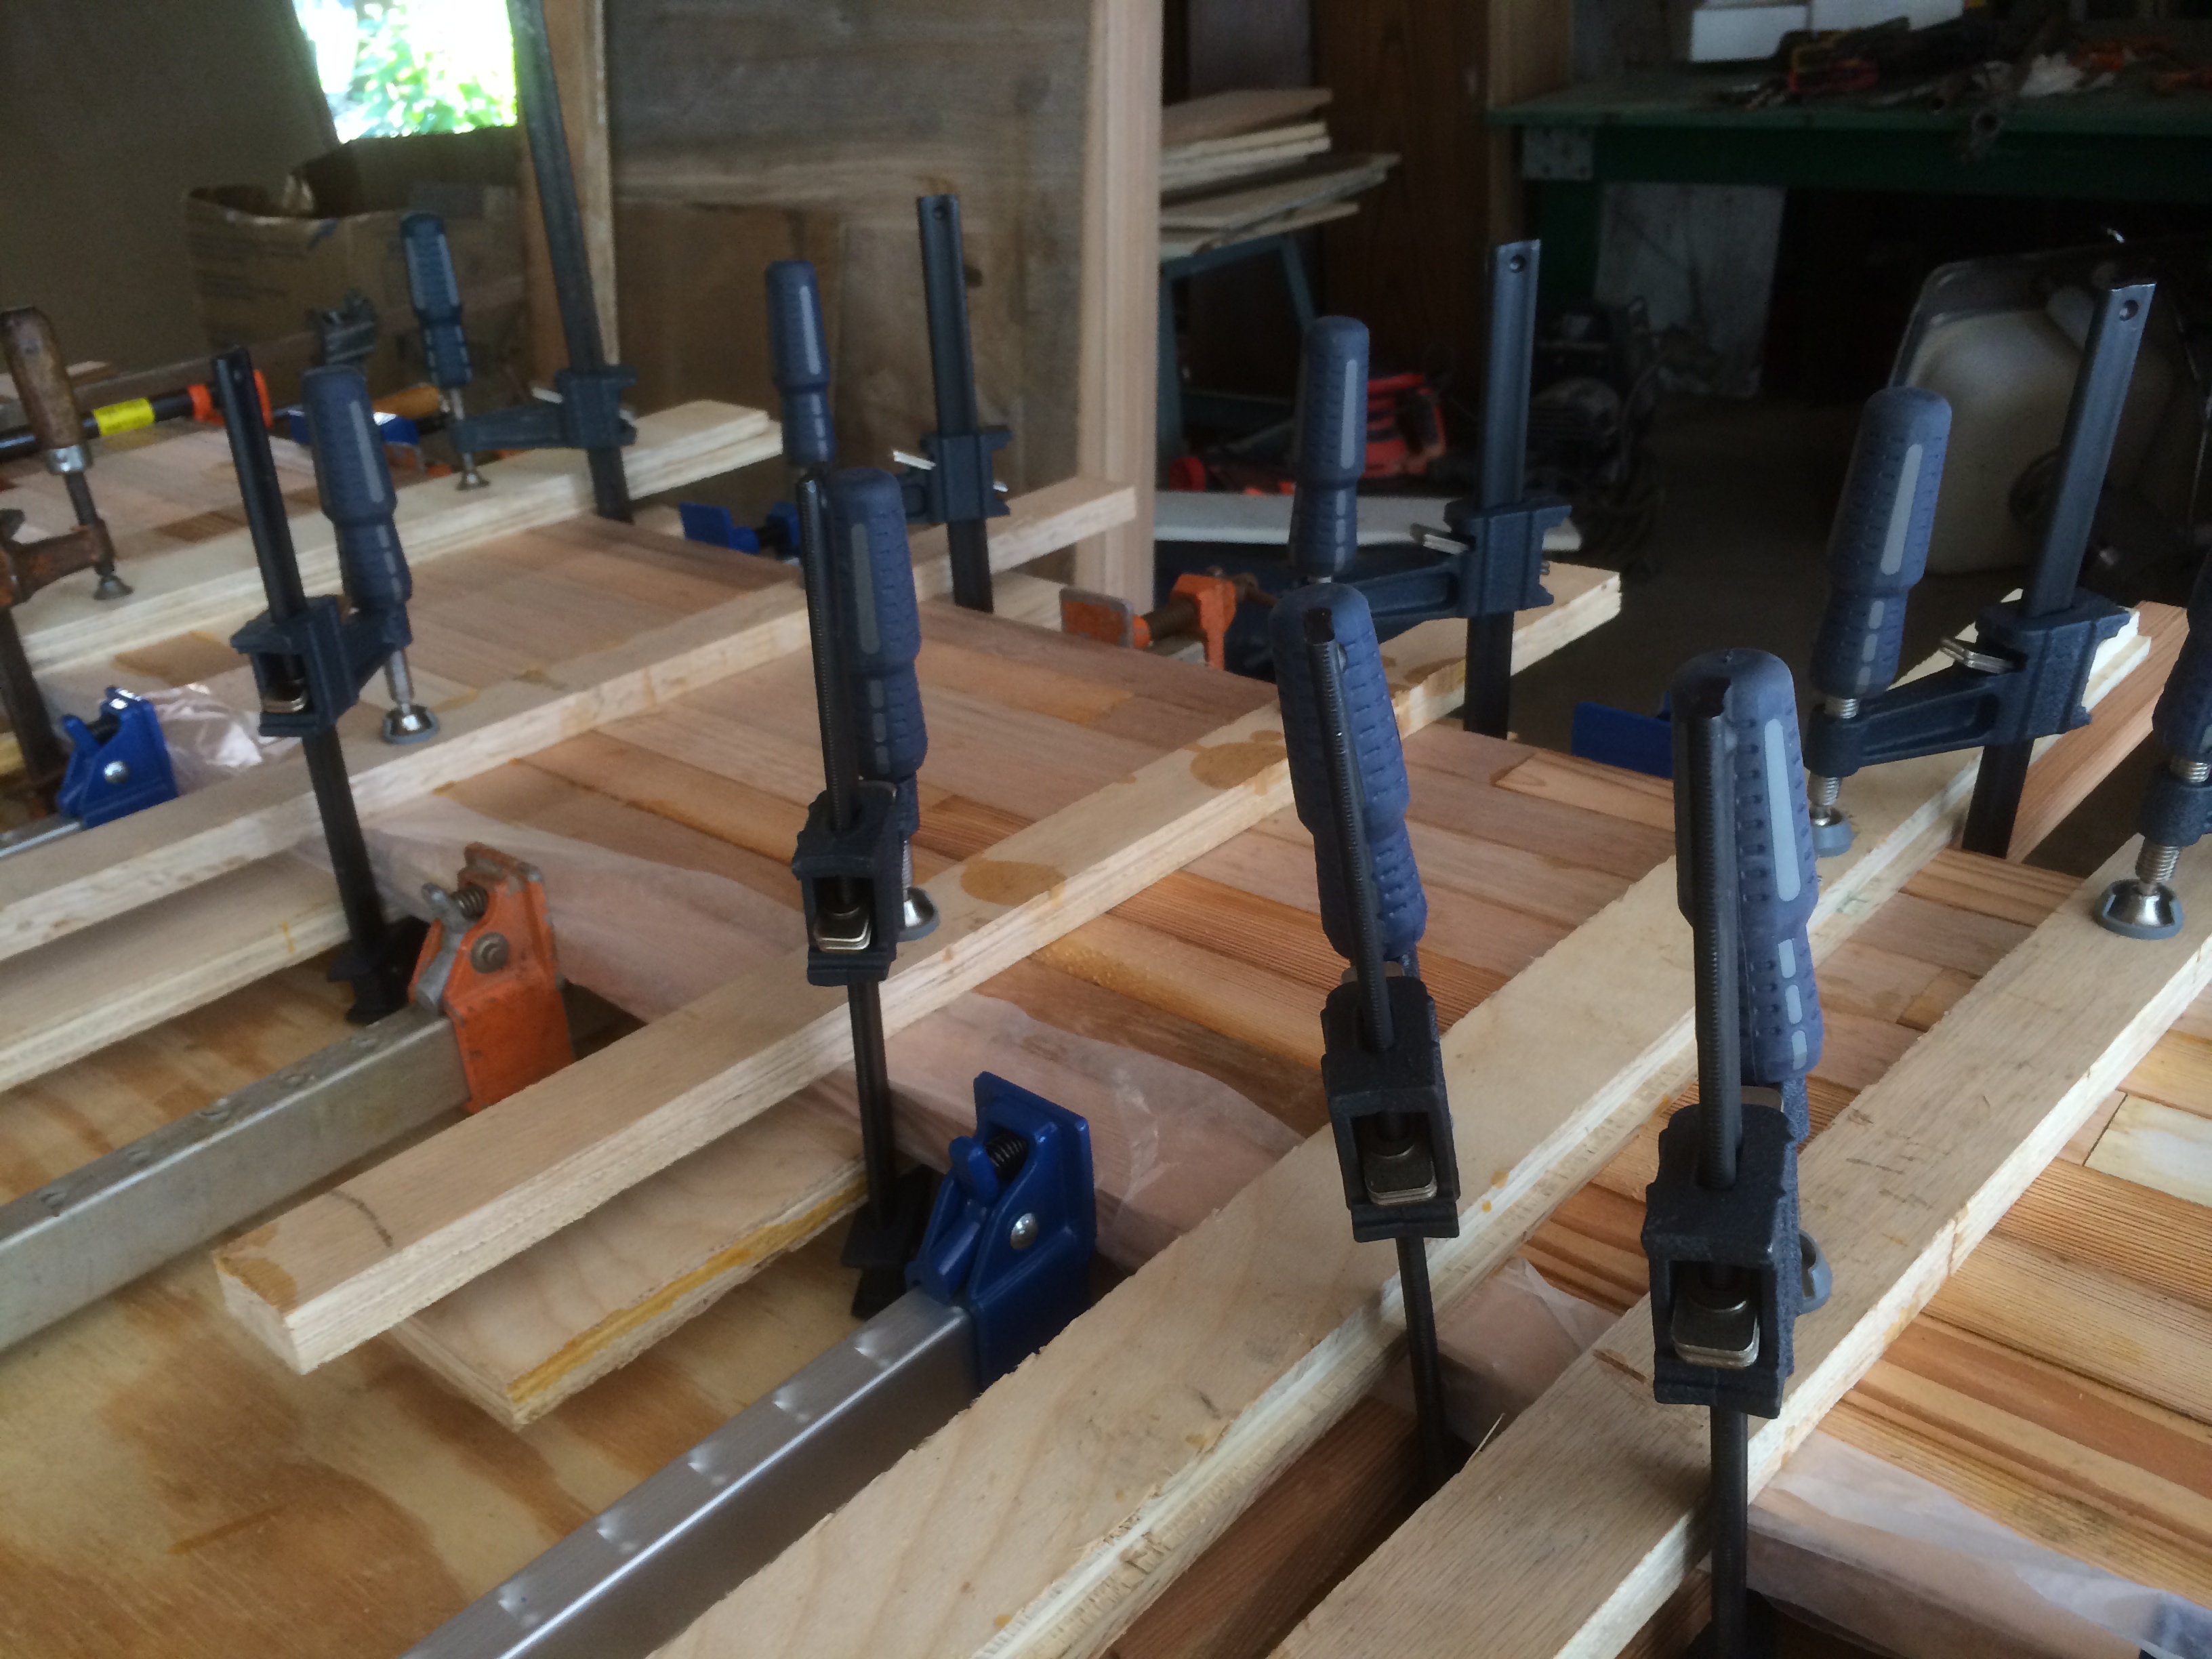
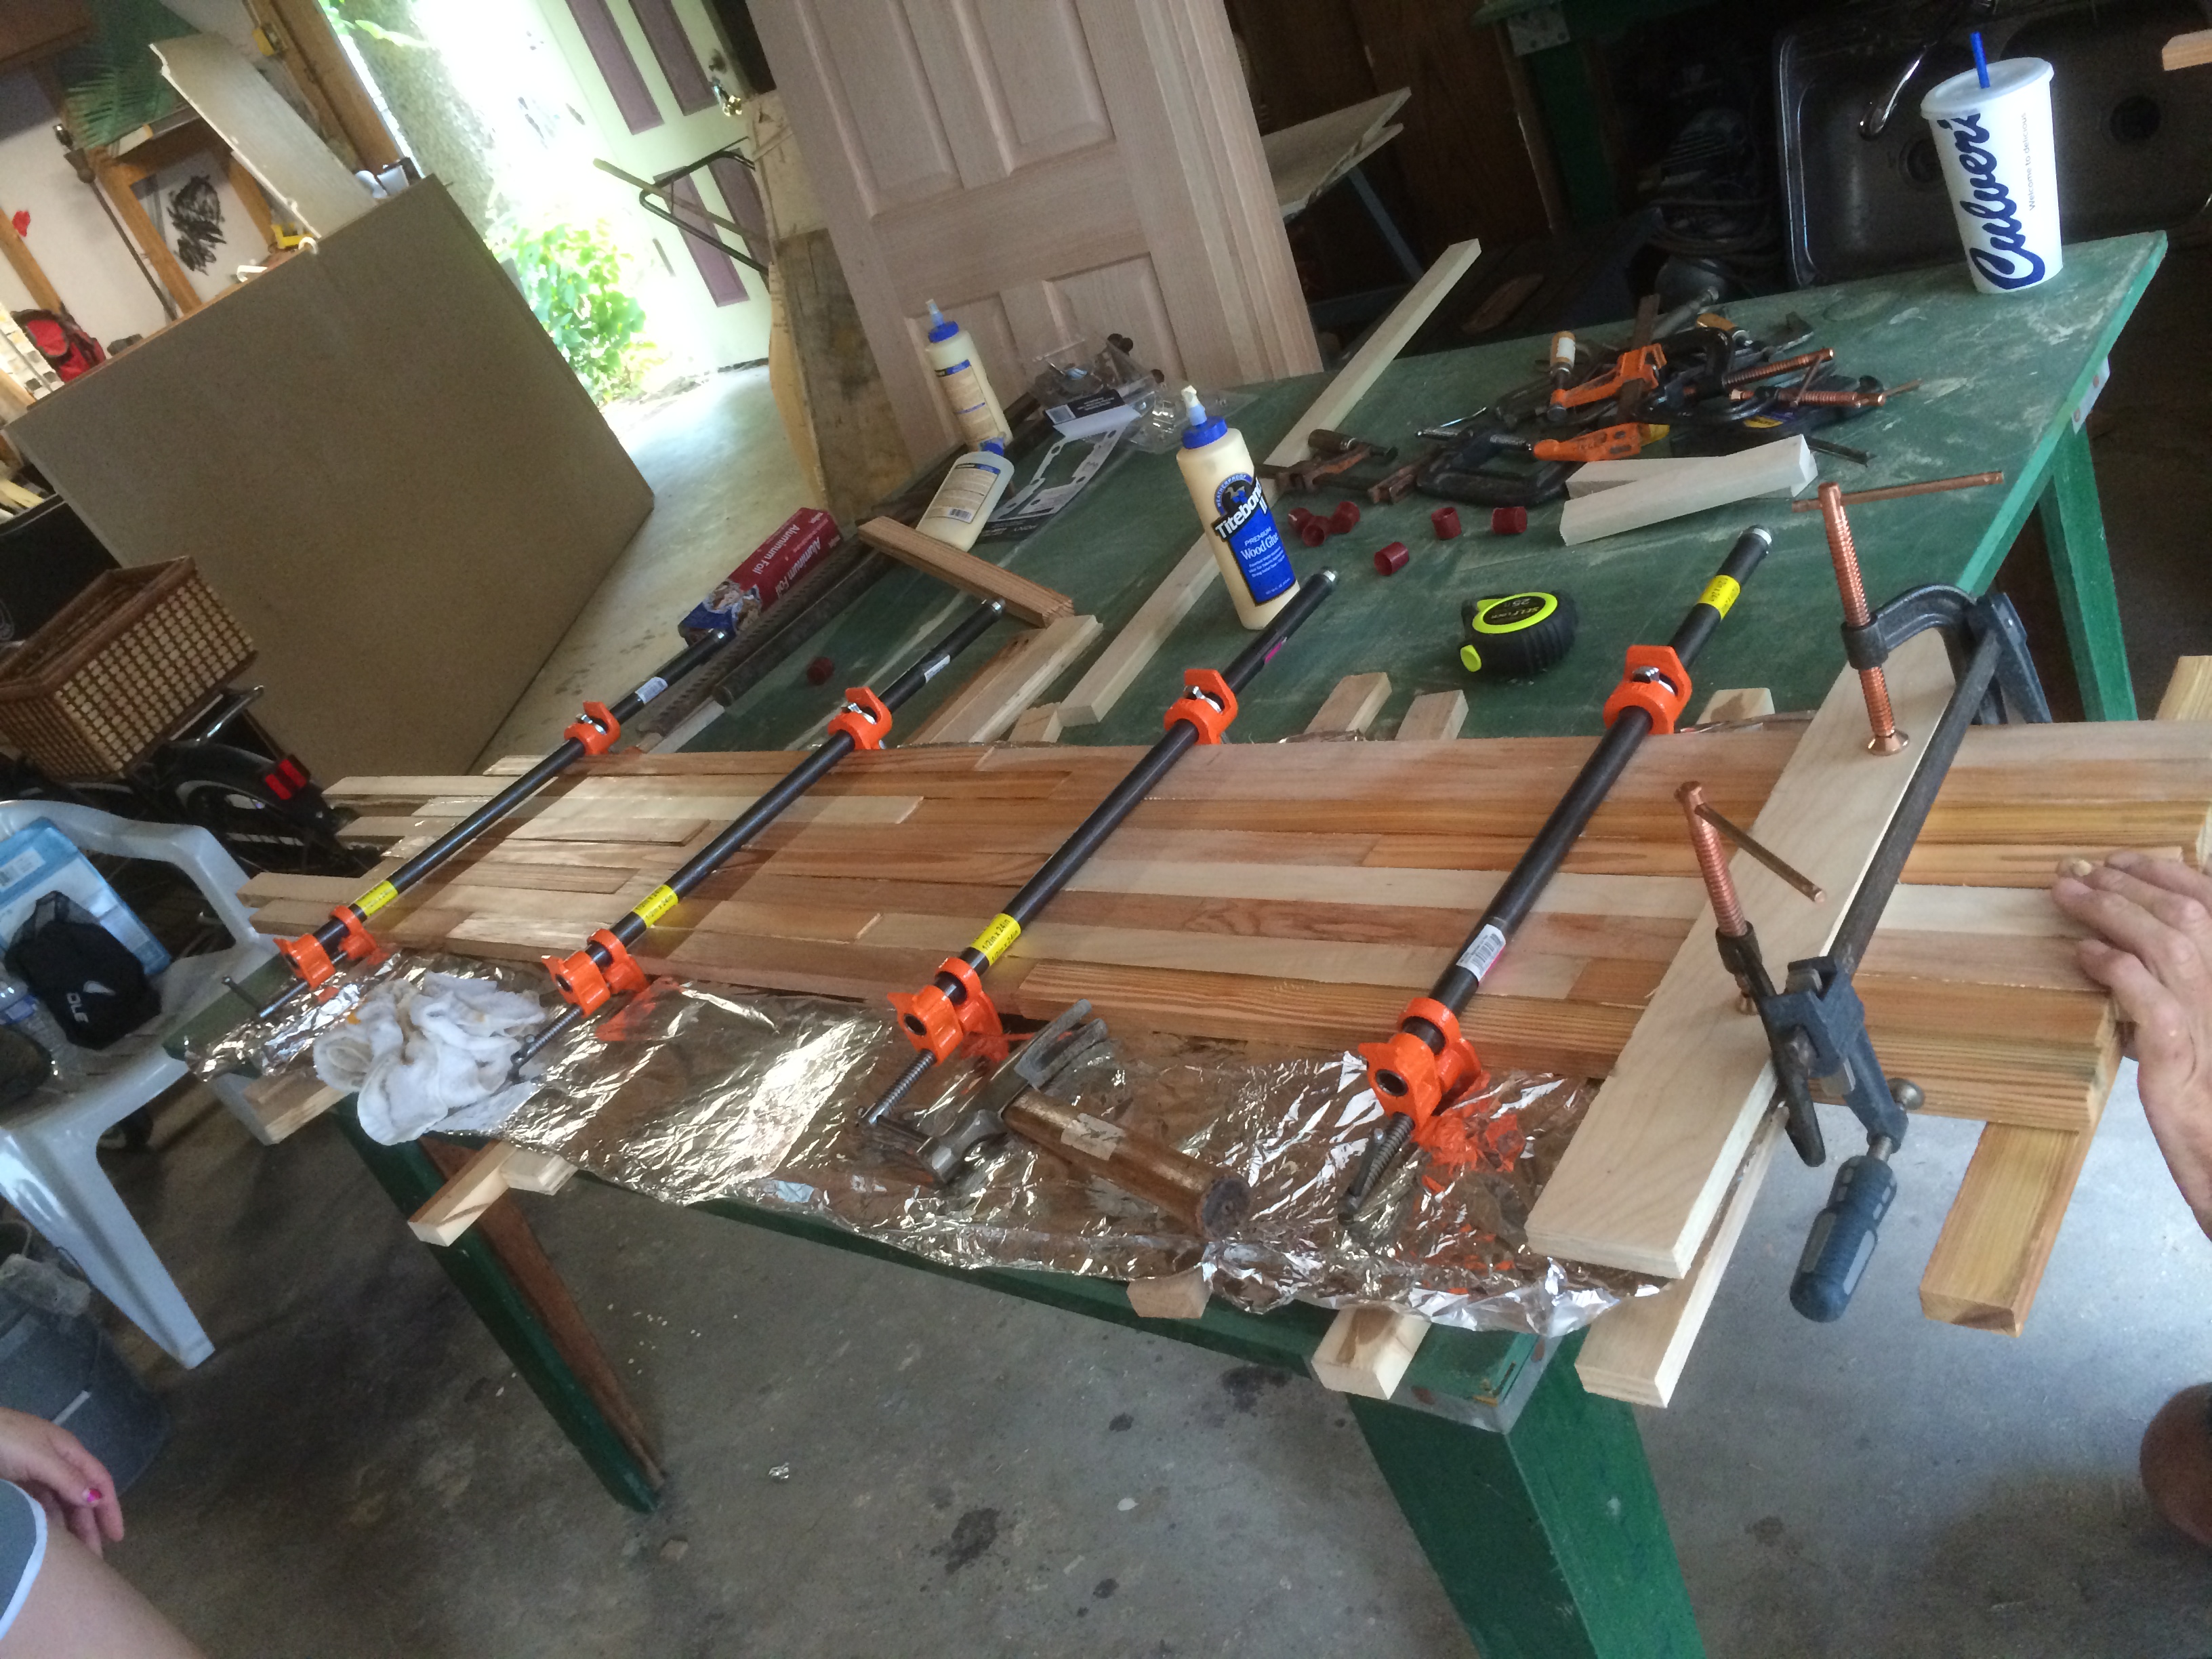
We let the glue dry for at least 24 hours. Although our countertops would sit on cabinets that were about 23″ deep we decided to assemble the countertops in pieces that were only 12″ wide. That meant that we had 8 total pieces to make. We decided to do it this way so that after the glue dried and we removed the clamps we could run the whole piece thru the planer one more time, which would ensure uniform thickness and save us a lot of sanding down the road. I tried calling different mills in the area and could not get anyone to agree to run these through their industrial planer so we were stuck using ours which is only 12″ wide. After the 12″ piece was planed for the last time we then had to glue it together with another 12″ piece which gave us the depth required to sit on top of the cabinet base. You may not follow me exactly but just know it was a lot of glue, clamp, repeat. It took us several weekends to get the countertops assembled.
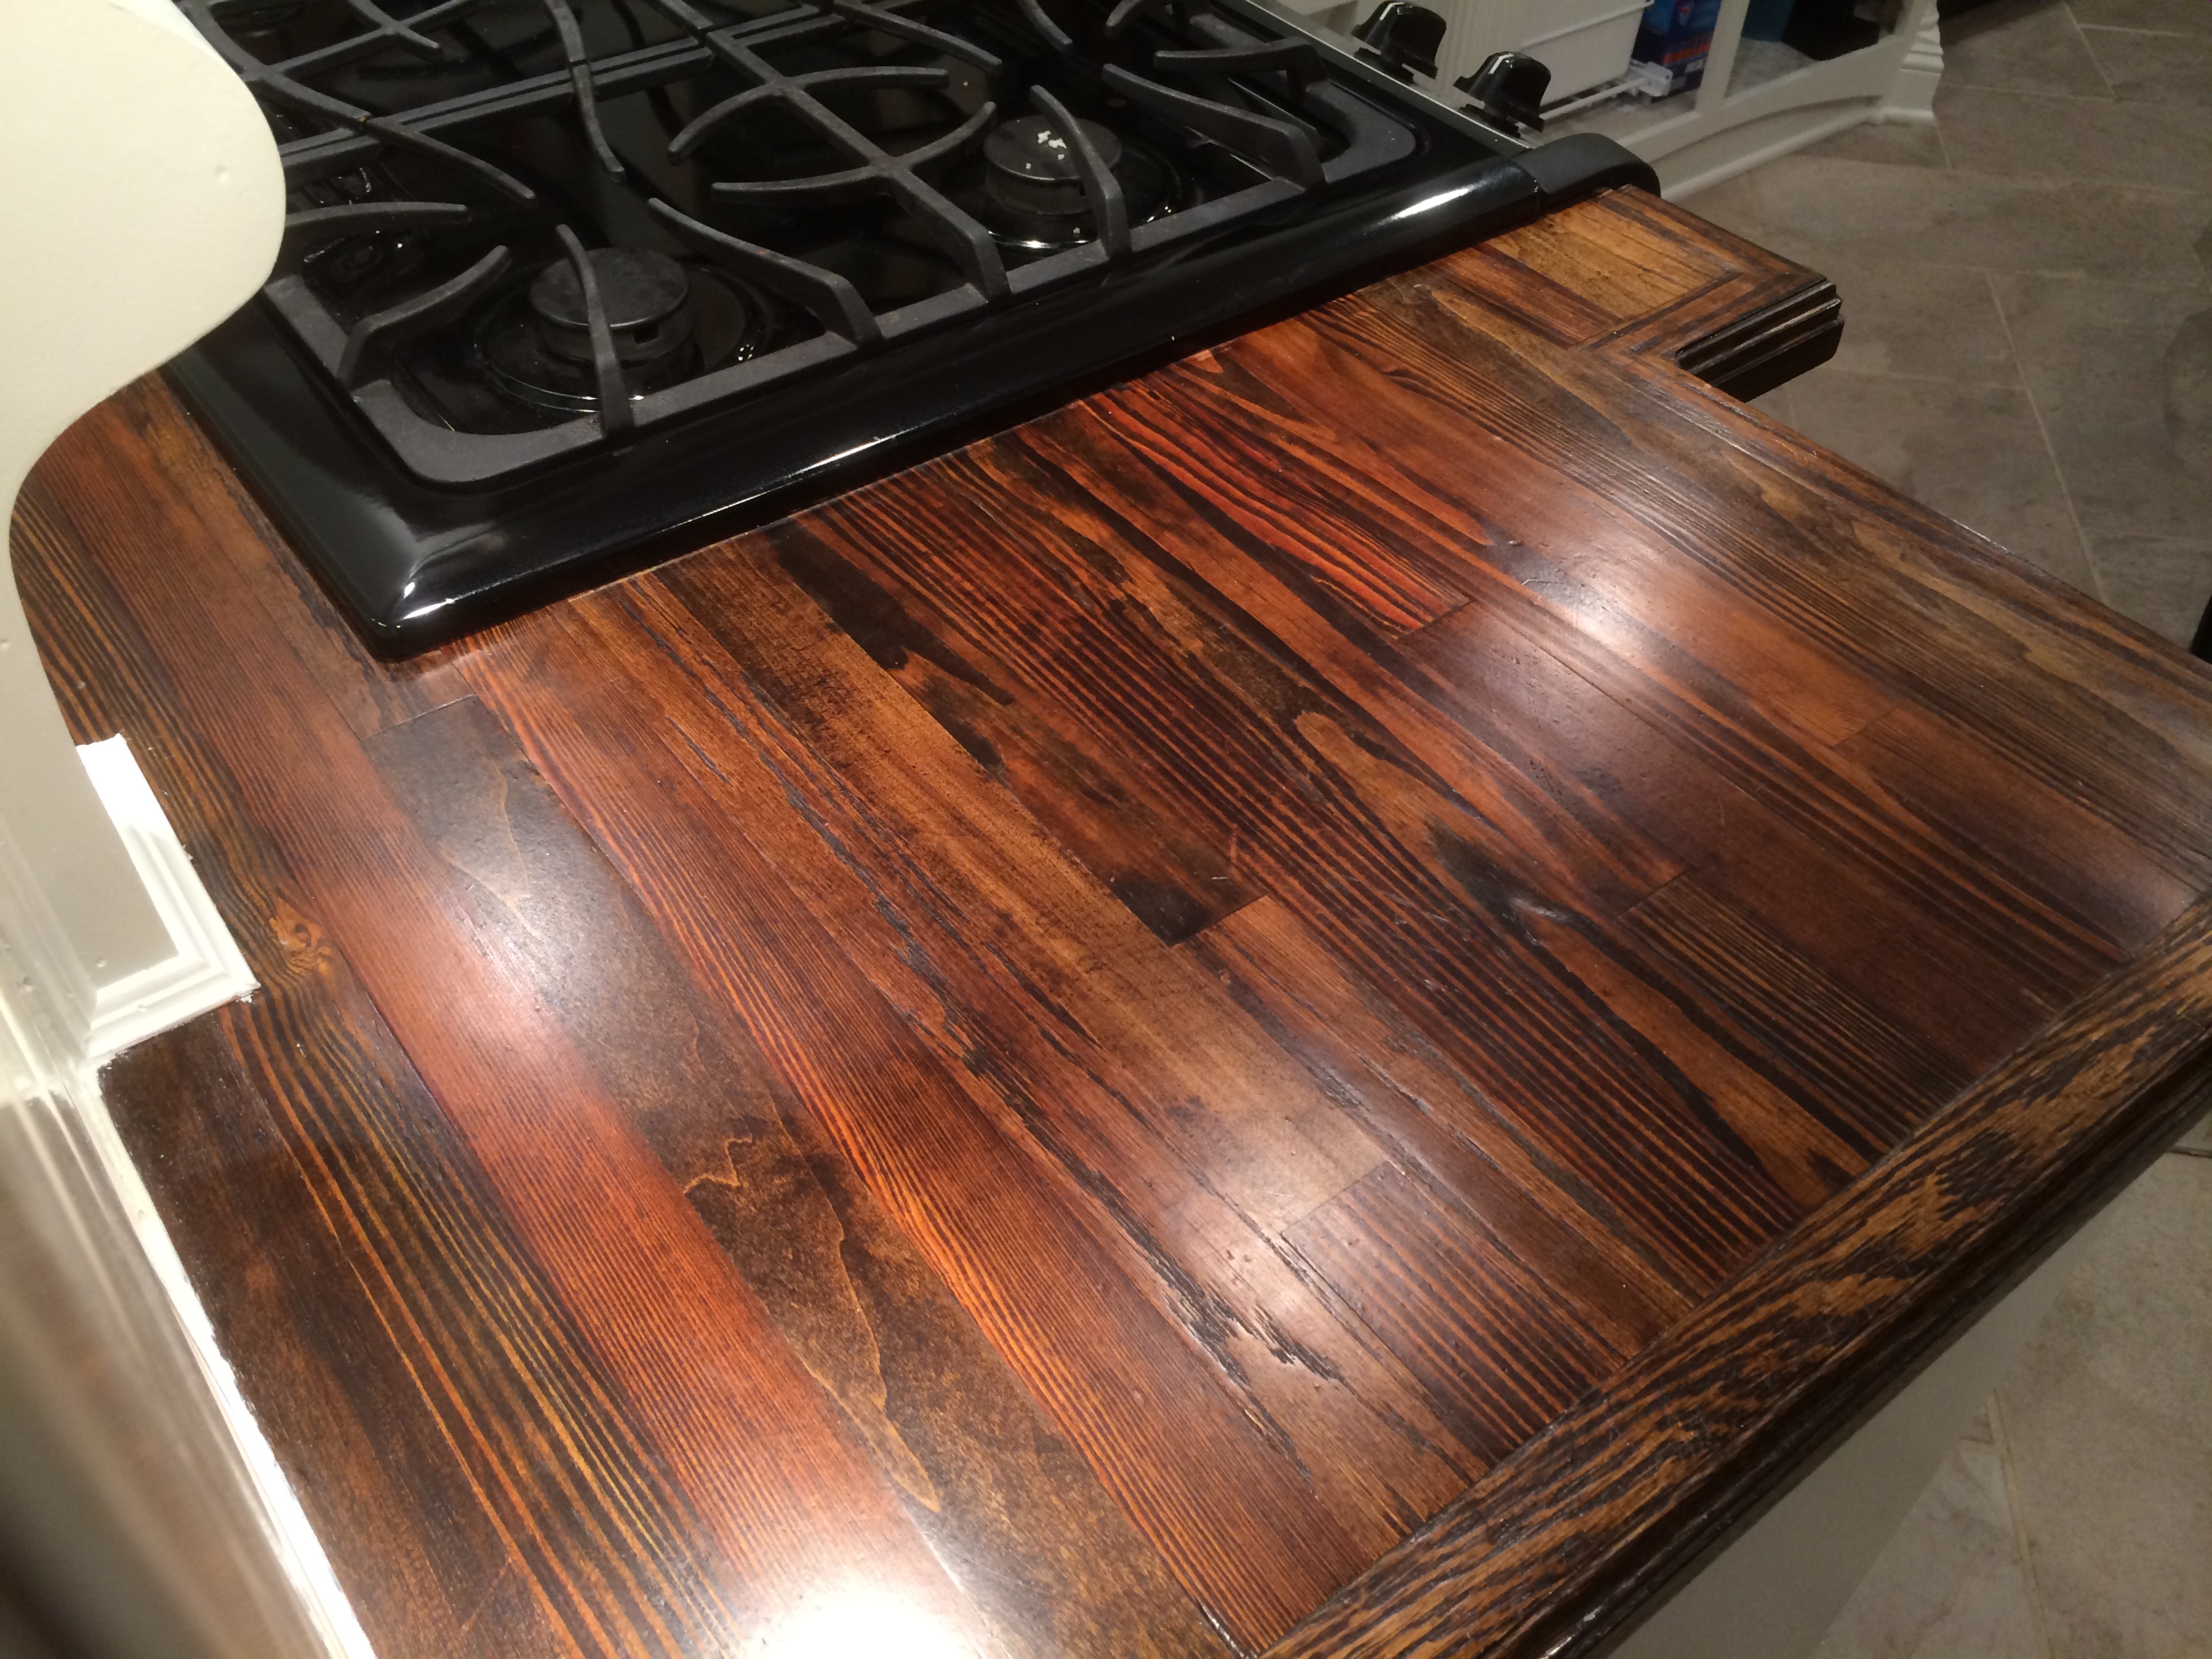
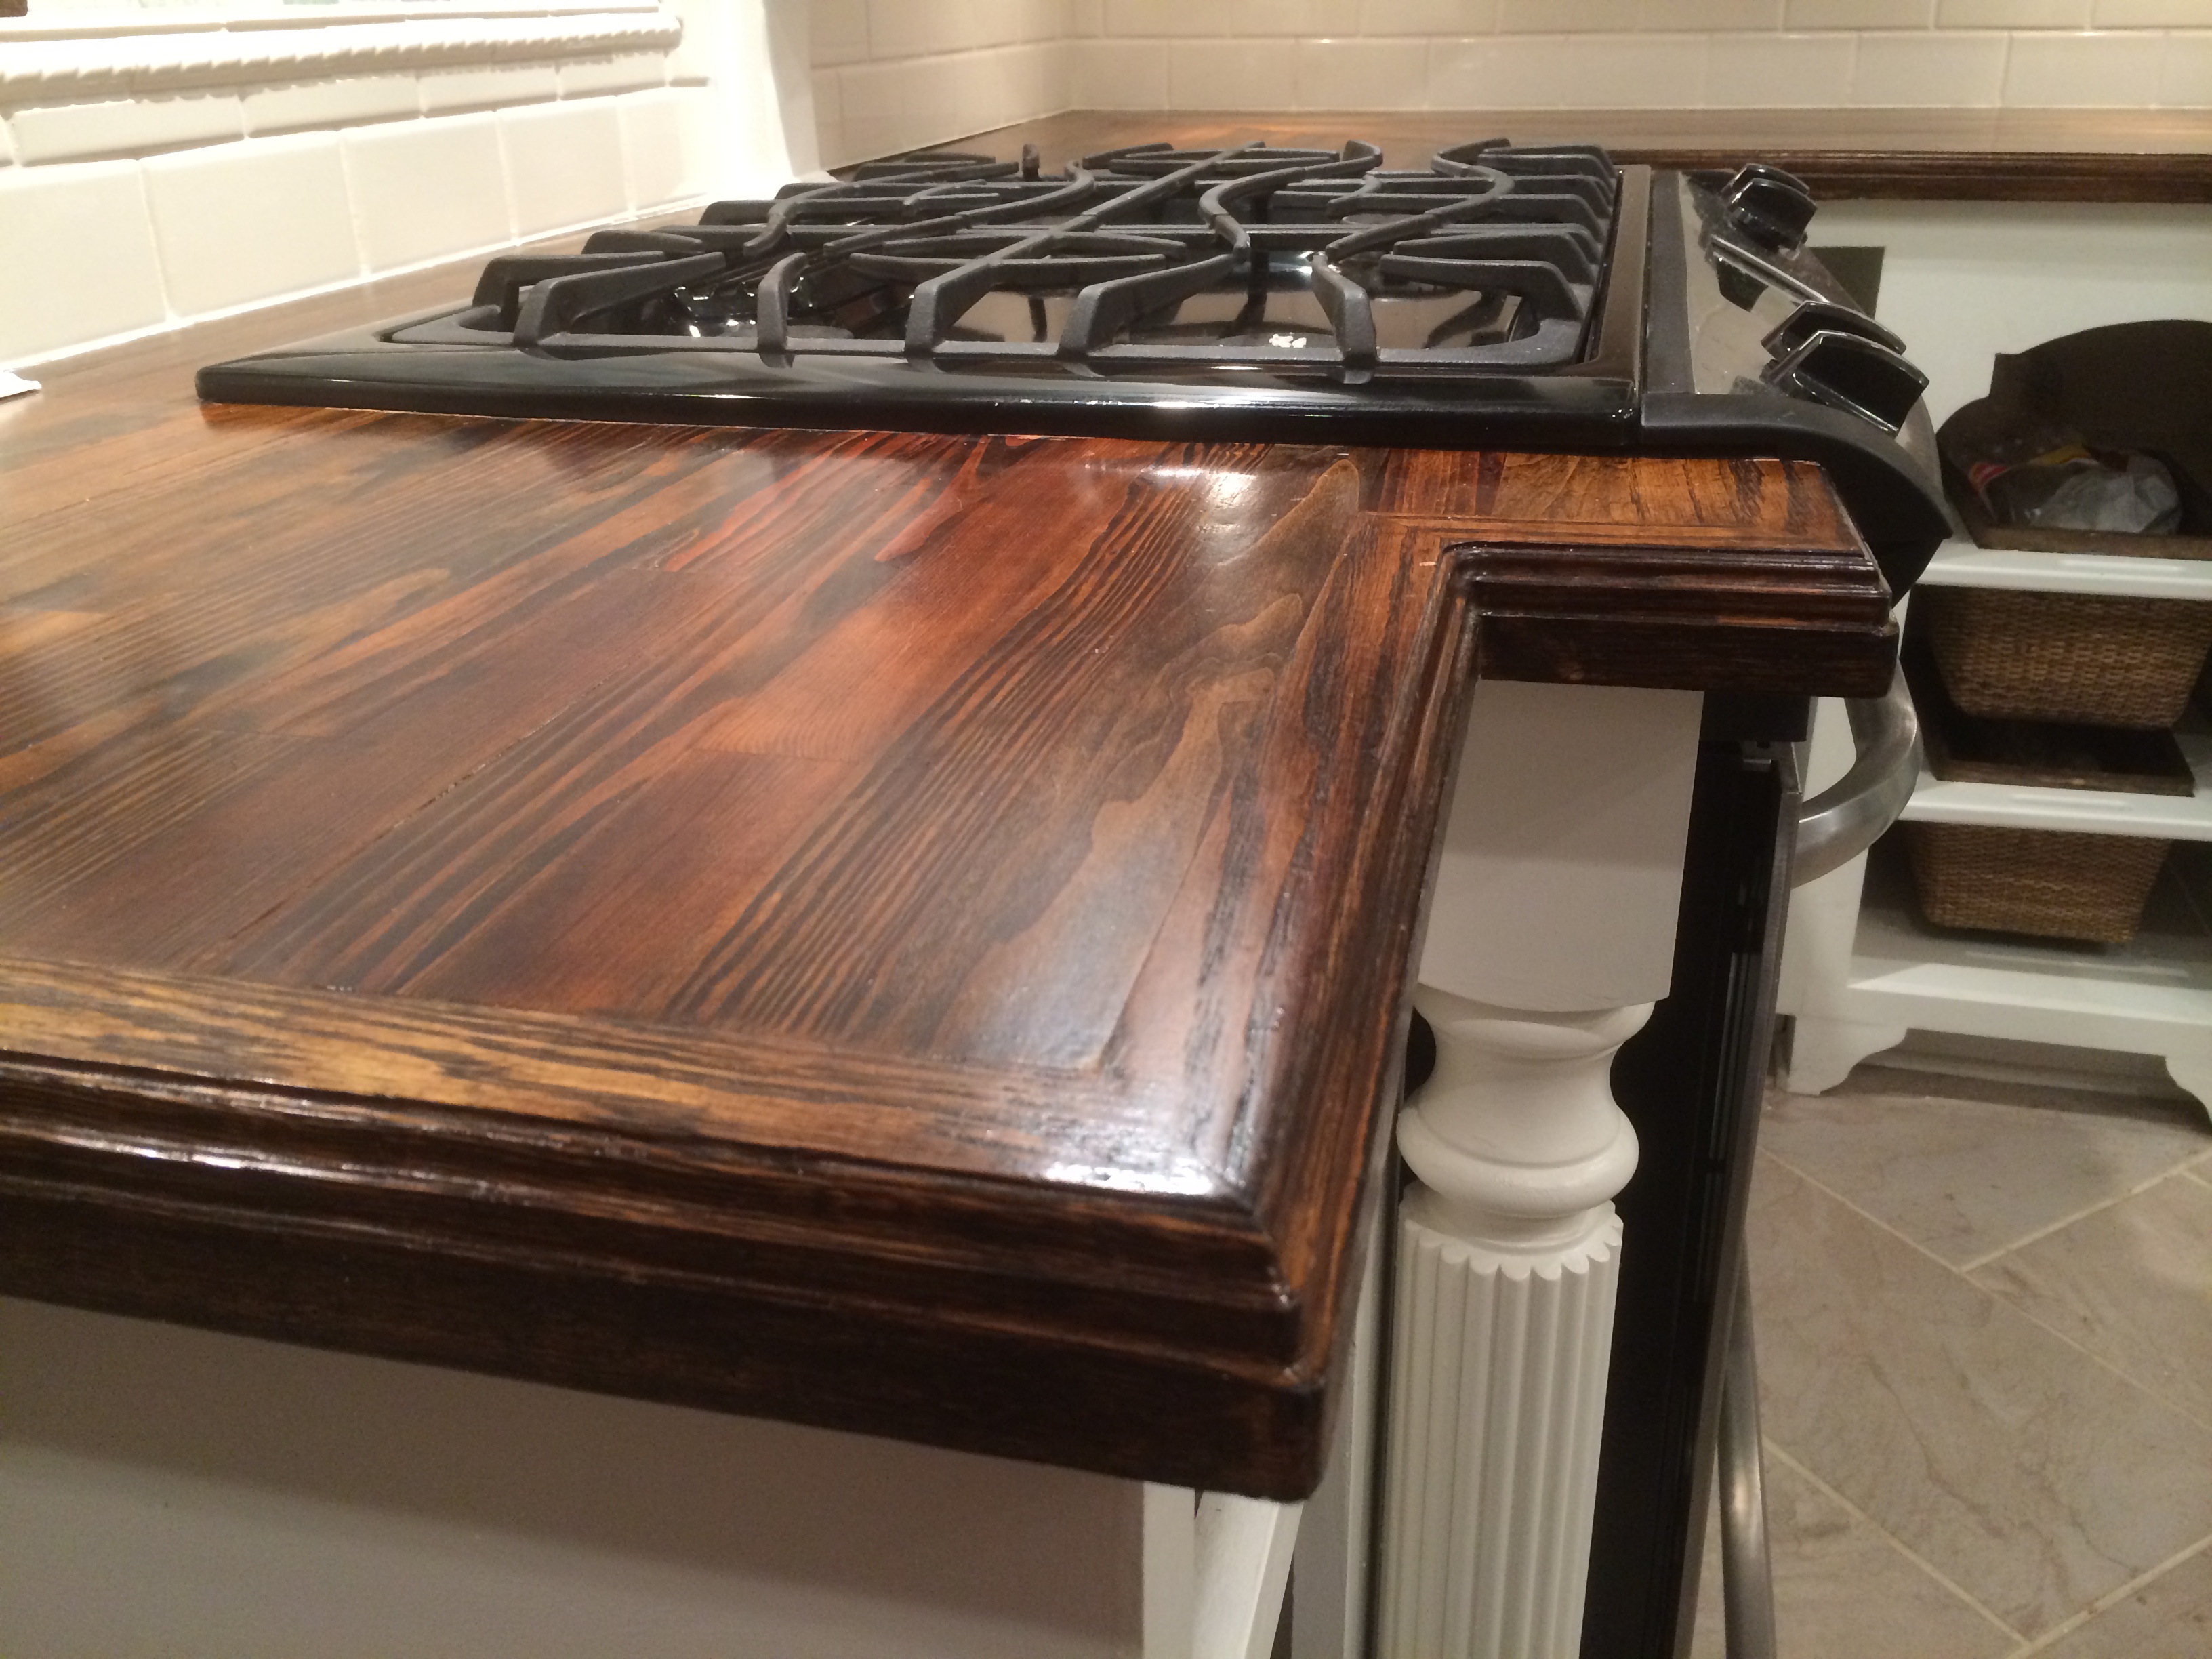
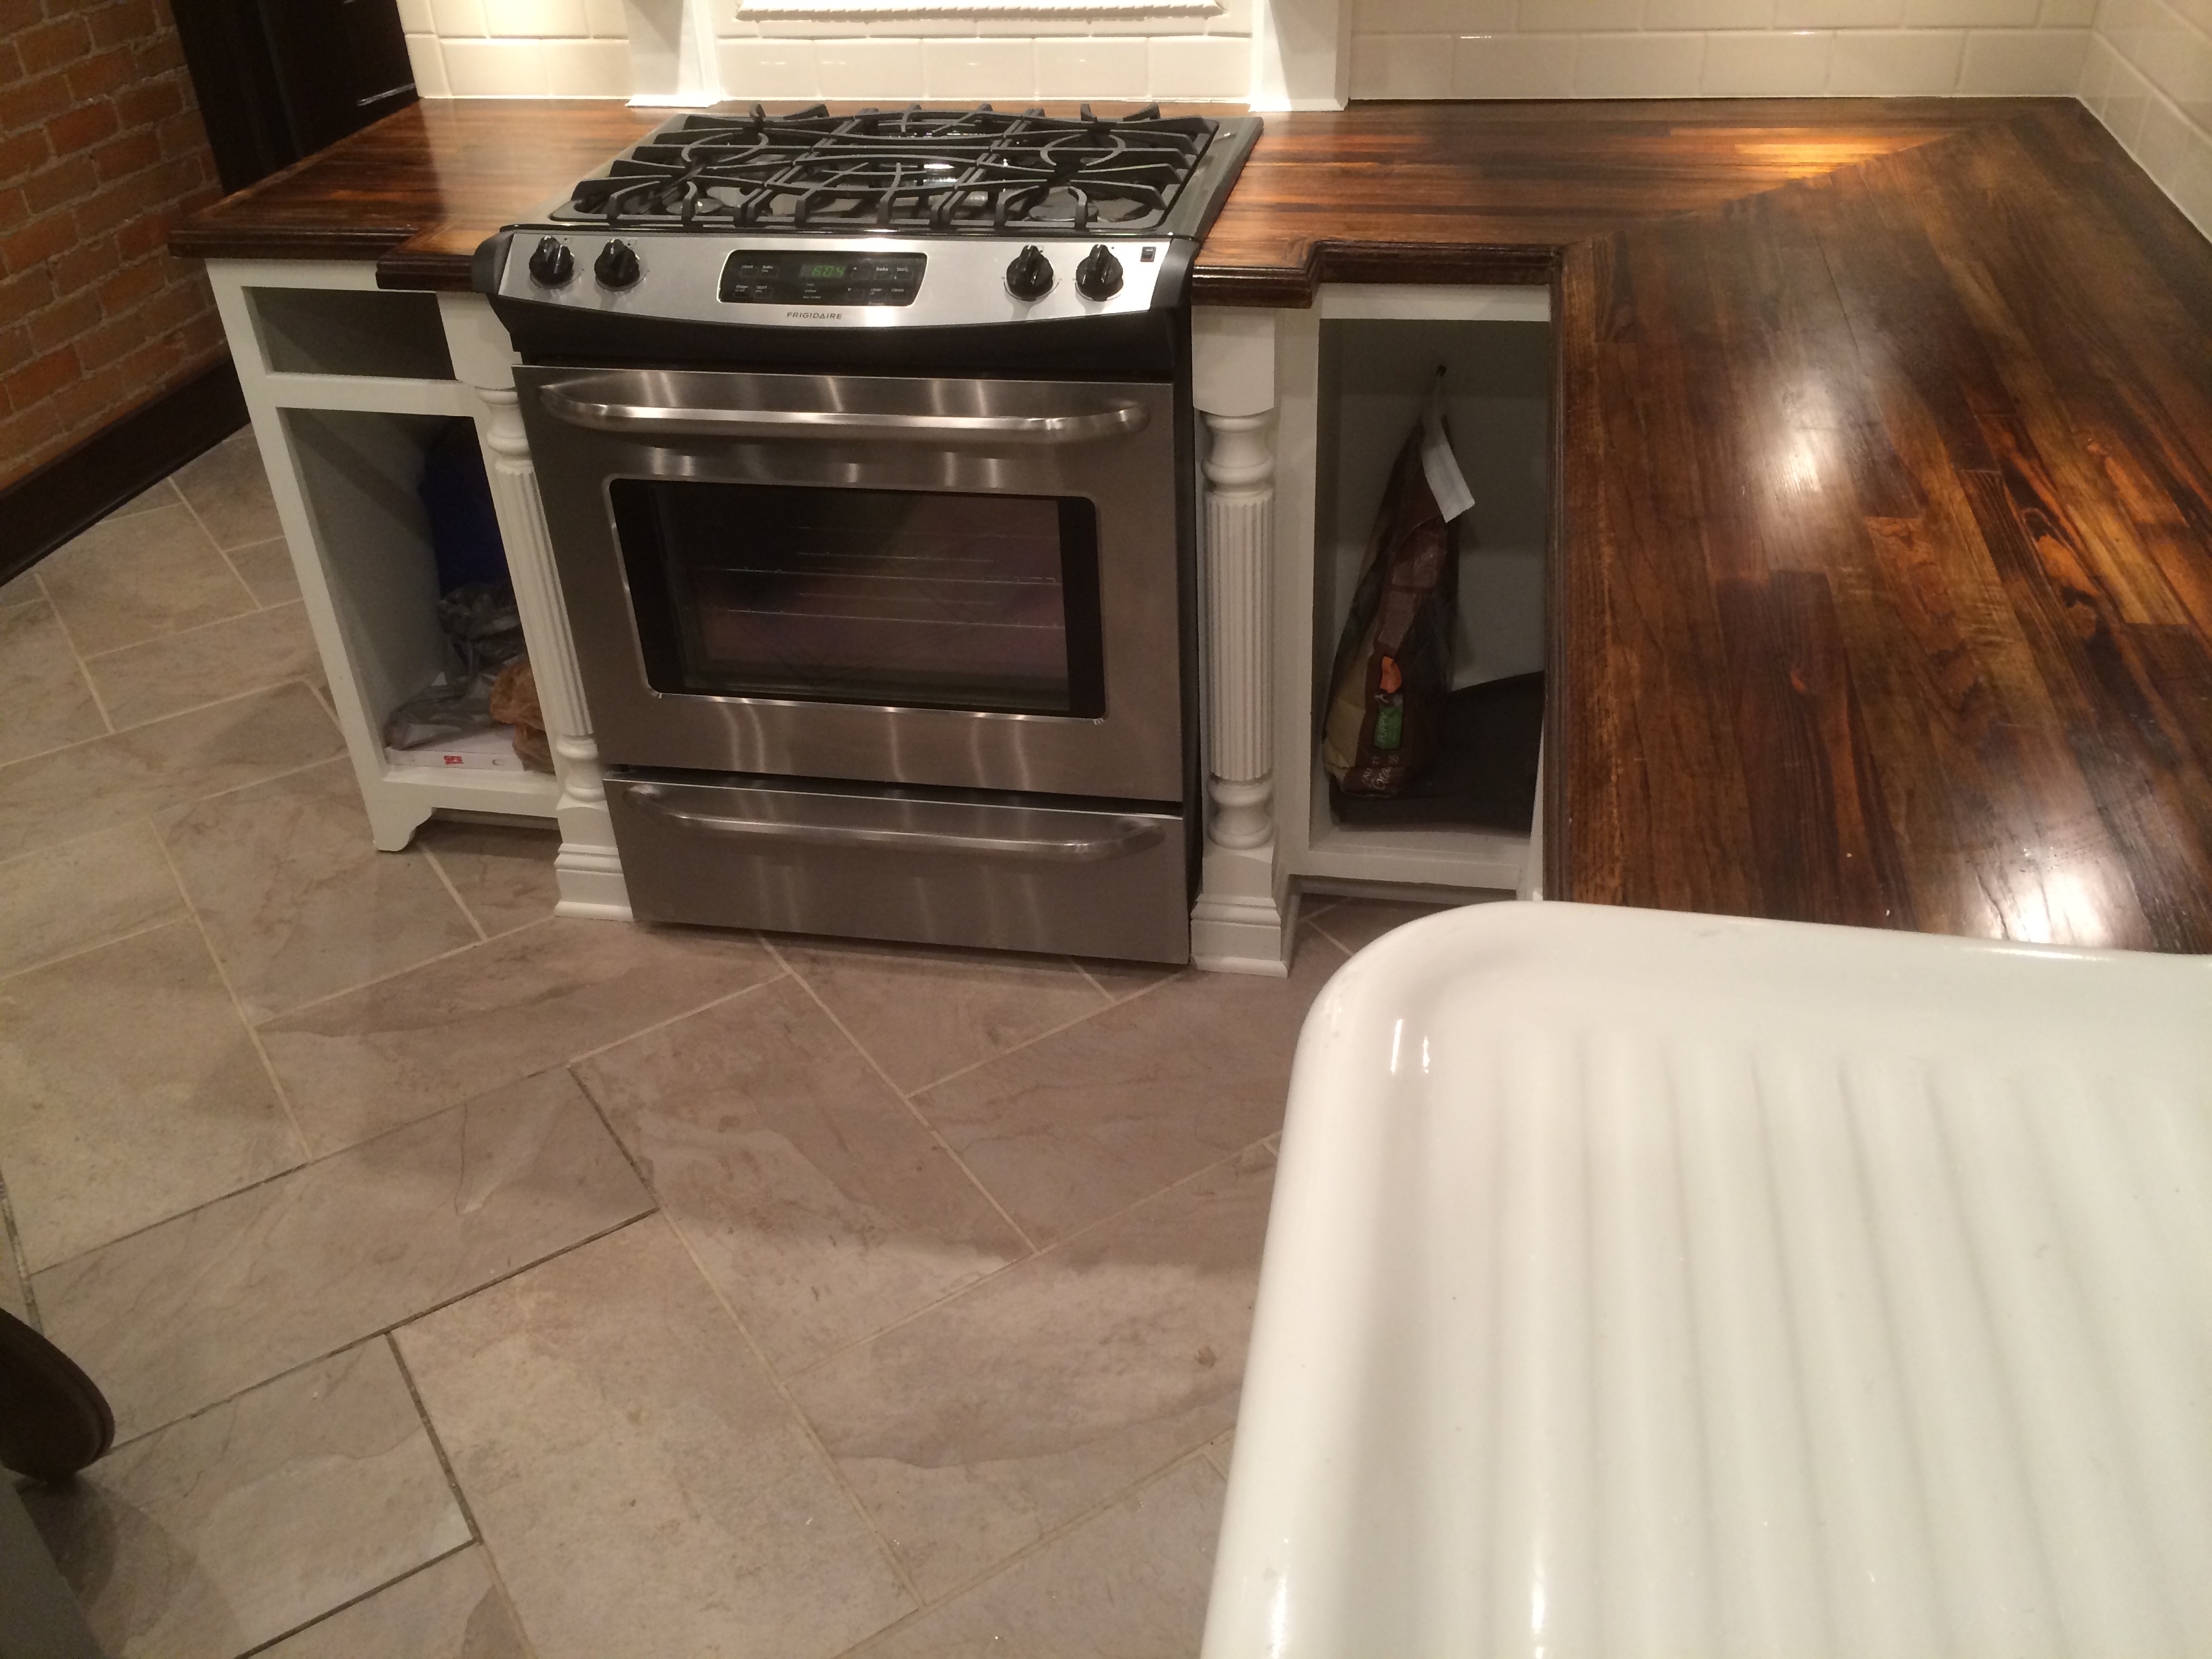
We had to add one more edge piece on to the front of the countertop which would be routed with a customized roman ogee profile. This gave the countertops a finished look.
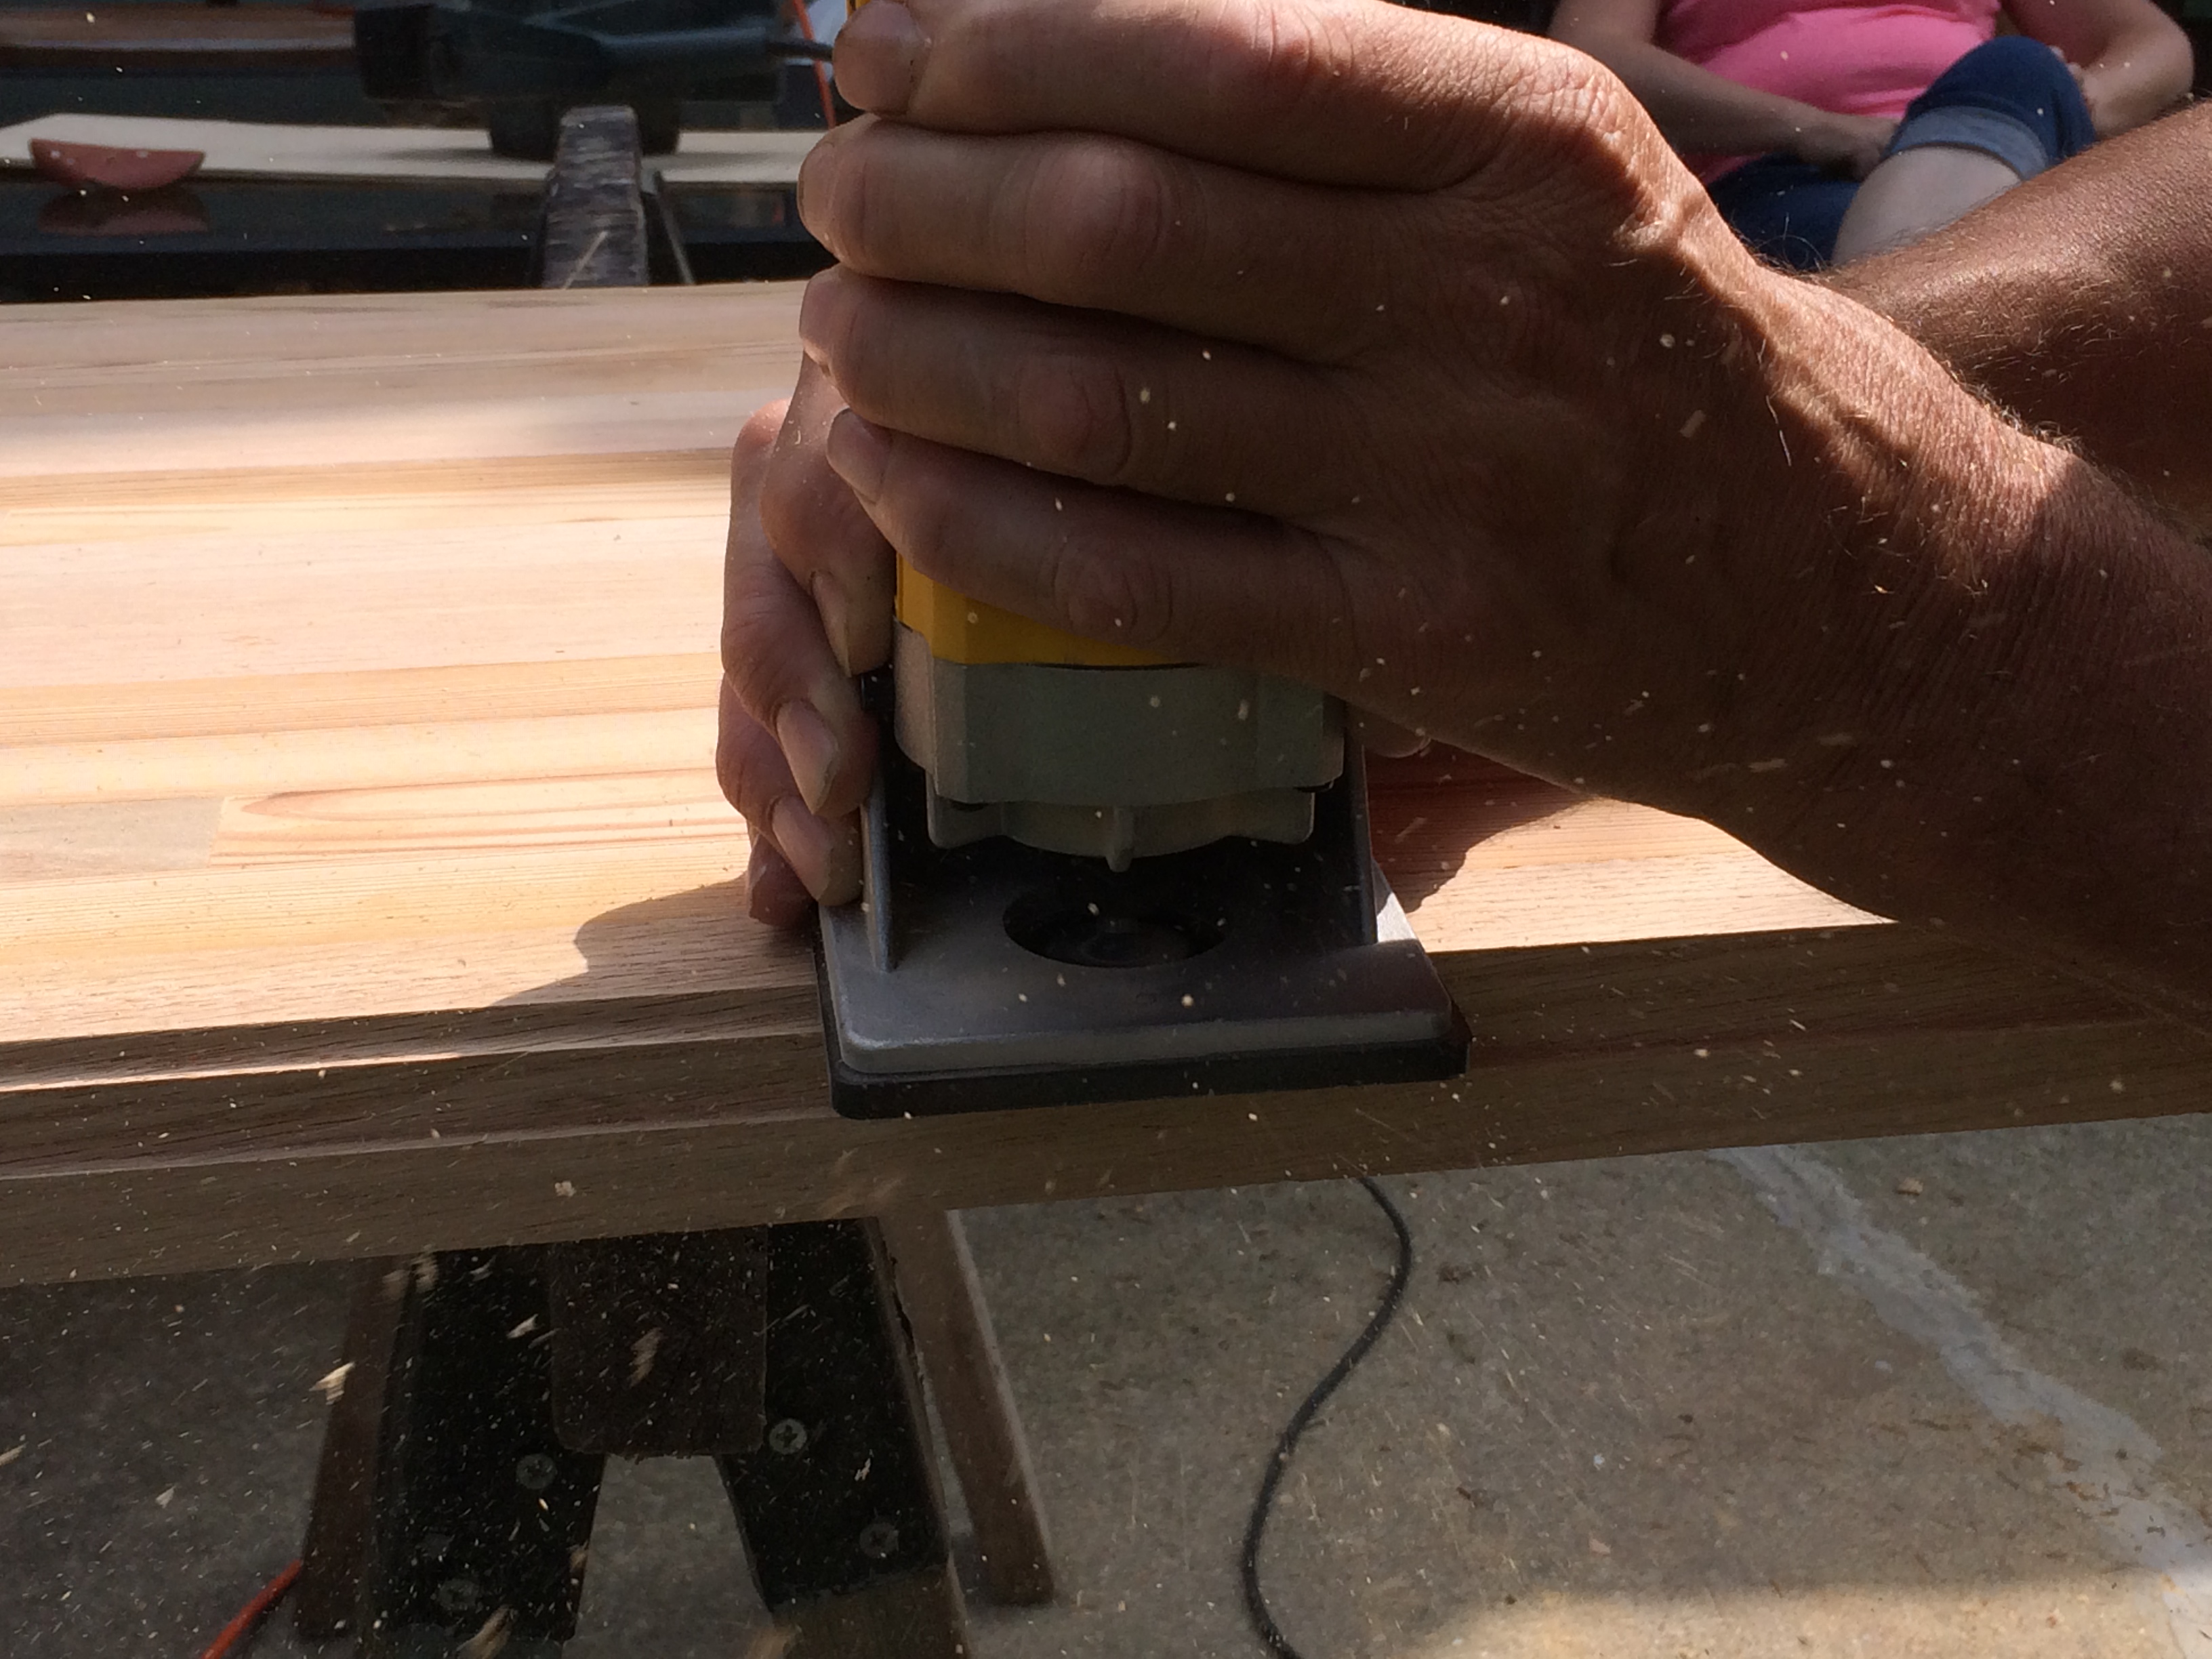
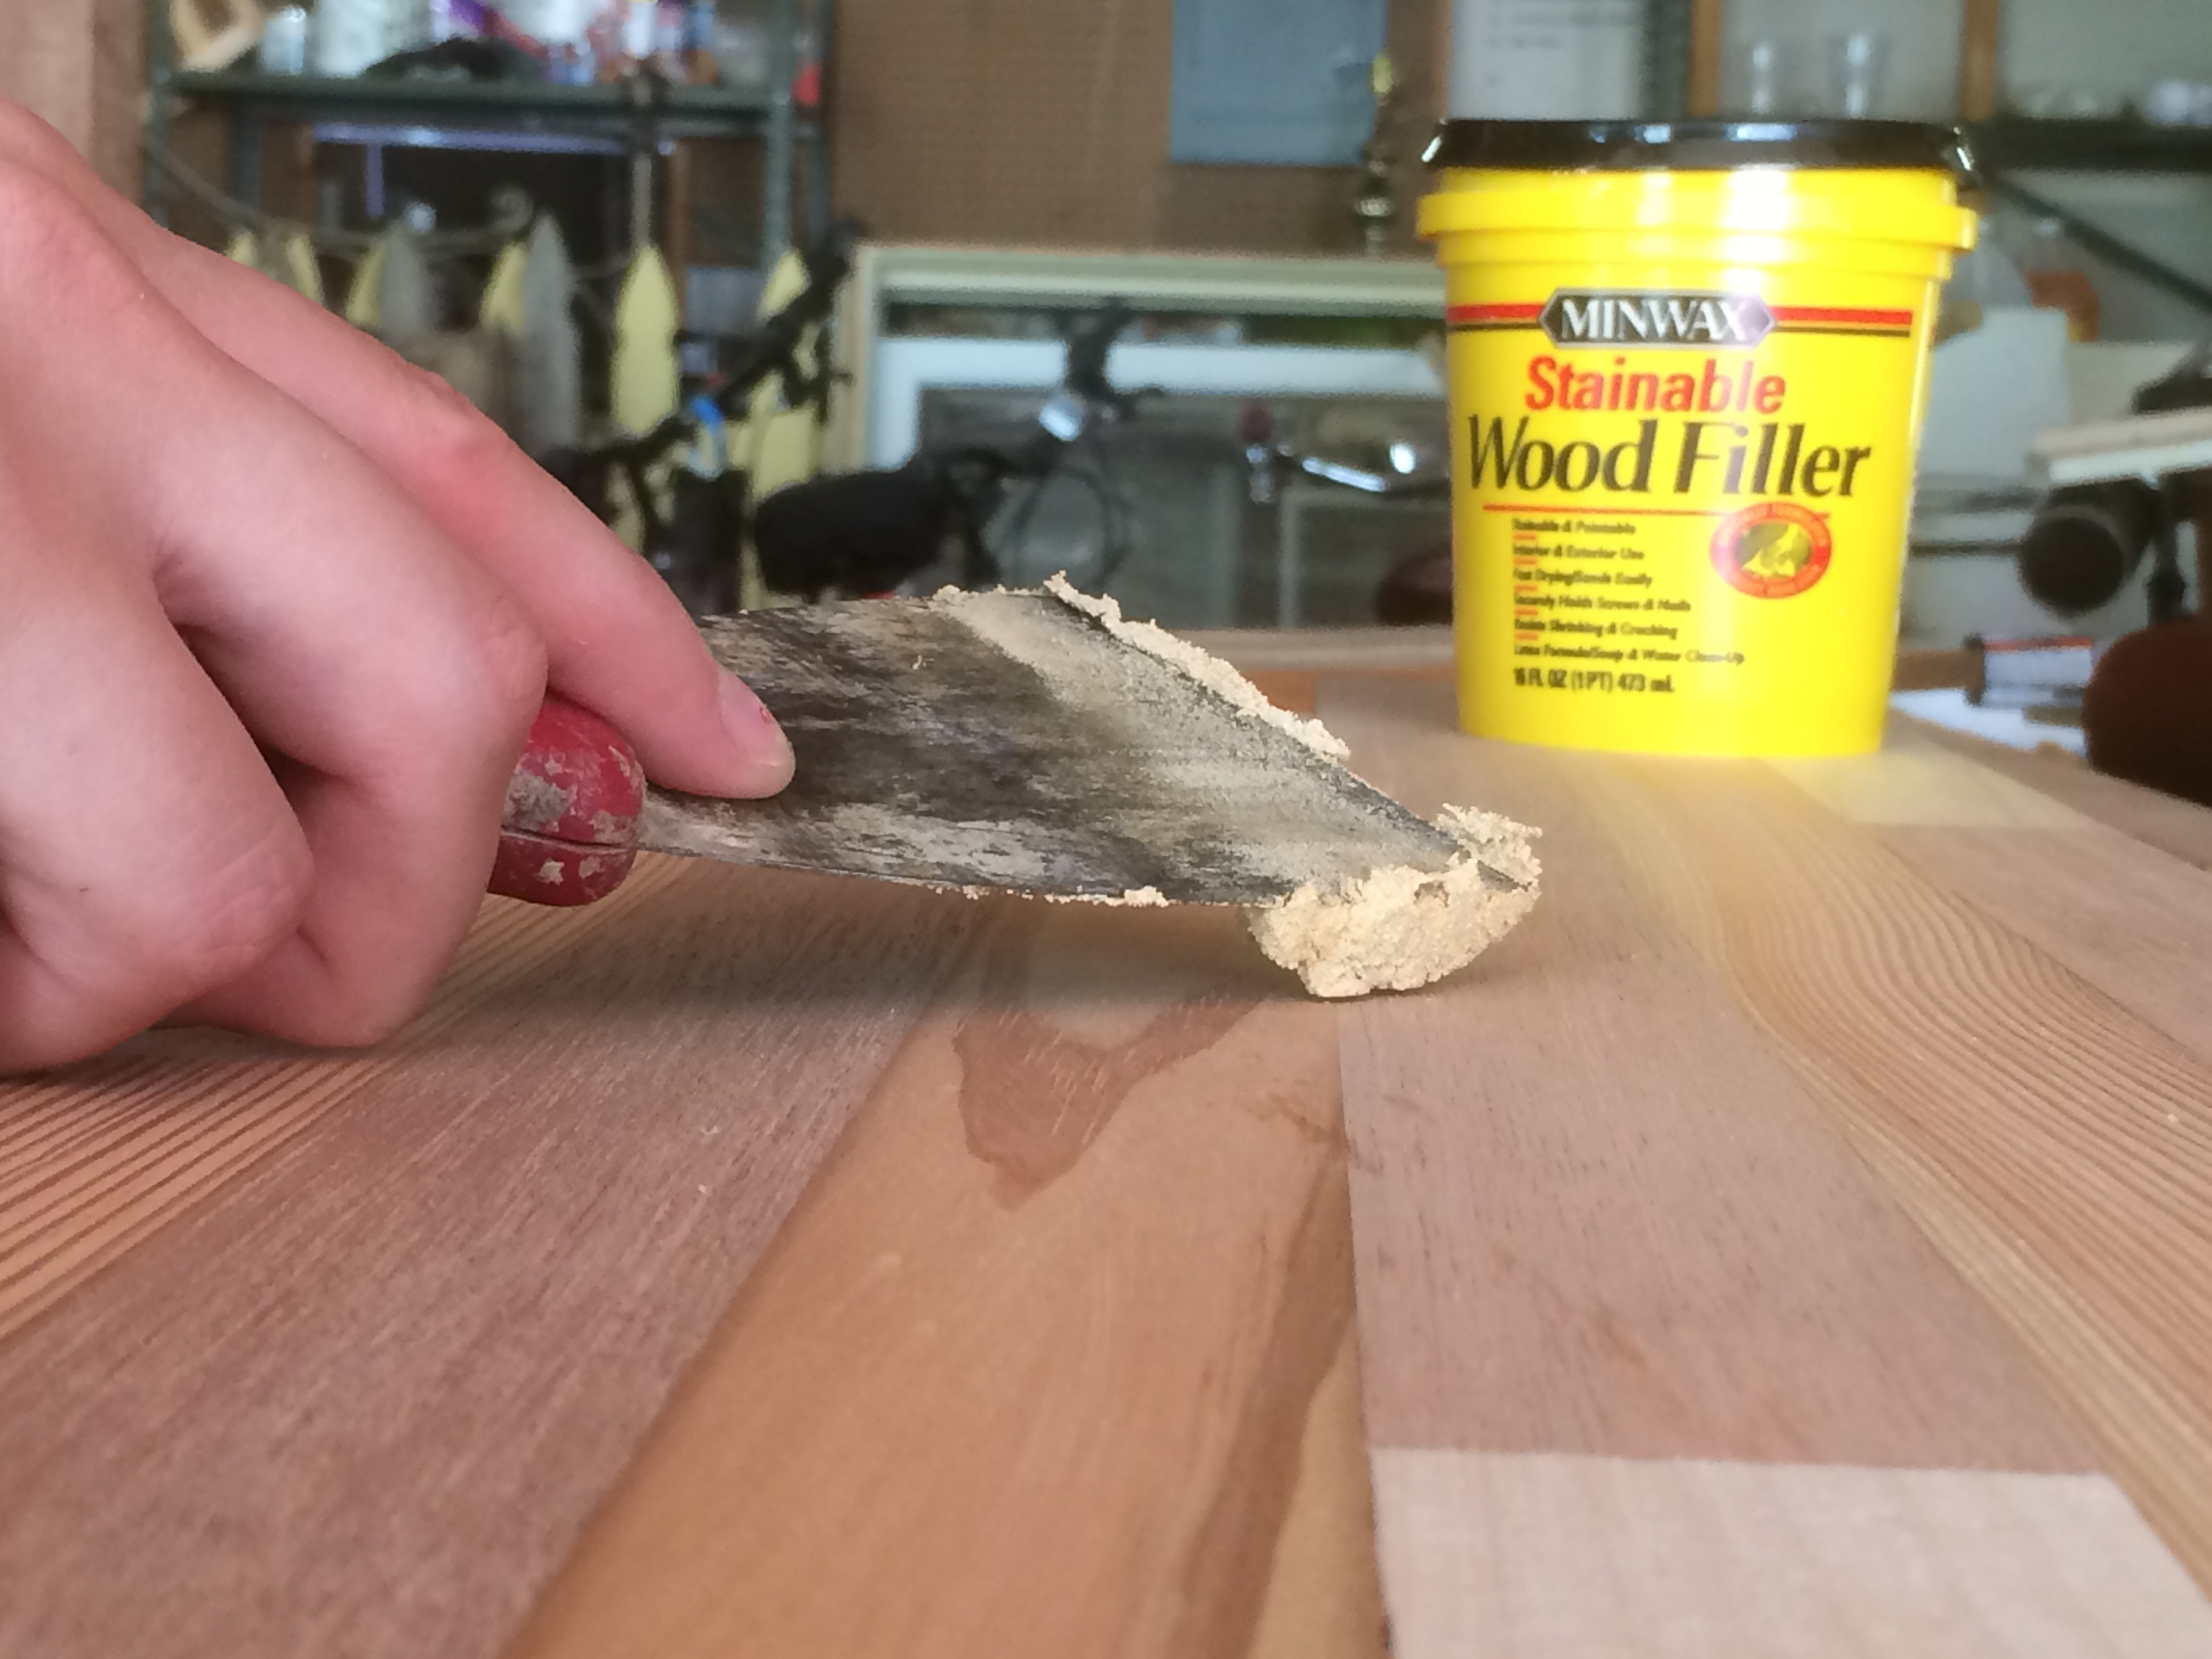
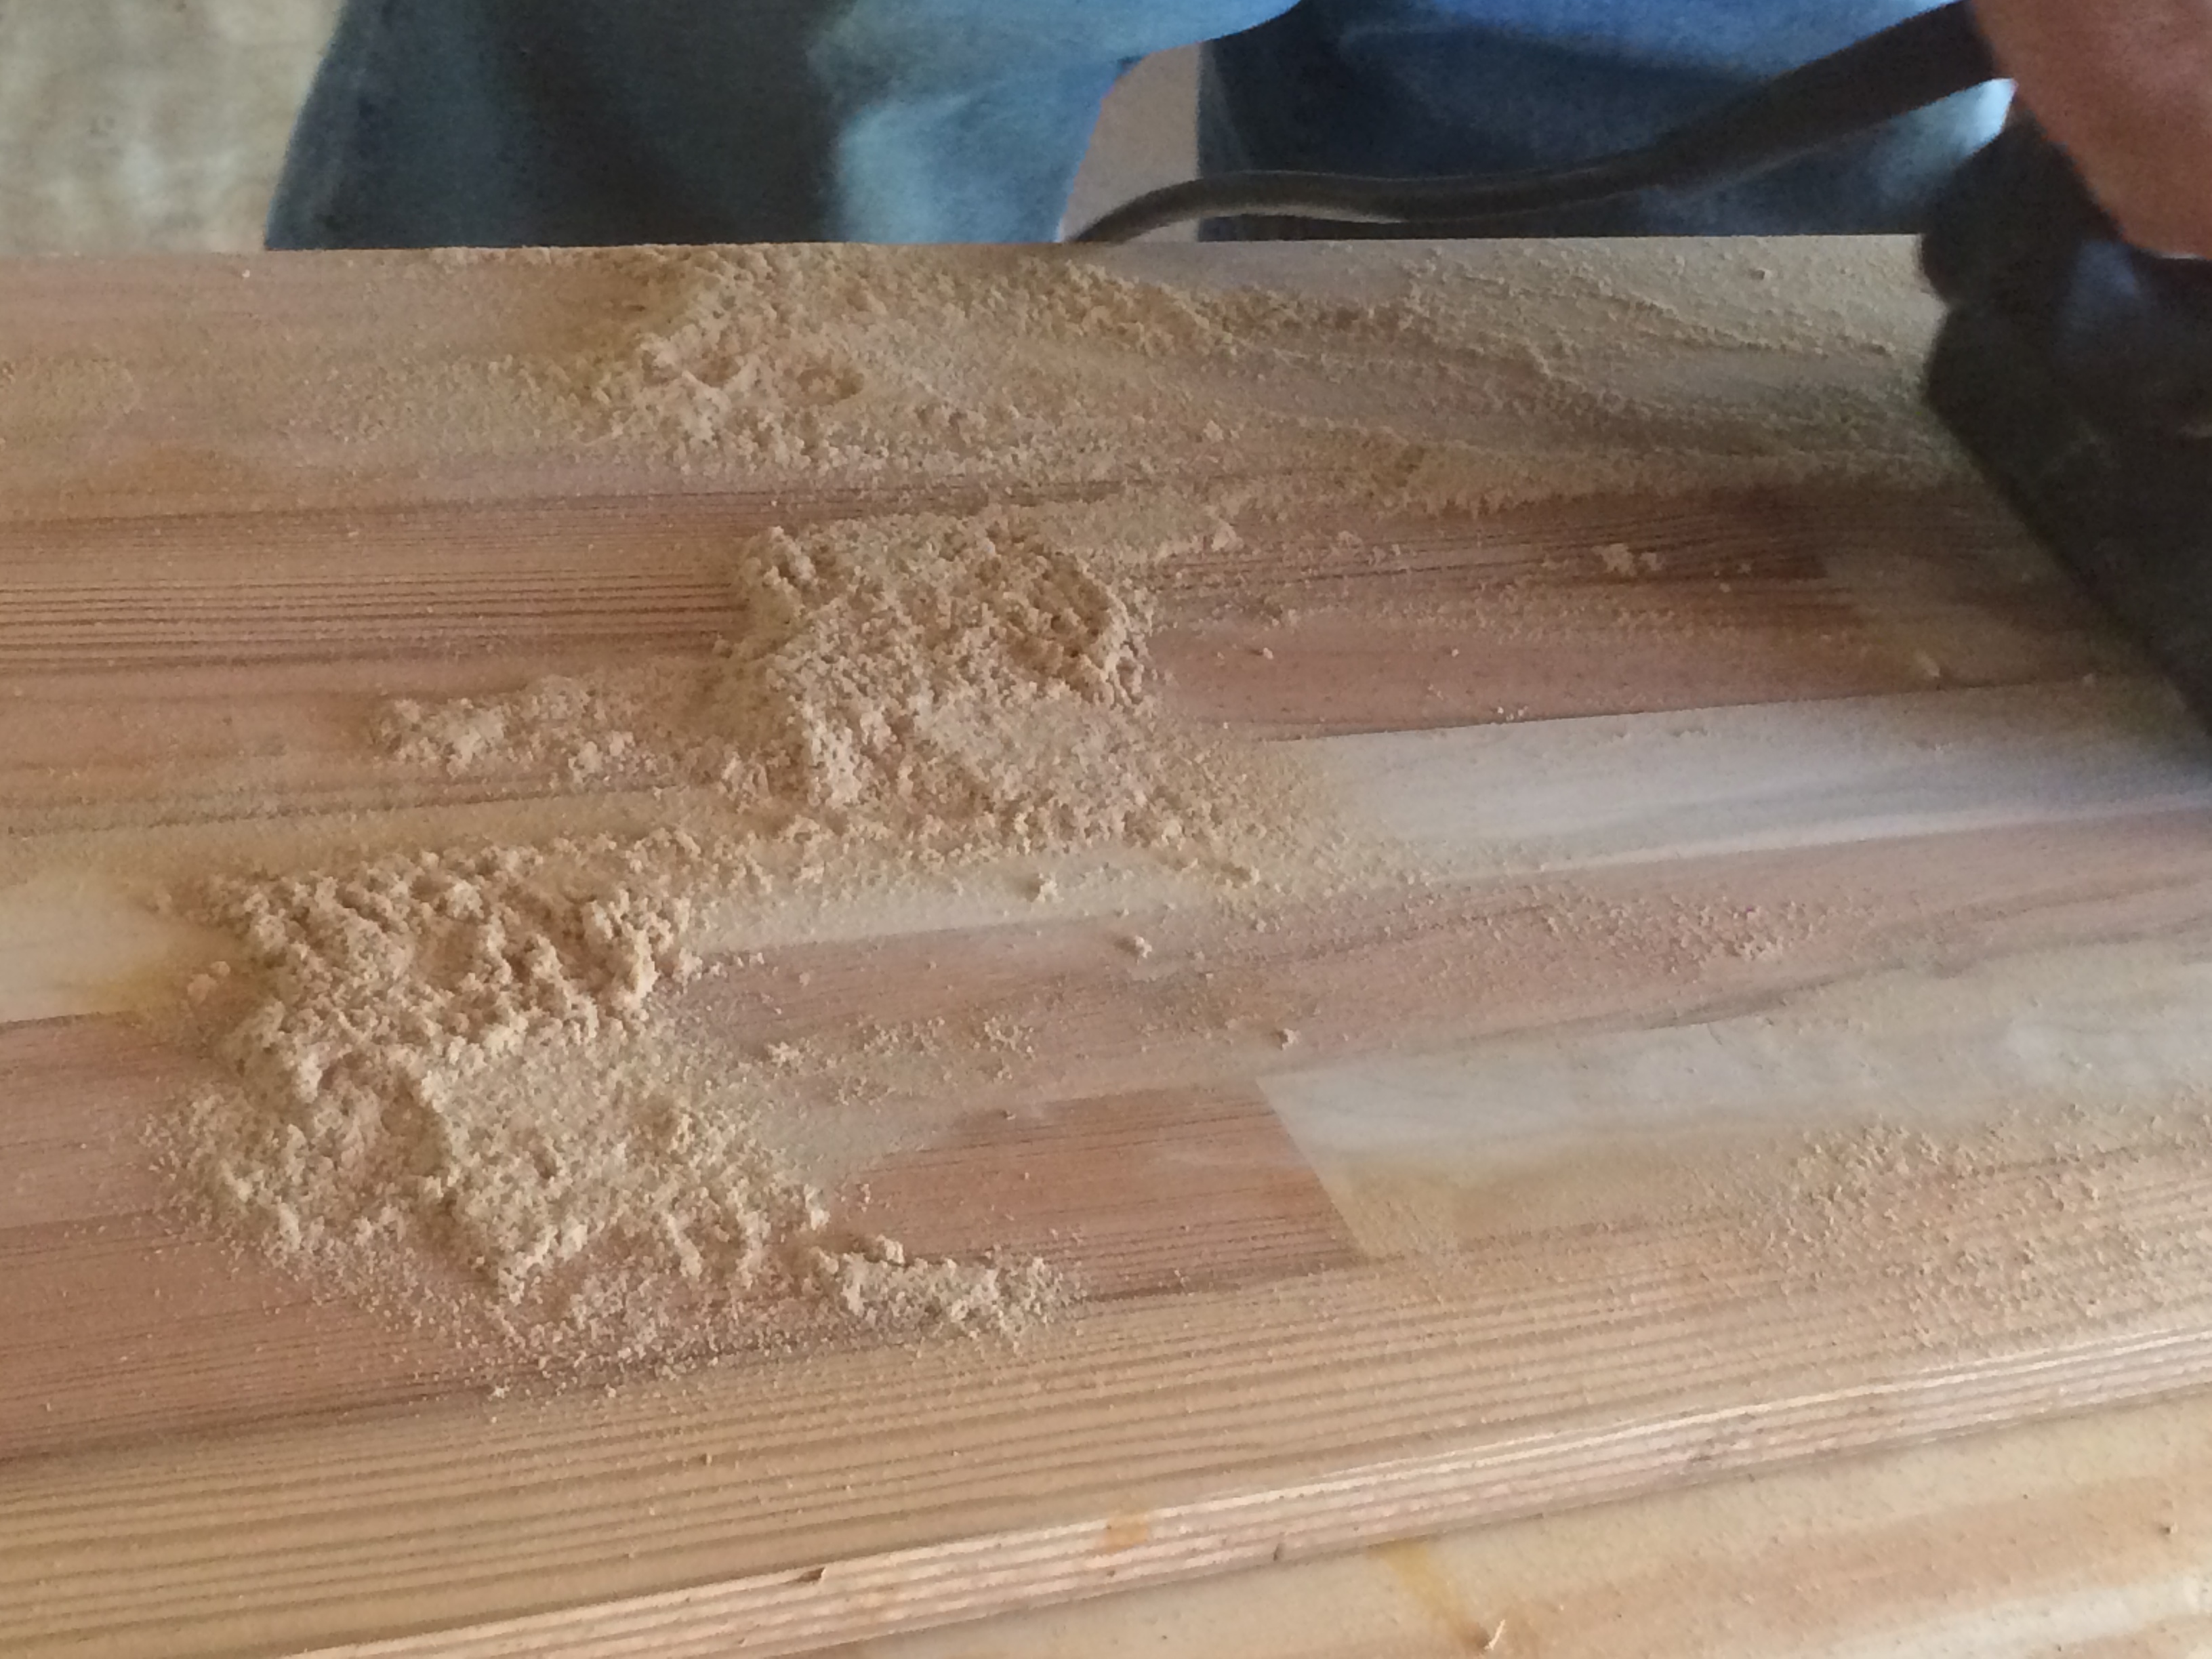
After that we had to begin the tedious process of using wood filler to hide all the minute gaps between the strips of wood. Then, it was a whole lot of sanding!

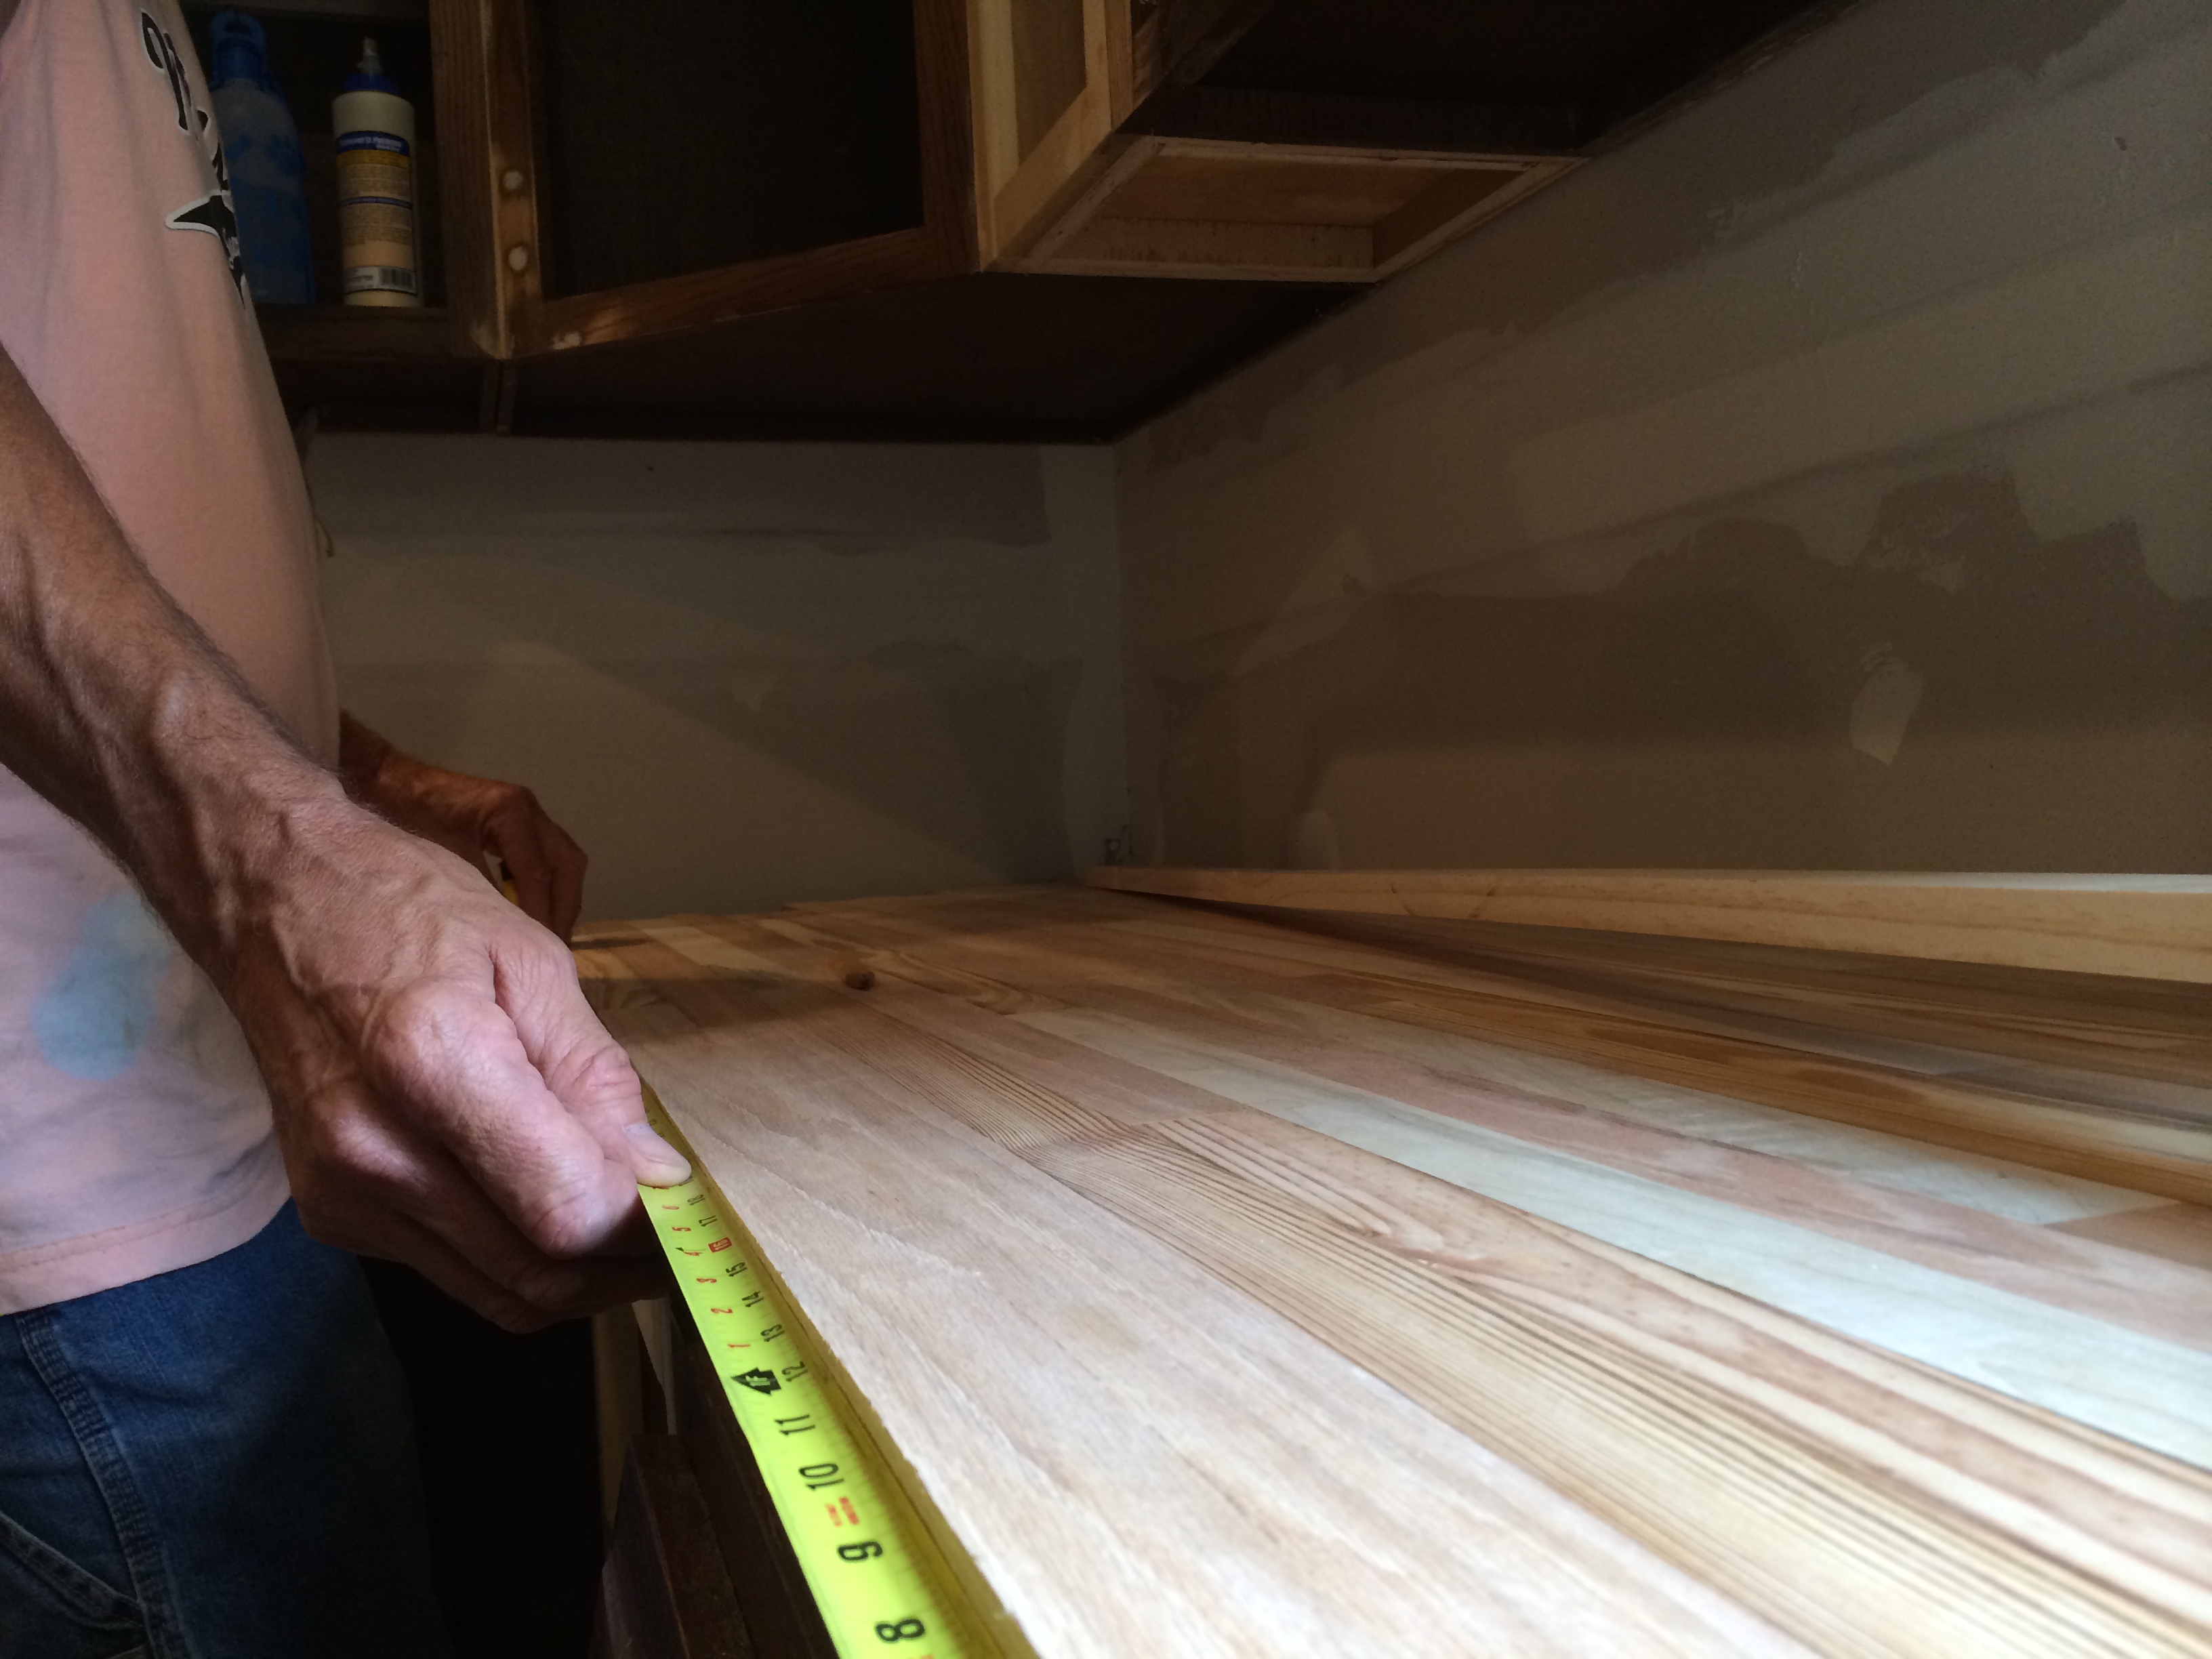
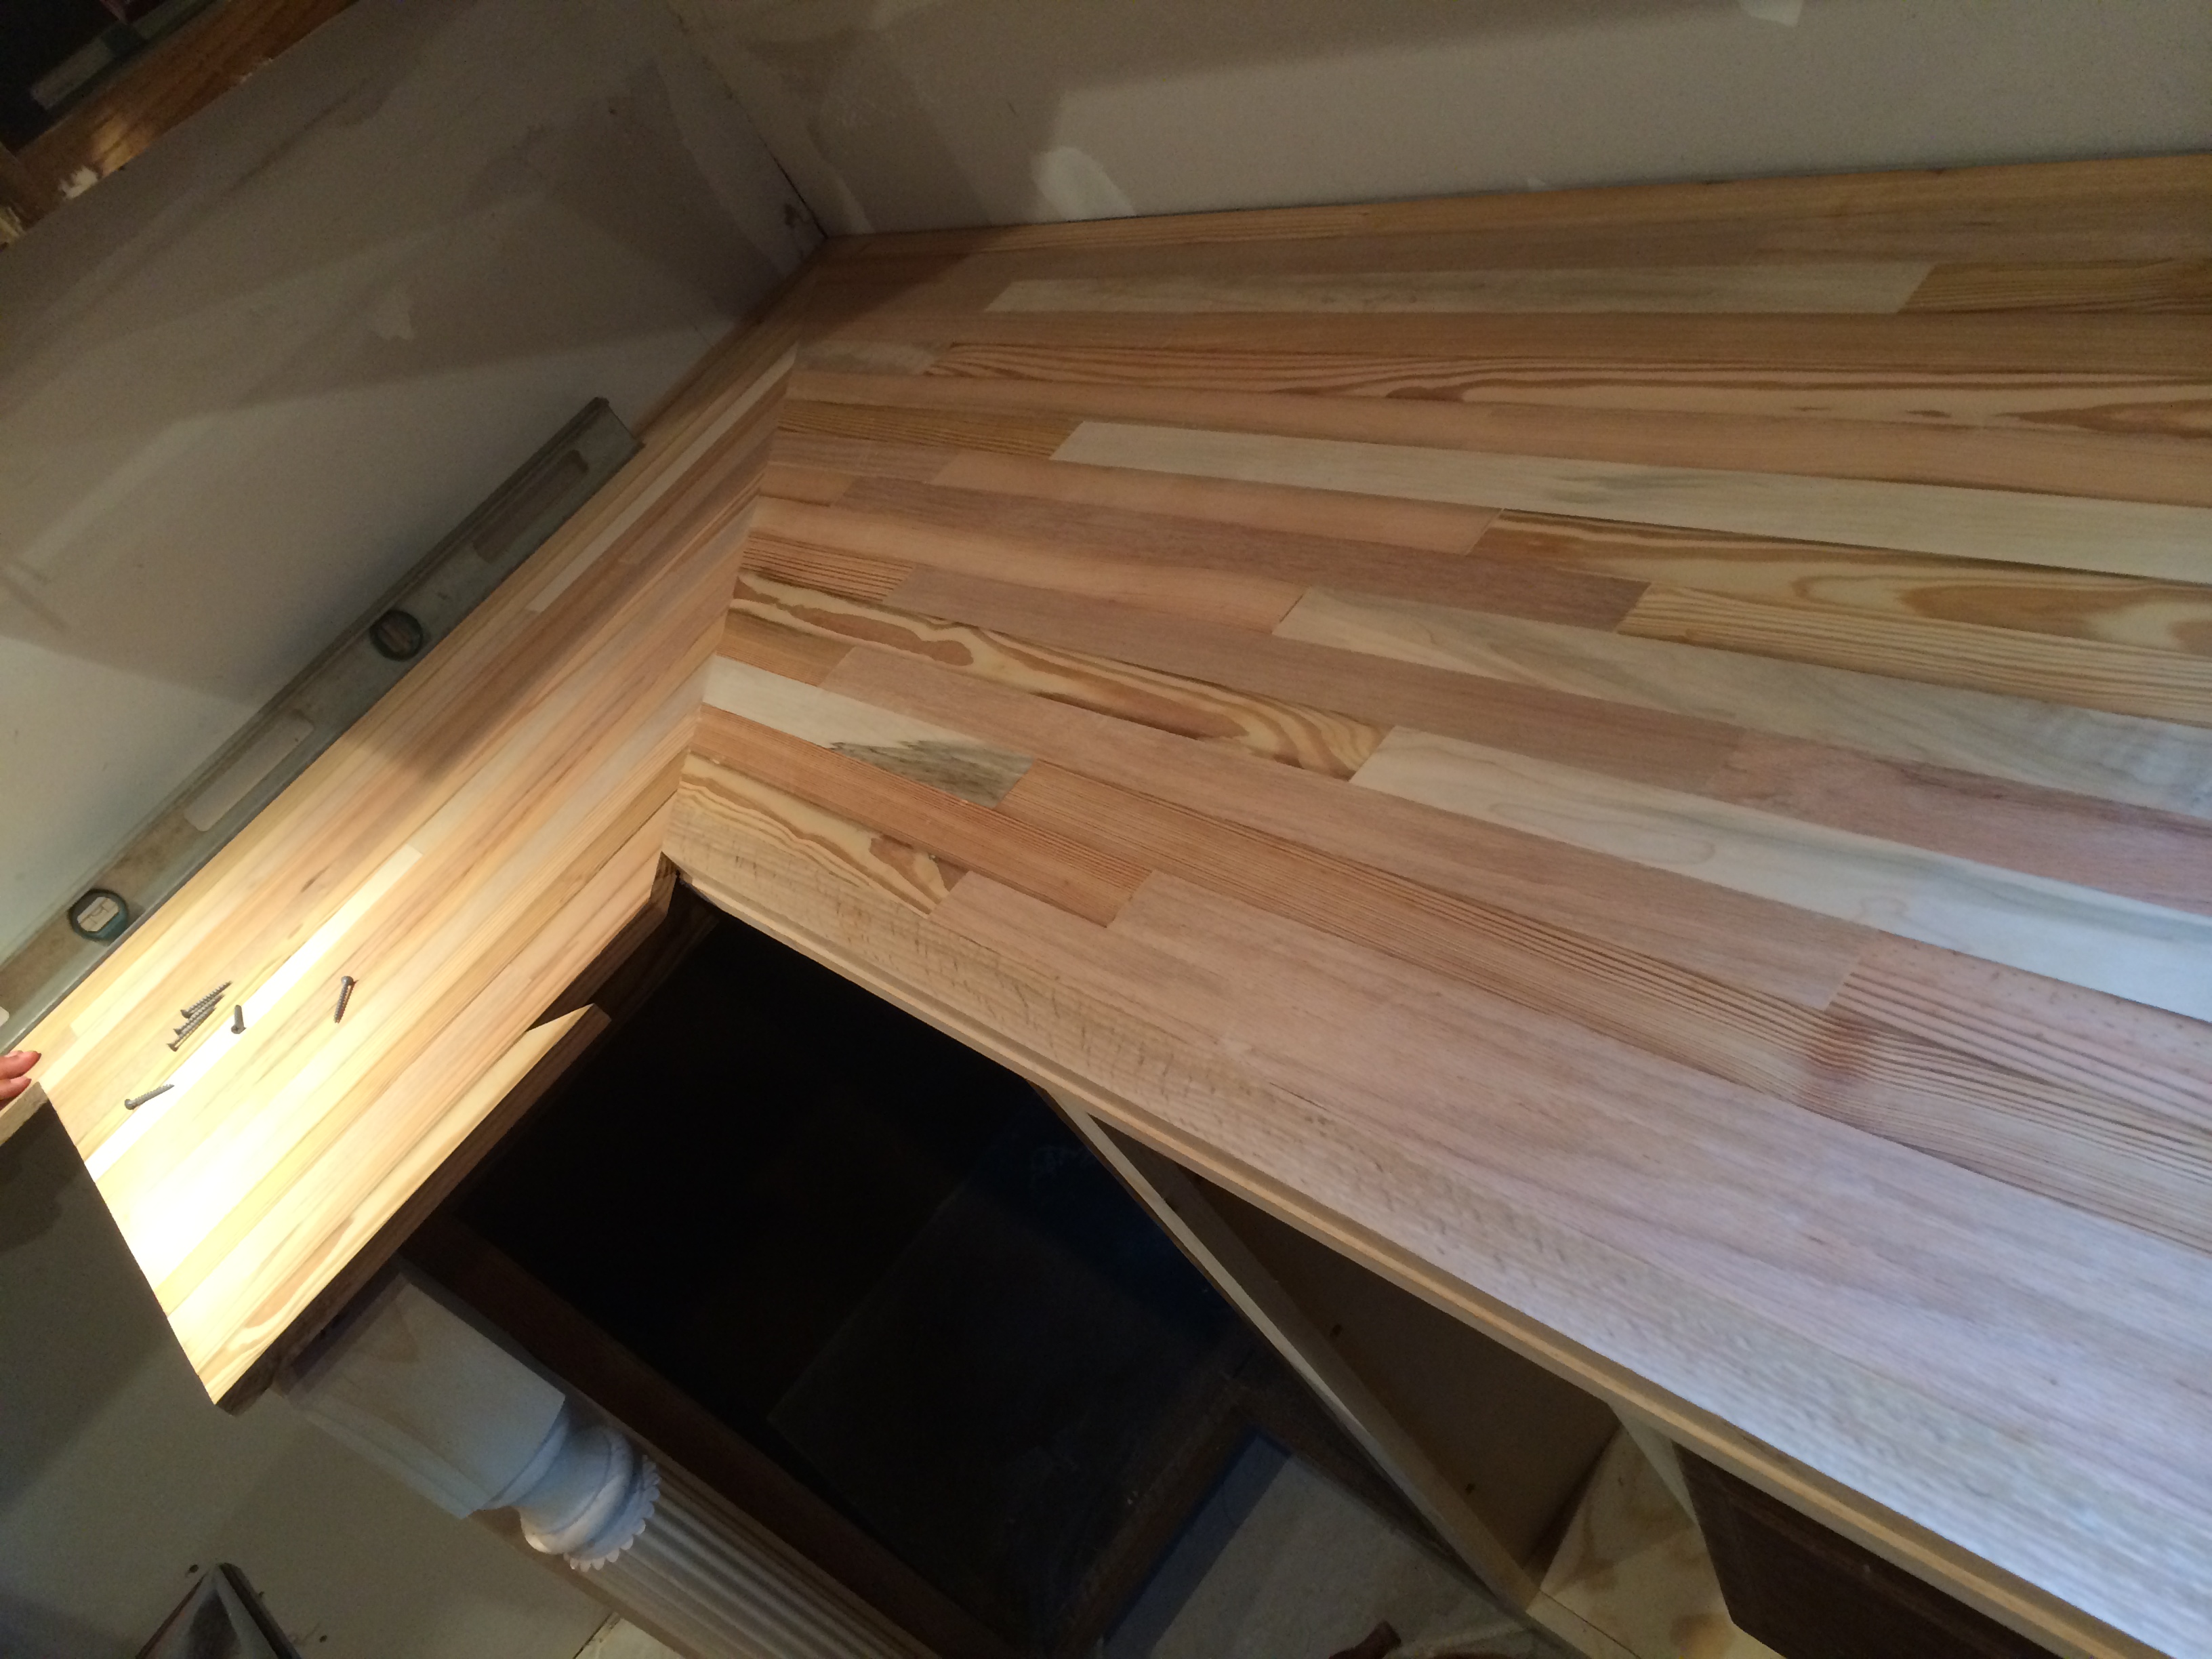
Soon it was time to bring the countertops in and start fitting them. Some of the cuts were difficult. We had to create two custom edges to match the profile of our antique cast iron sink. We also had to create a mitered corner at the junction of two slabs of countertop.
Aren’t they just BEAUTIFUL?!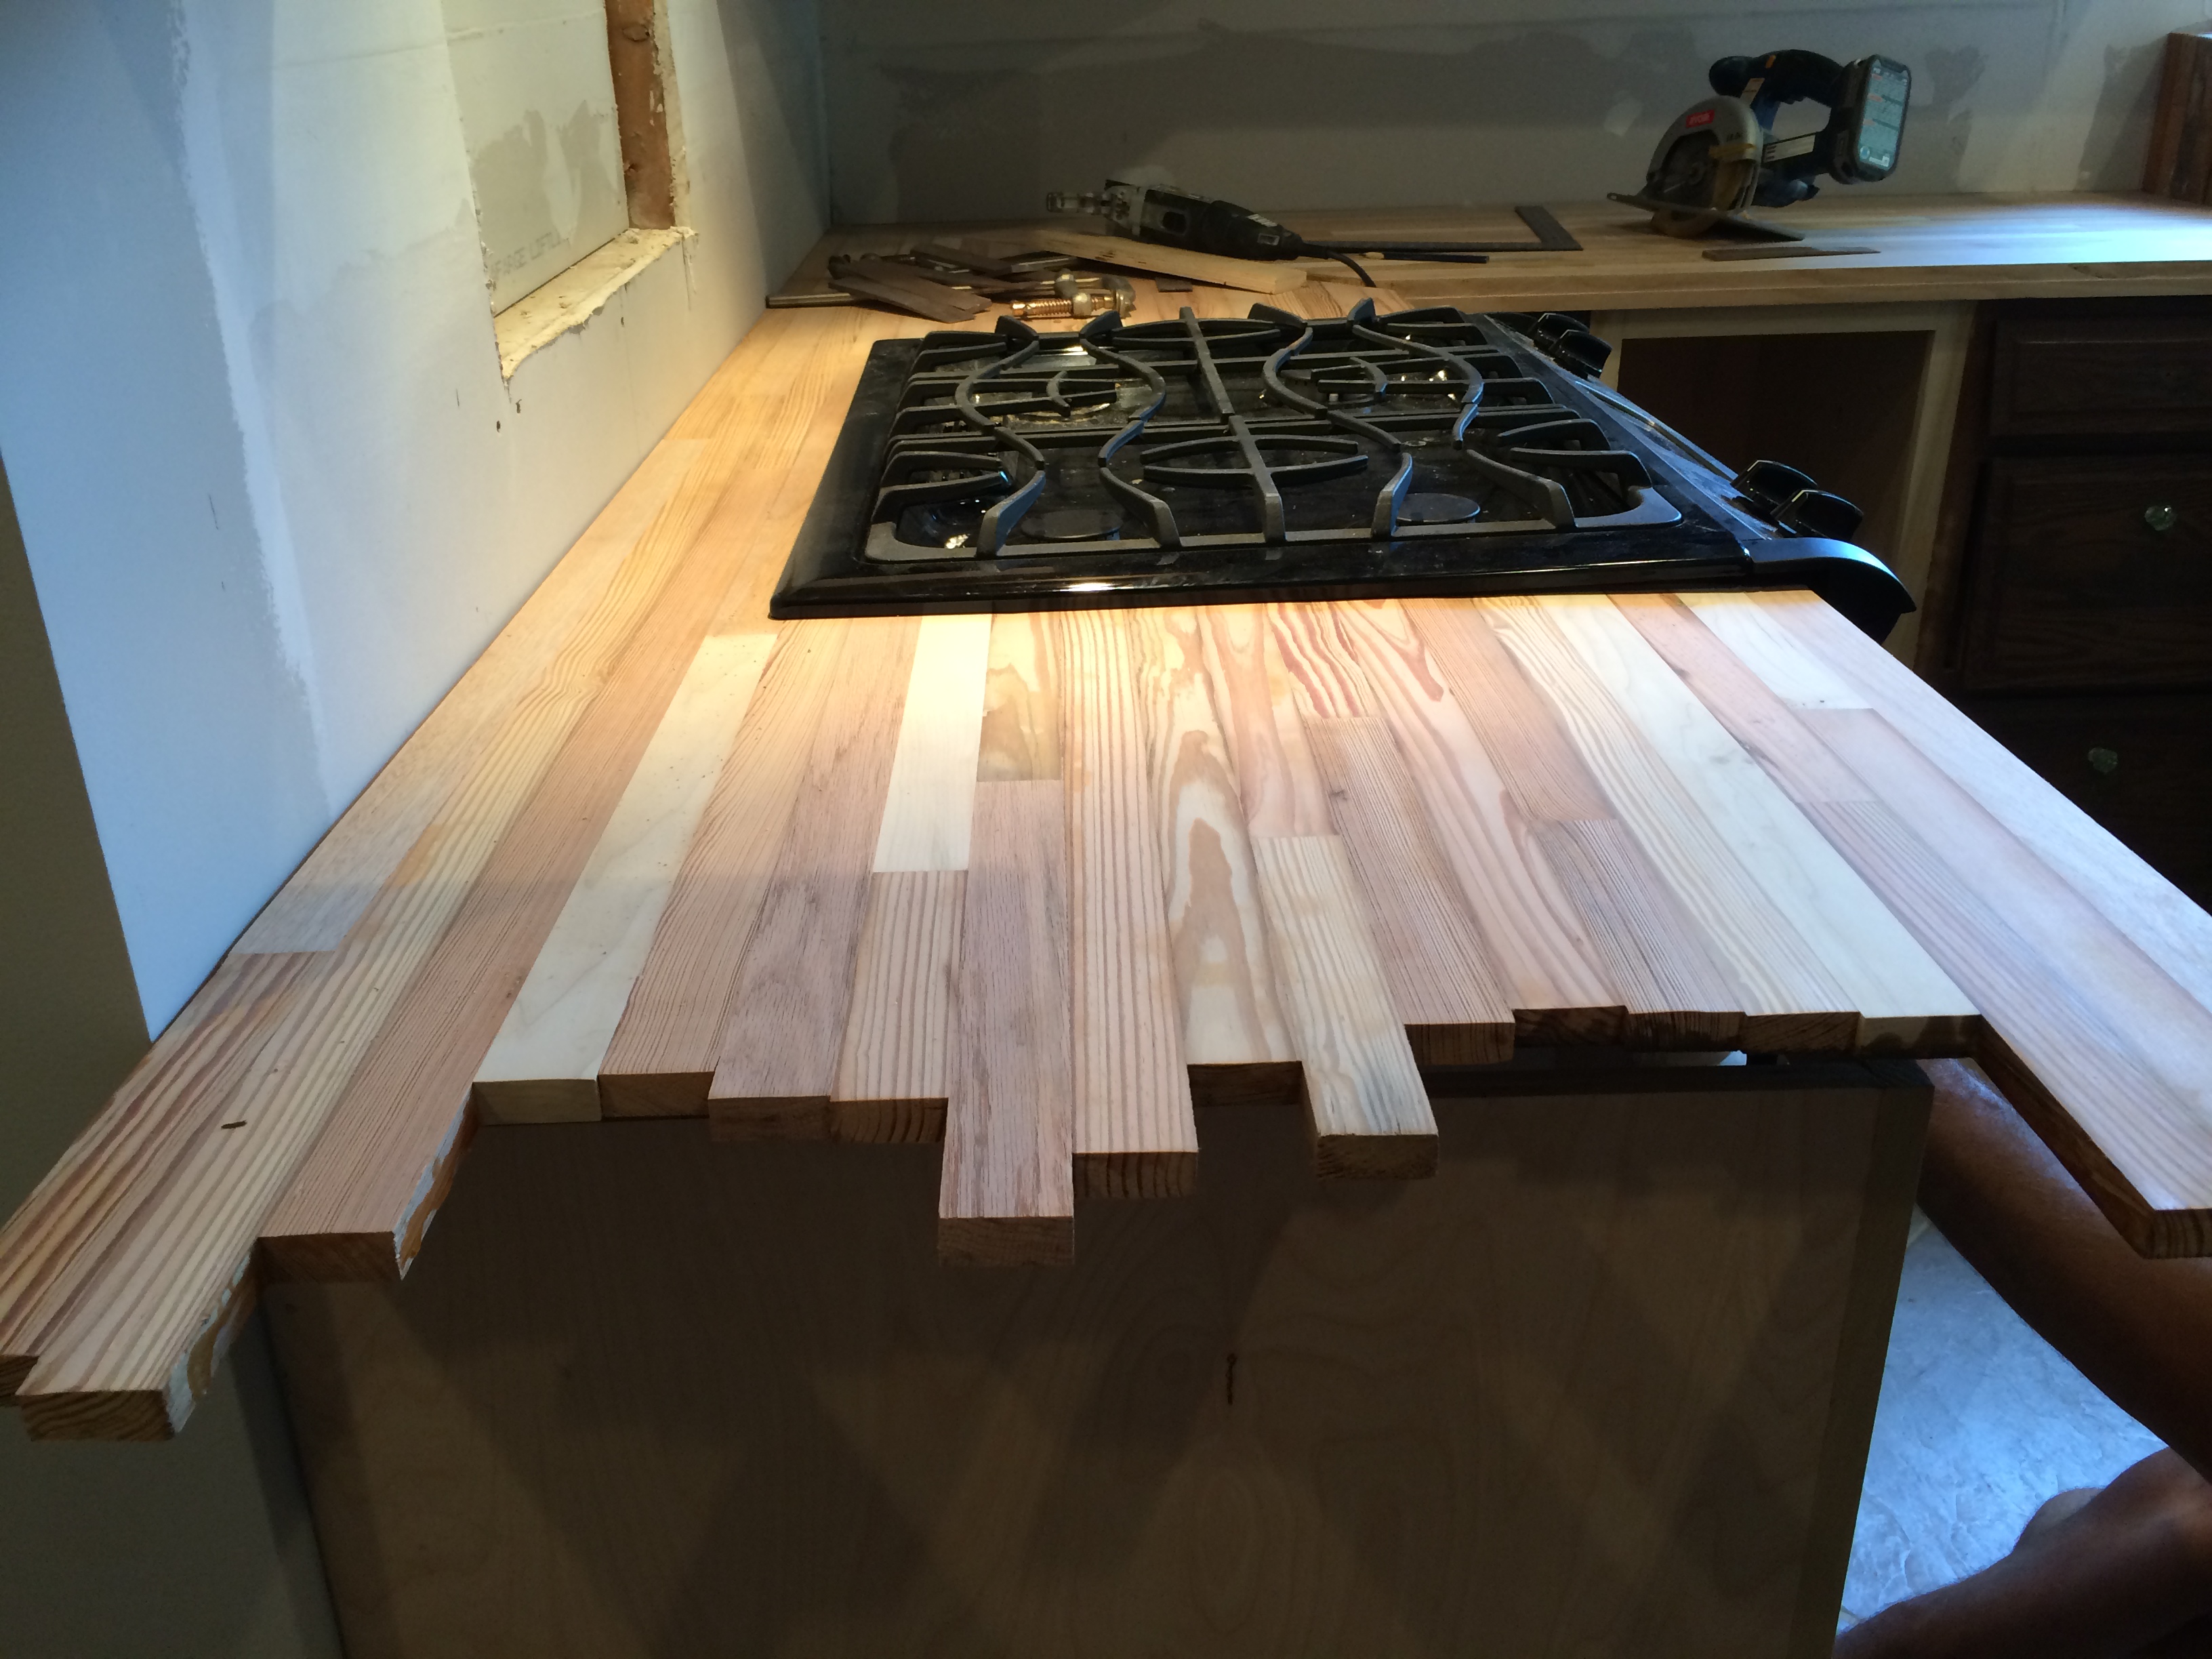
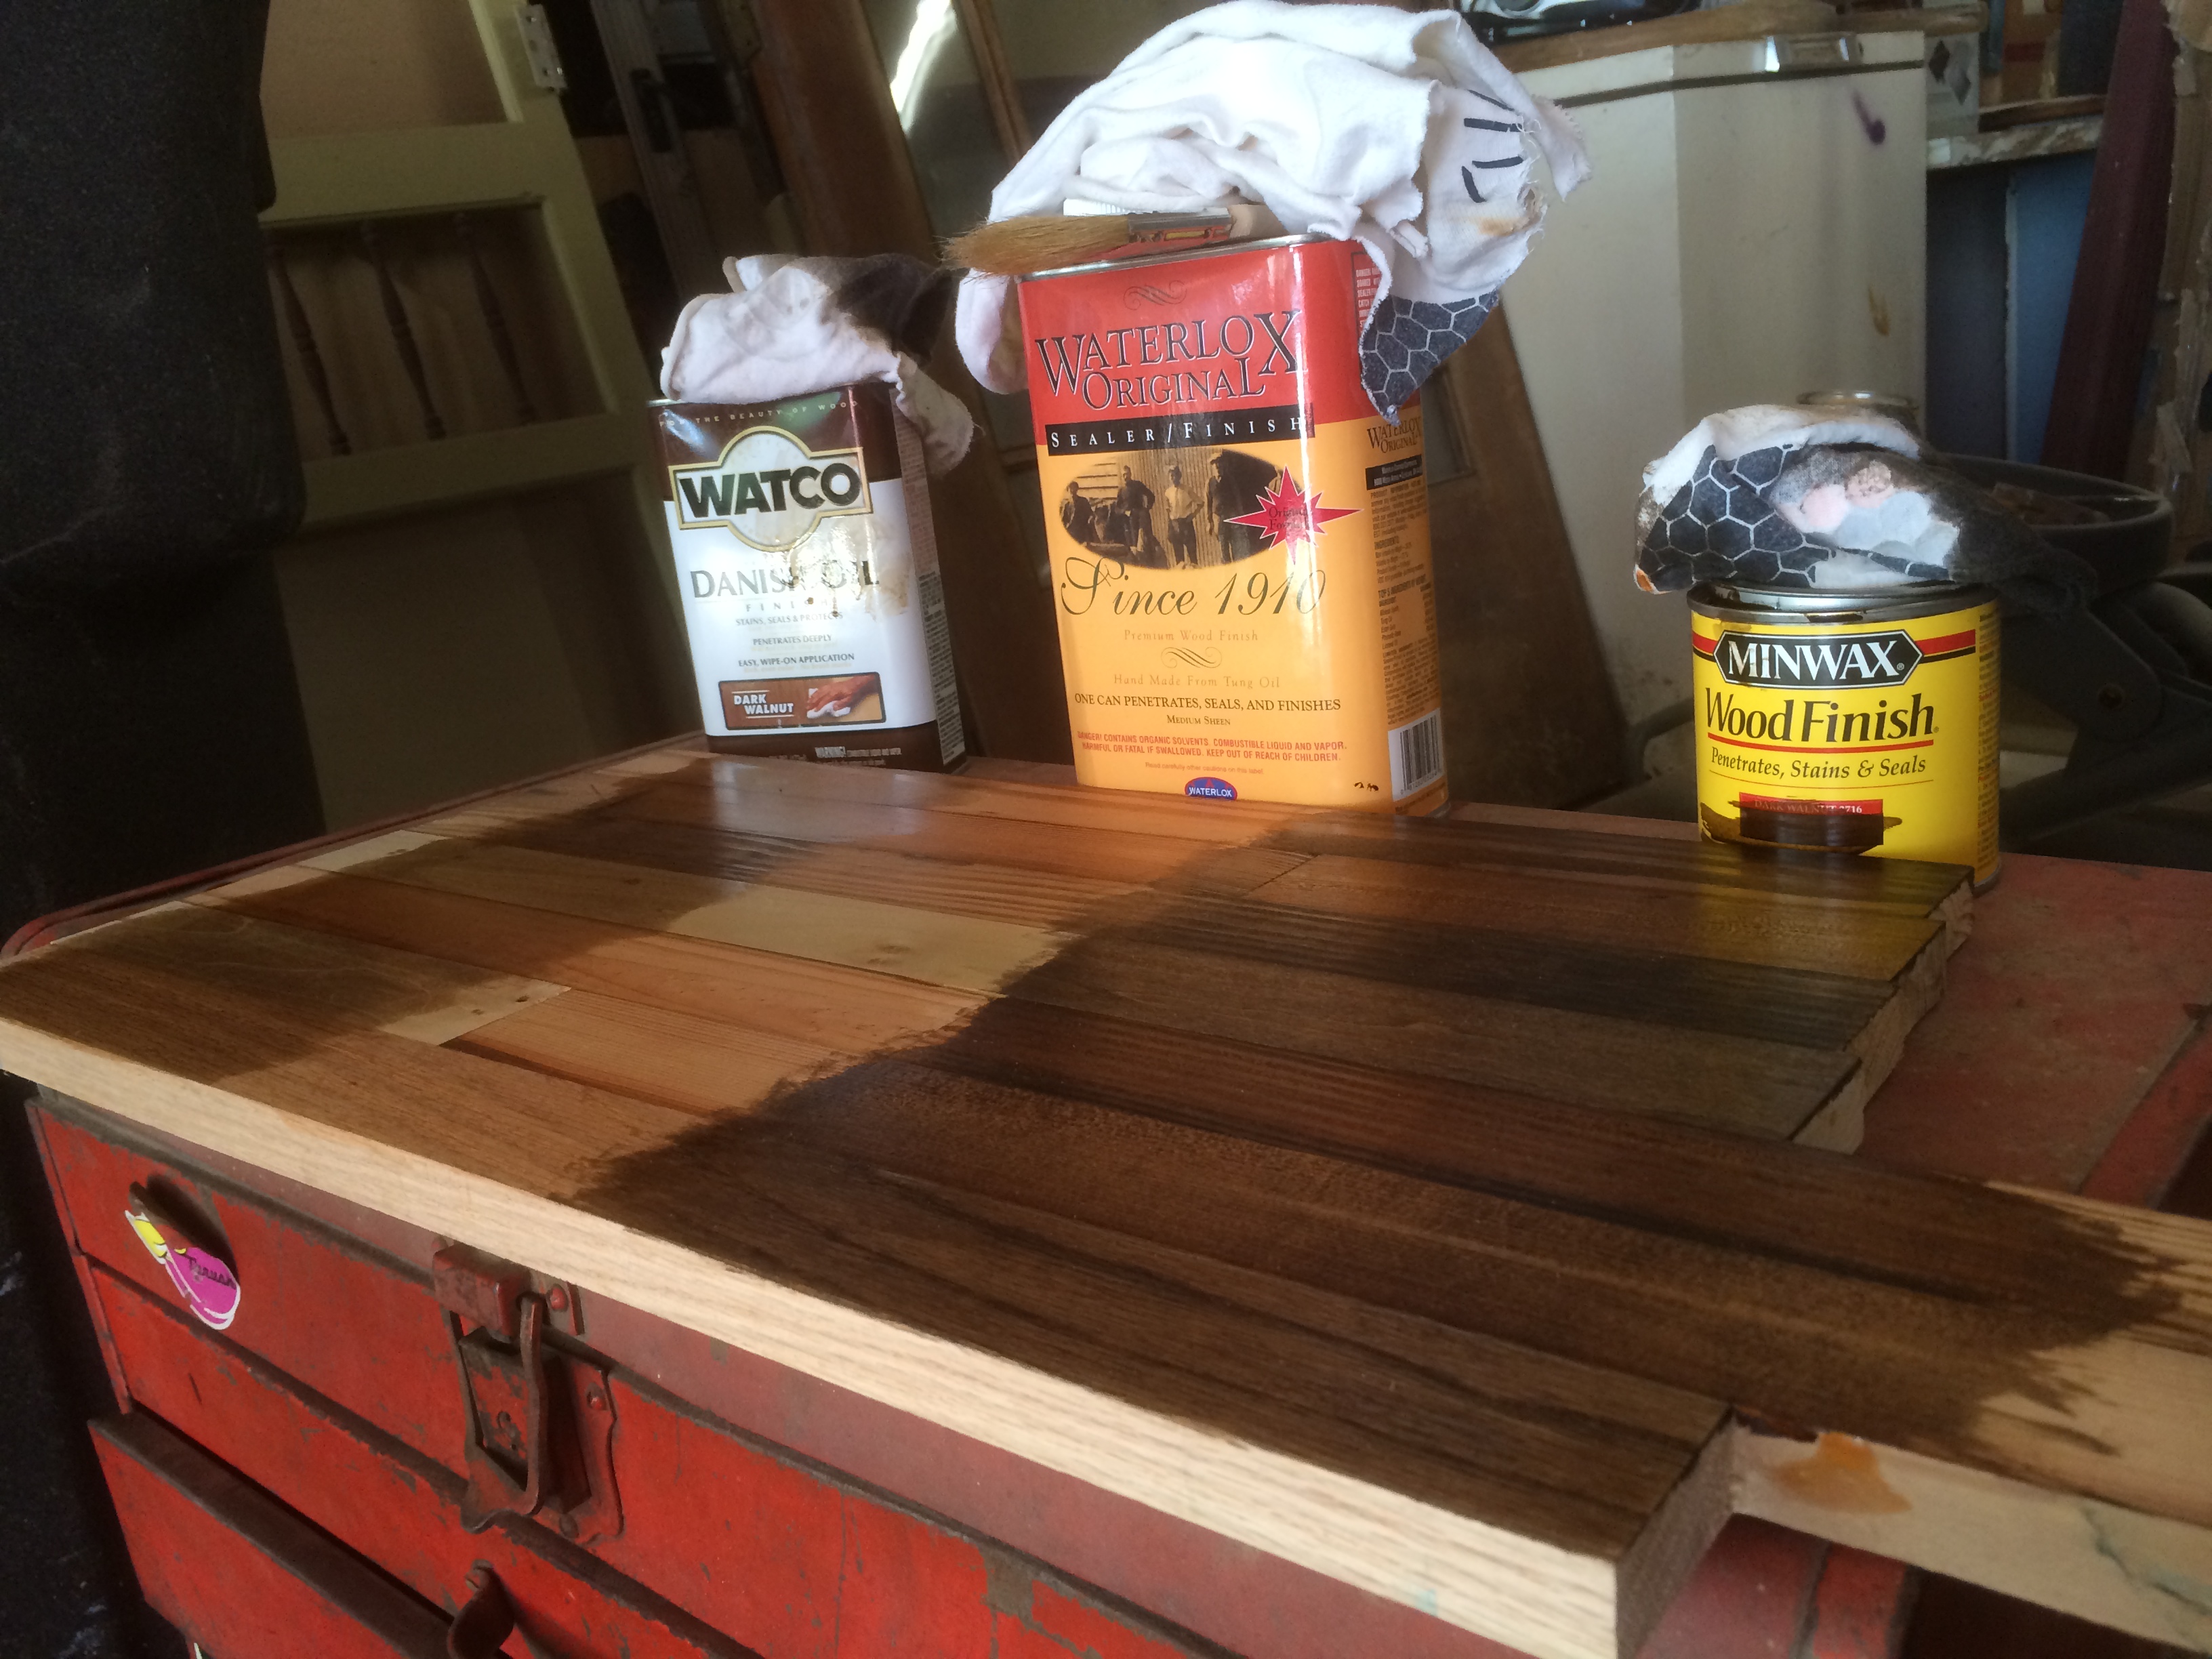
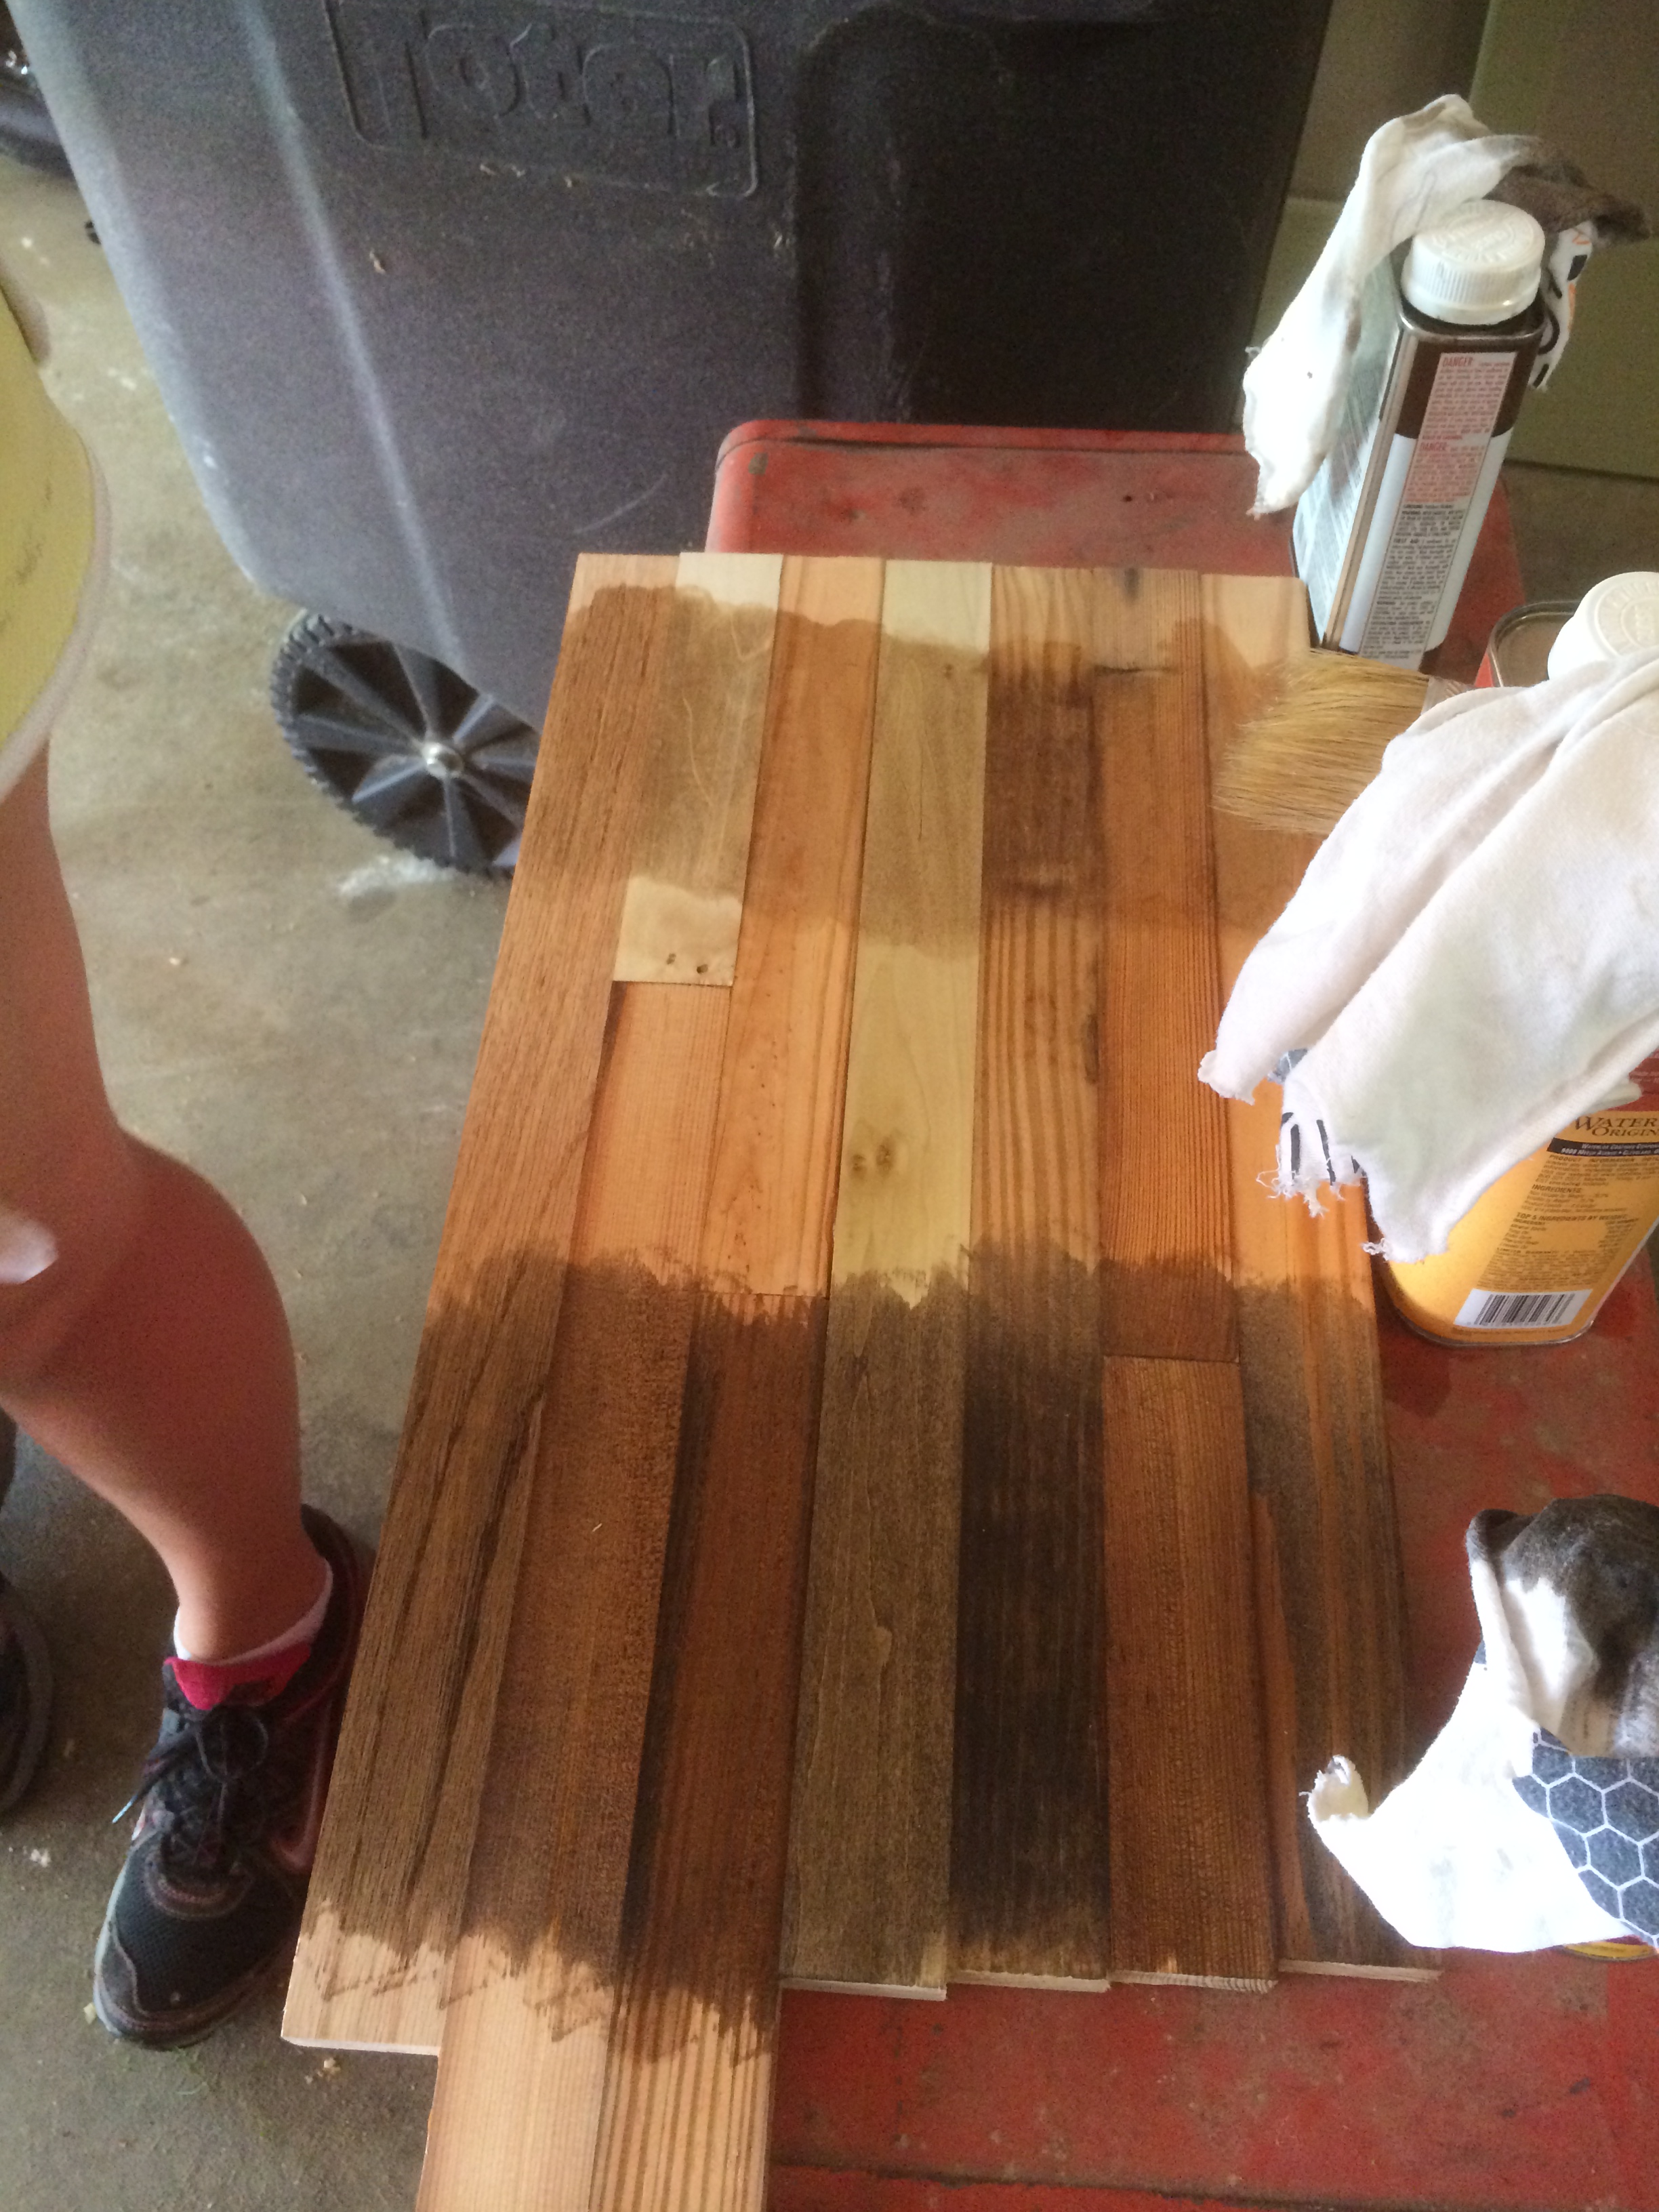
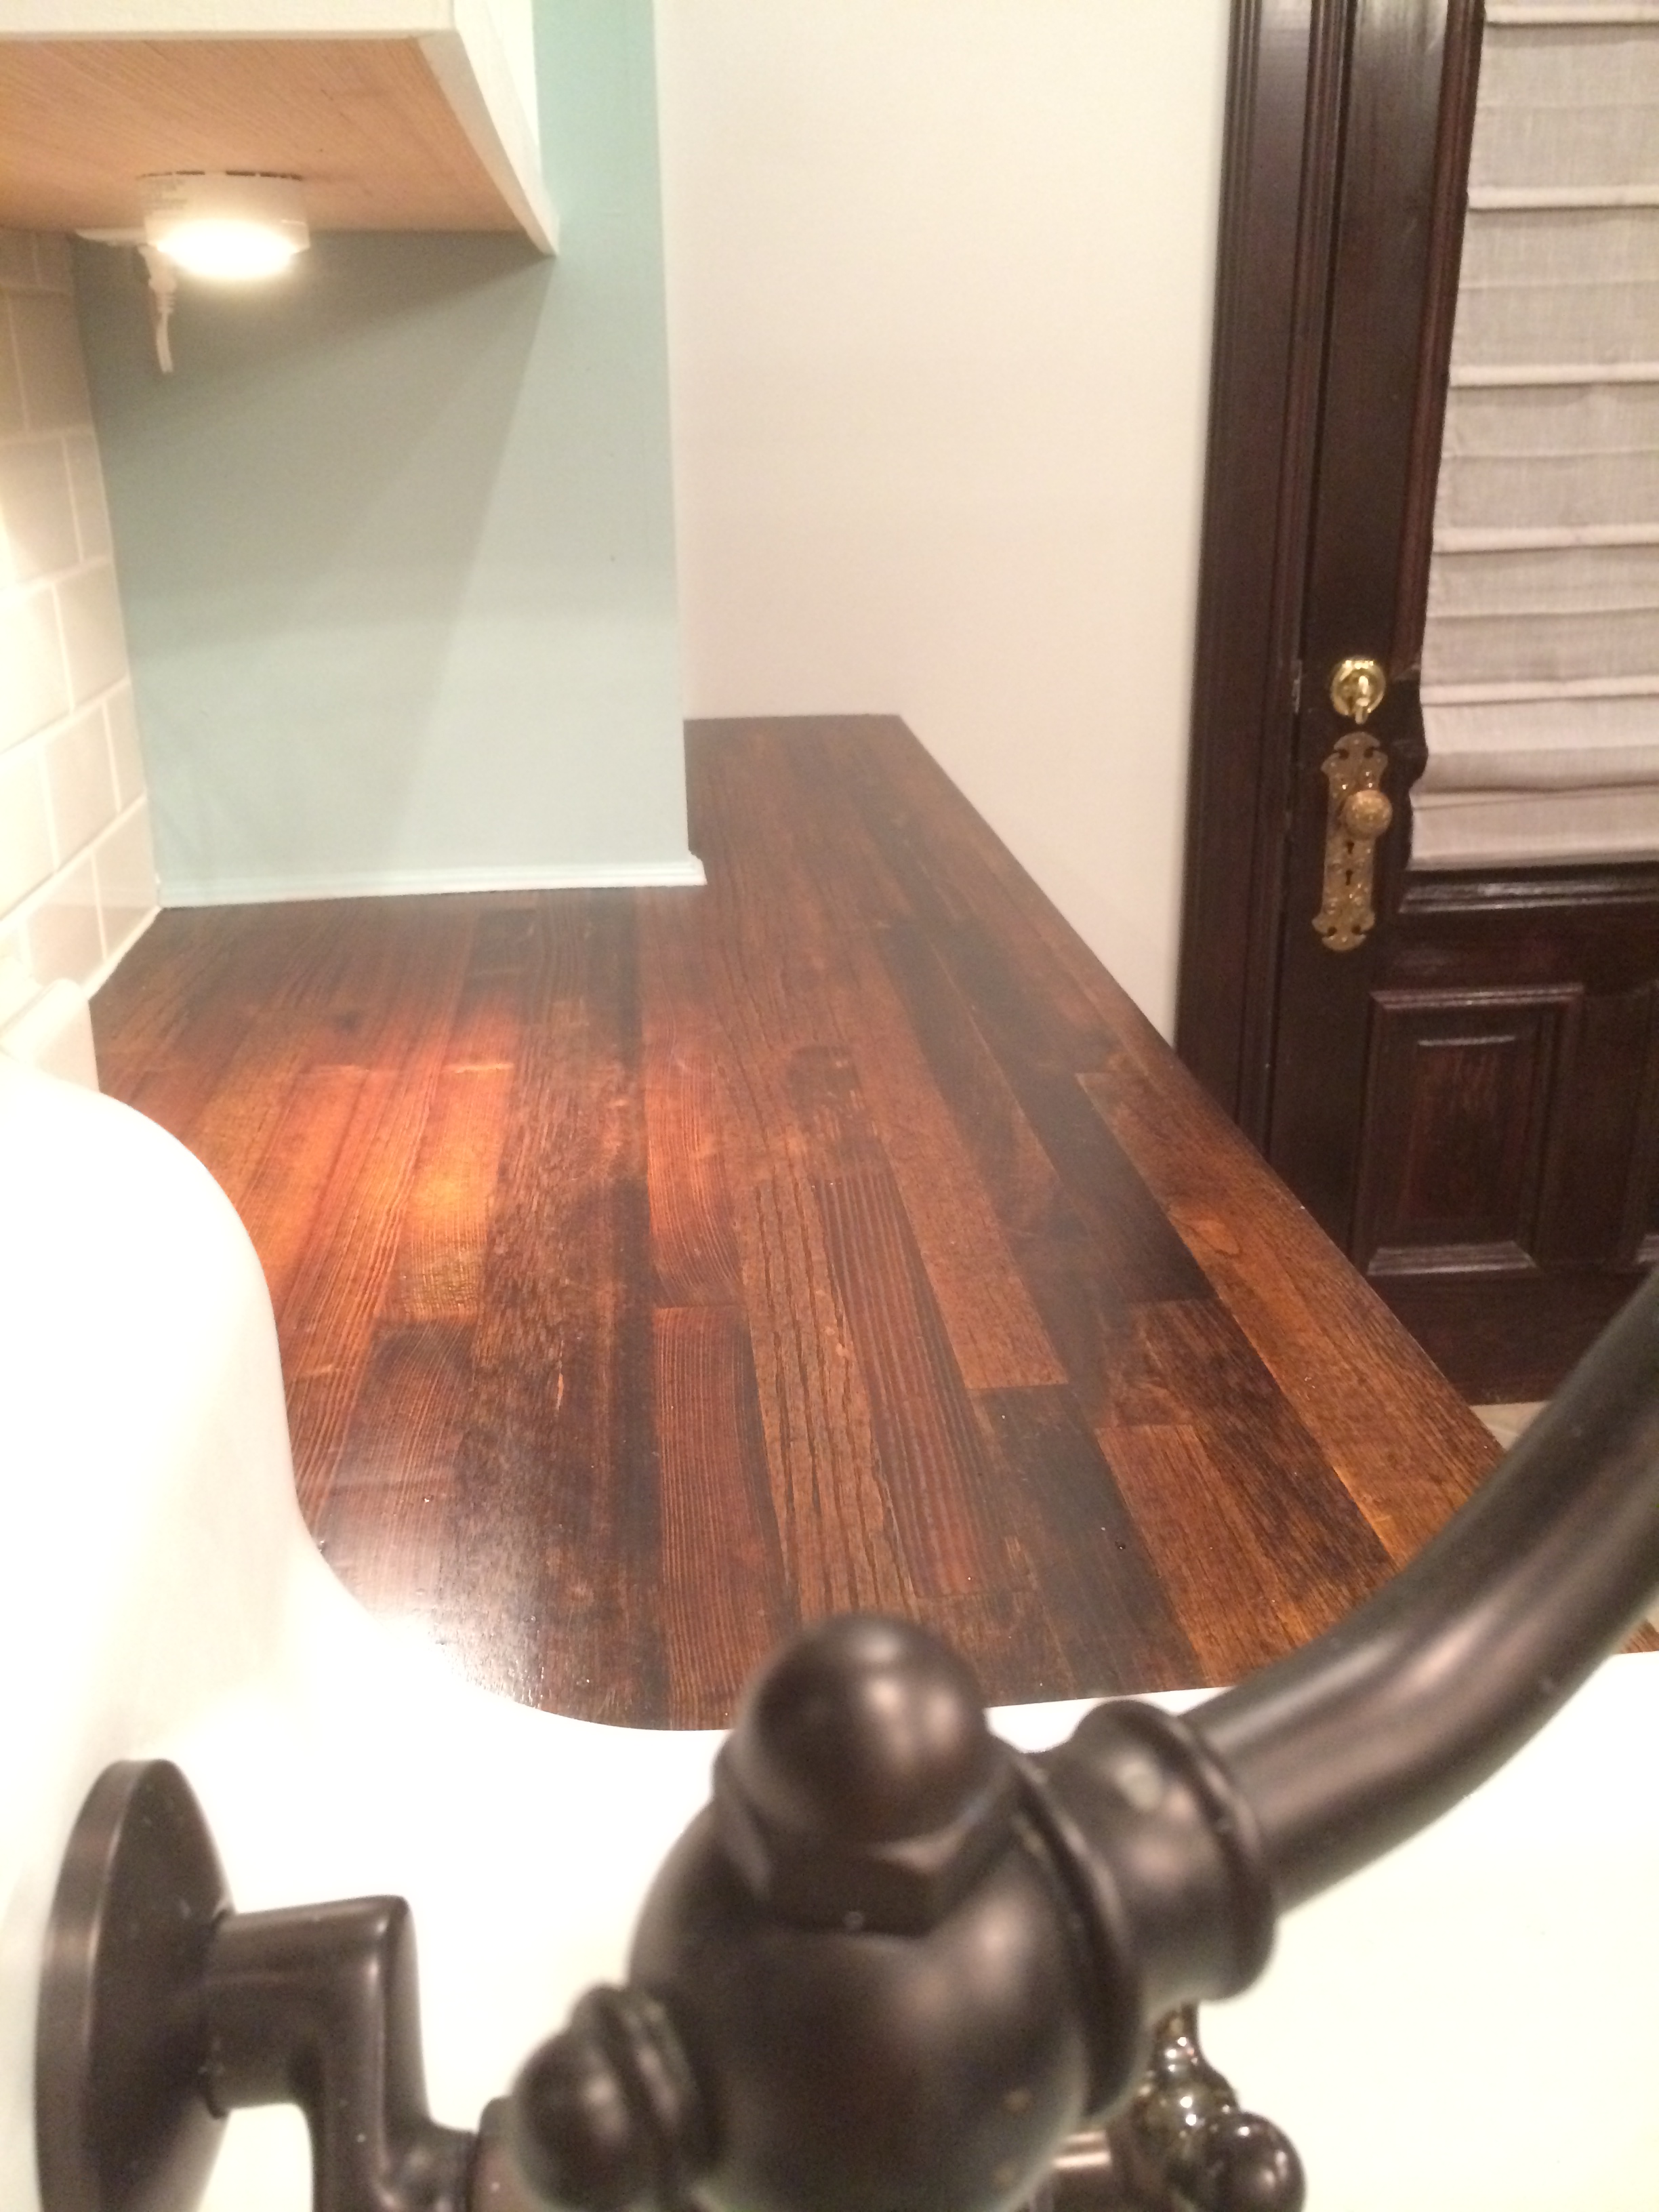
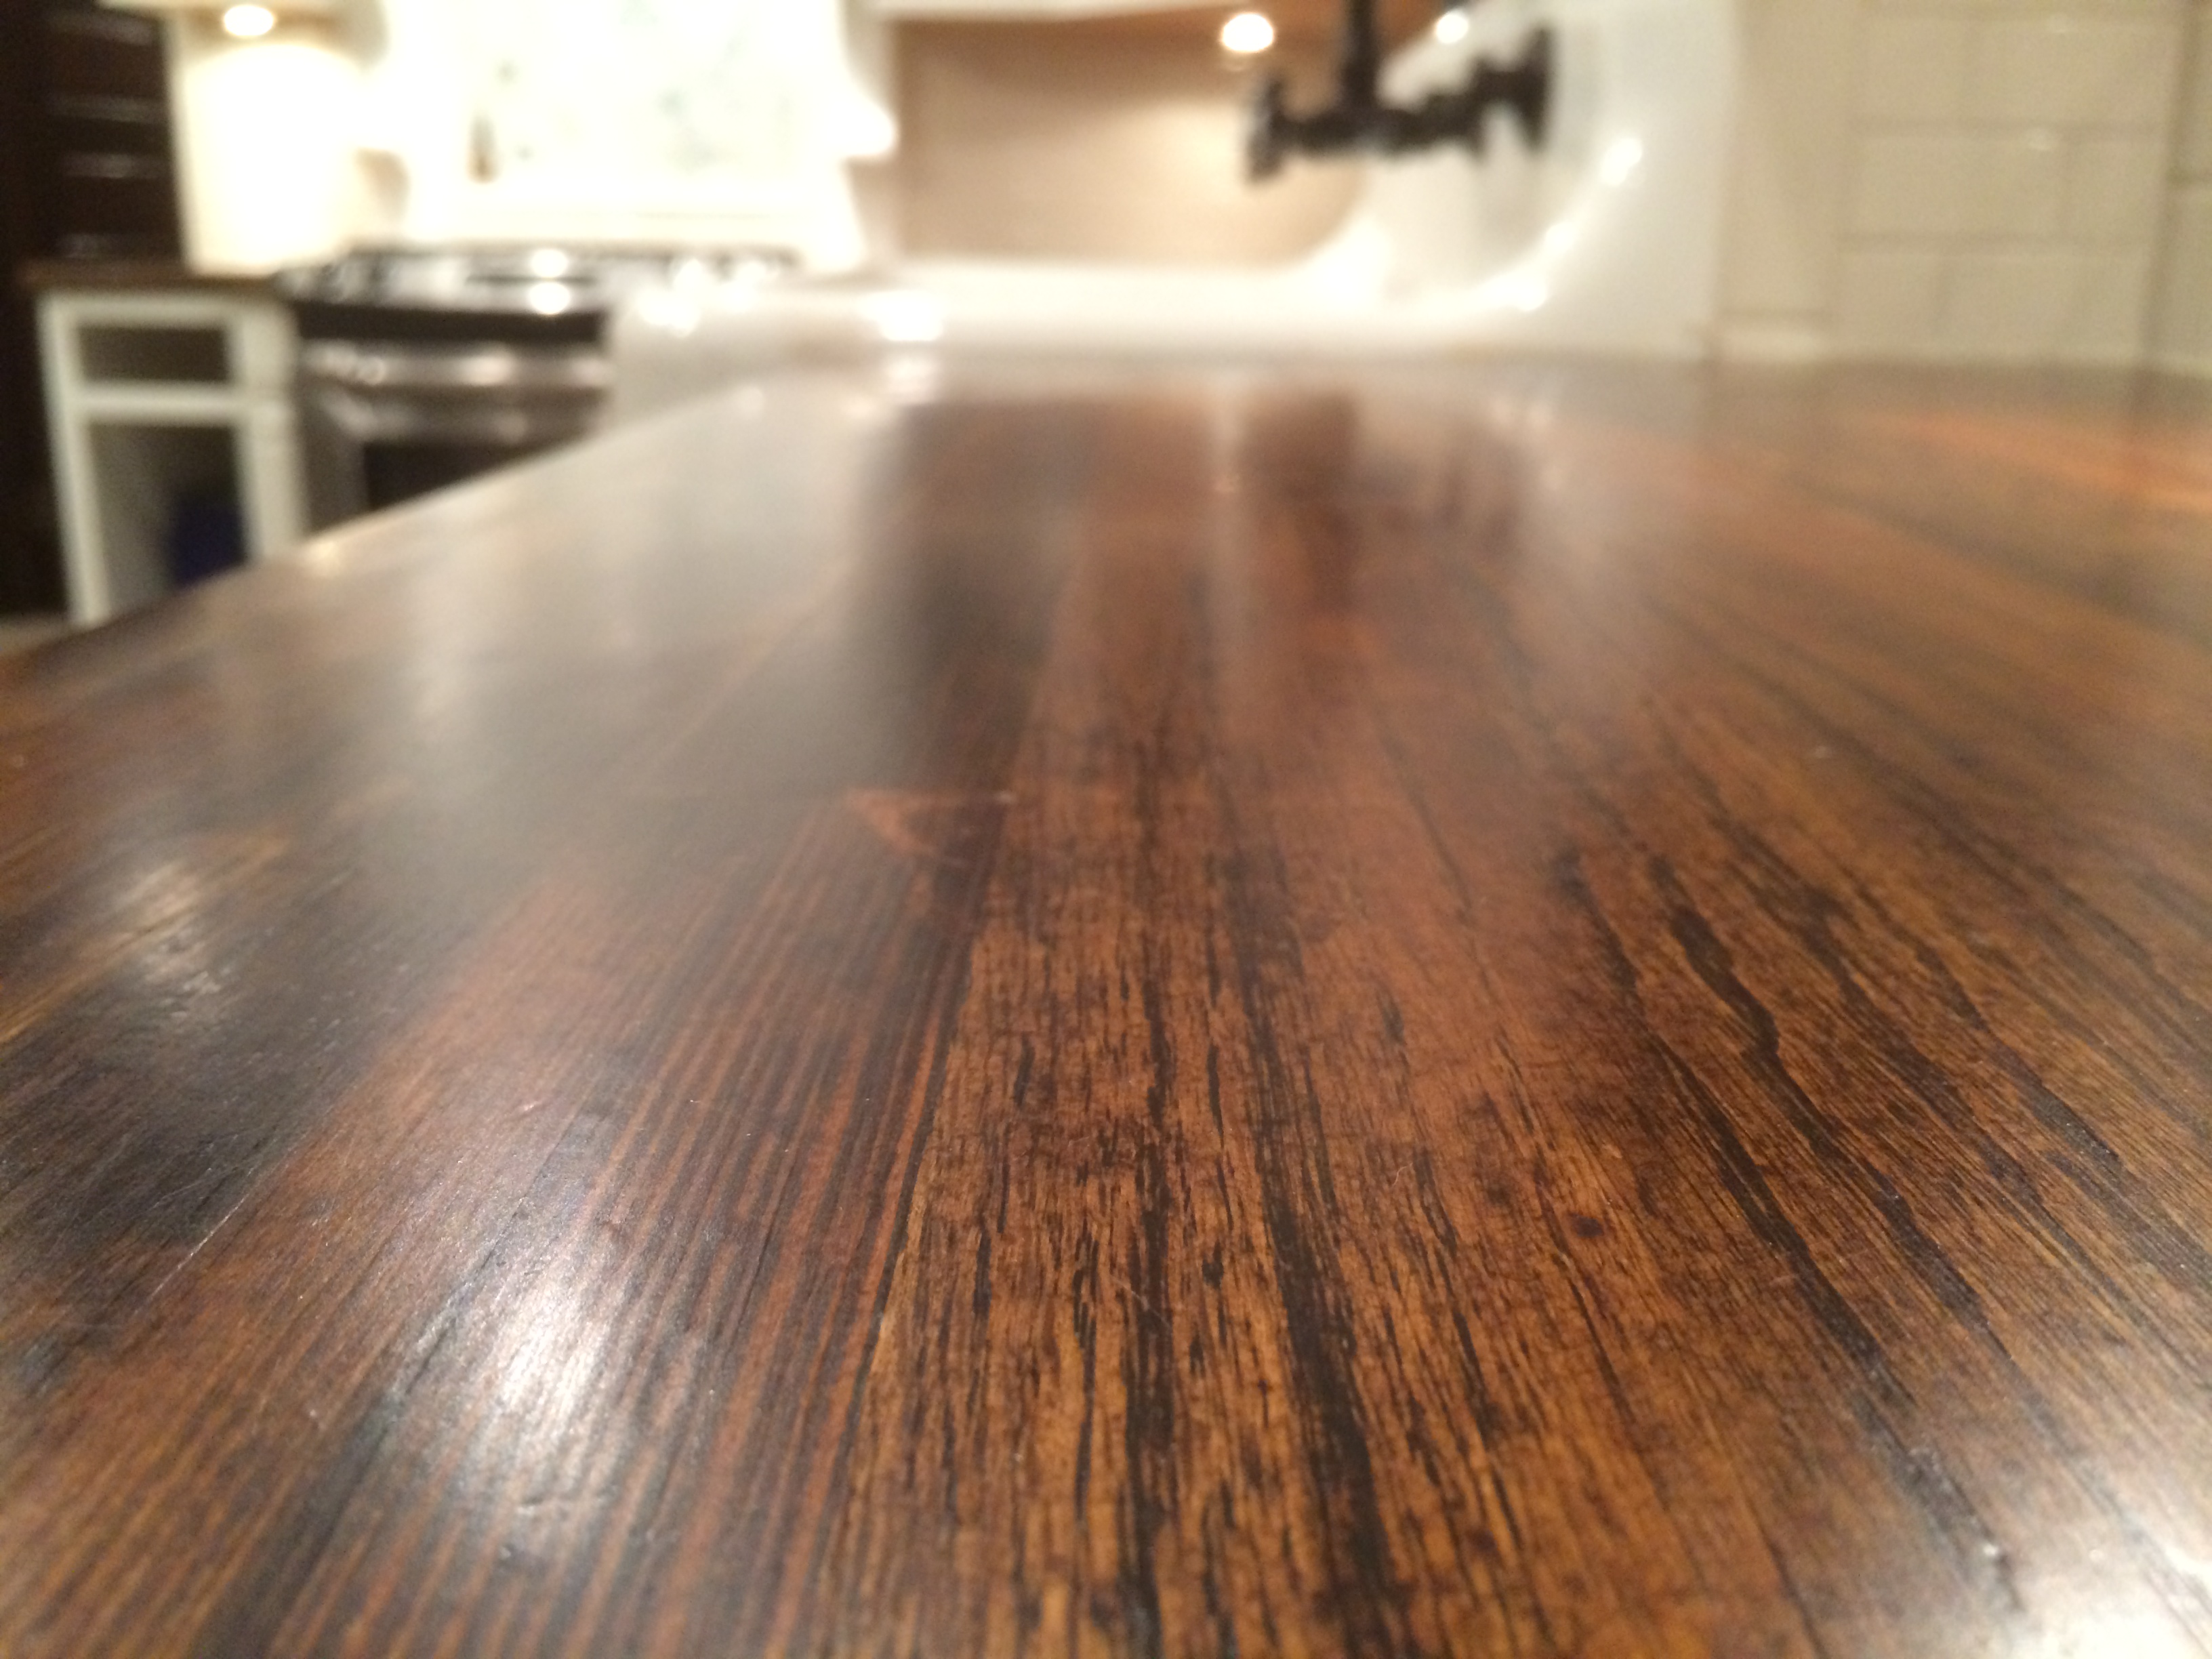
Once we had our final measurements, we began the process of cutting off the edges to fit the length of the countertop. I also started testing different stains and oils to determine how we would finish and protect the butcher block. We ended up choosing to stain the butcher block with a couple of coats of walnut stain. Then, after reading many, many reviews of different products we decided to seal the countertops with a product called Waterlox. Many people choose to only treat their countertops with oil; any scratches or dullness can easily be repaired and retreated as many times as you want. However, since we chose to make all the countertops out of wood (as opposed to just the island top, for example) then I wanted to make sure that they were absolutley water proof so there would be no chance of warping or water damage. For that reason, we sealed the countertops with Waterlox. The product is available online and you can choose a couple of different finishes. We decided to go with a satin sheen. After the walnut stain had dried, I applied several coats of Waterlox over the top. Although this sealer can be used by itself, we decided to apply it over the stain in order to get a darker, richer color. So far, this has held up very well.
After the countertops had completely dried we brought them in from our makeshift workshop in the garage and started the process of installation. I got the easy job 🙂
The end result is very warm and inviting, and I think, absolutely stunning. Although this project was a TON of work, knowing that we used salvaged wood that had a history in OUR neighborhood, made this all worth it. Check out these amazing countertops!
